Pre-painted bumper replacements are fast, easy, and inexpensive. But color-matching for solid colors can be more exact than with metallic finishes. Most factory colors do not come straight out of the can. If you’re aiming for perfection, they must be custom-mixed by an automotive paint vendor or professional body shop.
Impact of Bumper-Mounted Safety Devices
Many cars today have advanced driver assist system (ADAS) sensors in the front and rear bumpers. The collision avoidance sensors are used for everything from parking to backing and adaptive cruise control. Car manufacturers are very specific that you should only replace these bumpers with OEM parts. They even regulate the use of body filler and paint thicknesses to ensure these safety systems remain accurate.
These systems need to be recalibrated after a bumper replacement. Check a repair manual for details and limitations if you’re replacing a bumper with safety sensors.
There are still plenty of vehicles on the road that lack a full set of ADAS sensors. So this DIY approach is still a viable repair option for many vehicles.
Shop now for replacement bumpersThe DIY Bumper Replacement Process
Paint-A-Part does an excellent packaging job, carefully wrapping each new bumper with protective paper, heavy-duty cardboard, and plastic film. The three-layer approach provides ample protection for the rigors of shipping.
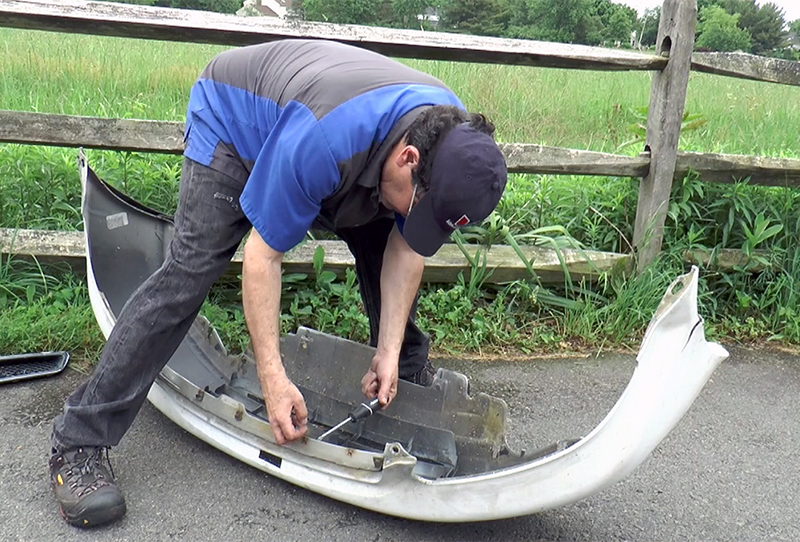
Directly swapping the fasteners from the old to the new bumper helps avoid misplacing any of the pieces.
Replacing older Civic bumpers is an easy task that doesn’t require special tools. For the sixth-generation Civic, we needed the following:
- Flat-blade and Phillips screwdrivers
- A set of metric sockets
- Conventional wrenches
- A sturdy set of lift ramps
Read this: Affordable Garage Lifts – Understanding Your Options
After you have the necessary tools, remove the existing bumper.
- Using the ramps, lift the front of the vehicle to access the fasteners under the bumper.
- After the car is up on the ramps, remove the plastic push-button fasteners at the top of the grille and bumper.
- Remove the bolts inside the fender wells and all the fasteners under the bumper.
- Pop the bumper off the car with an easy tug.
- Next, remove the grille and all the fasteners from the old bumper. You must use the original fasteners on the new bumper unless you buy new hardware.
- Swap the fasteners directly from the old bumper to the new one. This tactic reduces the chances of misplacing any fasteners.
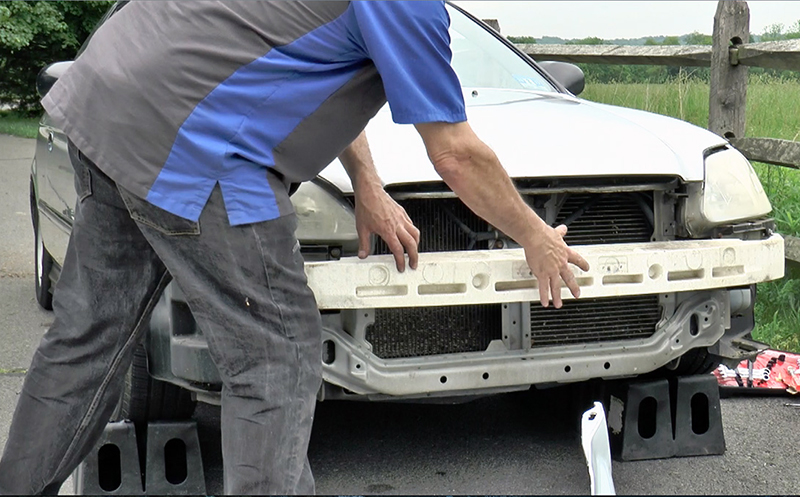
The Civic’s bumper foam is held in place by friction. No adhesives are necessary.
Mounting the Bumper Cover
Once the grille and the fasteners have been swapped—and before fitting the bumper skin—you must mount the original bumper foam on the car. Having a buddy on hand to assist in positioning the bumper is a huge help. One person should hold the bumper in place as the other one installs the fasteners, starting at the top and working down.
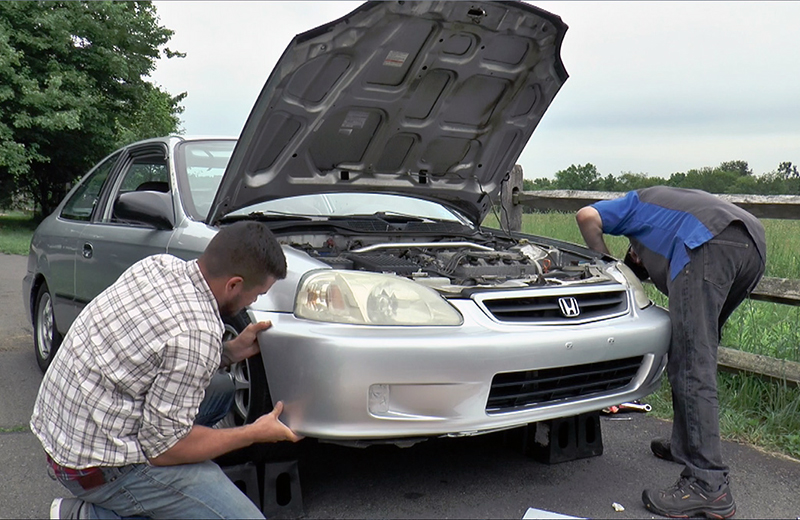
While most of the job can be handled by one person, positioning and alignment is less tedious with a helper.
The entire process of replacing the bumper takes about an hour—with very satisfying results. The change in our Civic’s appearance was dramatic.
Shop now for replacement bumpers