
About
All feedback (482)
- excessstocklimited (51446)- Feedback left by buyer.More than a year agoVerified purchaseGood buyer, prompt payment, valued customer, highly recommended.
- dailysee (30299)- Feedback left by buyer.More than a year agoVerified purchaseGood buyer, prompt payment, valued customer, highly recommended.
- eebikeparts (5234)- Feedback left by buyer.Past monthVerified purchaseHope to deal with you again. Thank you.
- nutz4b0ltz (113)- Feedback left by buyer.Past monthVerified purchaseGood buyer, prompt payment, valued customer, highly recommended.
- biketart* (144188)- Feedback left by buyer.Past monthVerified purchaseMany thanks from Biketart :-)
- epictools (562874)- Feedback left by buyer.Past 6 monthsVerified purchaseQuick response and fast payment. Perfect! THANKS!!
Reviews (8)
Apr 17, 2024
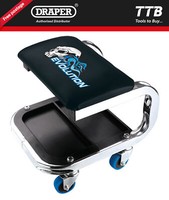
Really sturdy and ergonomically designed.
The bad part first. No instructions. You will need a 14mm wrench/spanner, a large Philips head screwdriver, a medium stubby Philips screwdriver. They do provide an Allen key. To save you hours of frustration (two hours in my case). 1. Fit the two C shaped pieces together, but loosely, and do not fit the bolt that ties them together (in fact, this is almost the last thing to do). Now the hard part. 2. Get some decorators tape and fix the two black metal strips under the seat so that the mounting holes line up. Don't put the tape where it will become trapped by the frame. Down the two outside edges of the frame put some more tape and mark the centre of the holes in the frame. Add some tape to the sides of the cushion to also mark each mounting hole. You will need these marks as fitting the bolts is working in the dark, you cannot see what you are doing. 3. The four thin bolts and one small washer each then fit up into the mounting holes of the seat. The holes will not line up, and a lot of wiggling and cuss words will be said as you try to get each of the four bolts loosely screwed in. Once you are sure each is in, and not cross threaded, then snug them up using the stubby Philips head screwdriver. 4. Put the rear tray in place (curved cutouts to the back), and fit the wheels to the inserts (with washers on the insert side), use the Allen key but leave them loose for now. The wheels have squared off legs to fit in the square holes. 5. Now fit the bolt to fix the two halves of the frame together. Two washers on the nut underneath. Use the large Philips head screwdriver and tighten this nut and bolt up for good (it will be covered up soon). 6. Fit the front tray and wheels. 7. Tighten up all the wheels.
You should be done. This stool is perfect for me working on my motorbike when it is on its left stand. The big wheels roll and turn really well.

Aug 12, 2020
Relaxing
Really good for a long hot soak in the bath!!
Apr 22, 2020
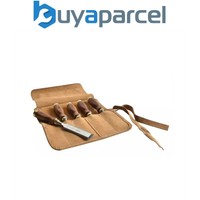
Lovely Quality.
This is a really well made set of chisels. Lovely pouch too.