Brake fluid goes bad over time. If bad fluid is left in the system too long, your calipers, wheel cylinders, anti-brake system, or master cylinder could fail. To prevent problems, you should replace your brake fluid every 30,000 to 45,000 miles (or two to three years). Check your owner’s manual for the recommended change interval for your vehicle.
If you regularly drive through water, mud, or dirt roads, you might need to replace your brake fluid more often. We recommend testing your brake fluid every six months. Testing is easy with a brake fluid test strip. See the steps below.
Replacing your brake fluid is not complicated if you use a pressure bleeder. There is an alternative manual bleeding process, which we don’t cover in detail here. It requires an assistant to pump and hold the brake pedal while you open and close the bleeder at each wheel.
The reservoir must be kept full. Using a squeeze bulb (like a turkey baster), you remove the old fluid from the reservoir and replace it with fresh fluid. The manual method takes longer, and you run the risk of leaving old fluid in the system, which can contaminate new fluid. That’s why we recommend the pressure bleeding method.
After you flush the brake system and add new brake fluid, your brakes should work as well as or better than before.
Tips and Tricks
- DOT-3 or DOT-4 fluid is recommended for most vehicles. These fluid grades can be mixed without concern. Motorcycles use DOT-5, which is silicone-based and cannot be mixed with DOT-3 or DOT-4.
- Keep clean towels and brake cleaner on hand. Clean brake fluid that gets on any painted surface immediately. Brake fluid melts paint if left unattended.
- Buy more brake fluid than you think you’ll need. Three to four quarts is sufficient for most vehicles and will leave leftovers. If properly sealed, brake fluid does not go bad.
- Avoid over tightening brake fittings and bleeder screws.
- Although this process is commonly called “flushing,” it doesn’t use chemical flushes. Don’t put anything other than fresh brake fluid in the system.
- Letting the bleeder run dry or allowing air to enter the master cylinder can introduce air into the ABS hydraulic pump. If that happens, use a scan tool to bleed the pump.
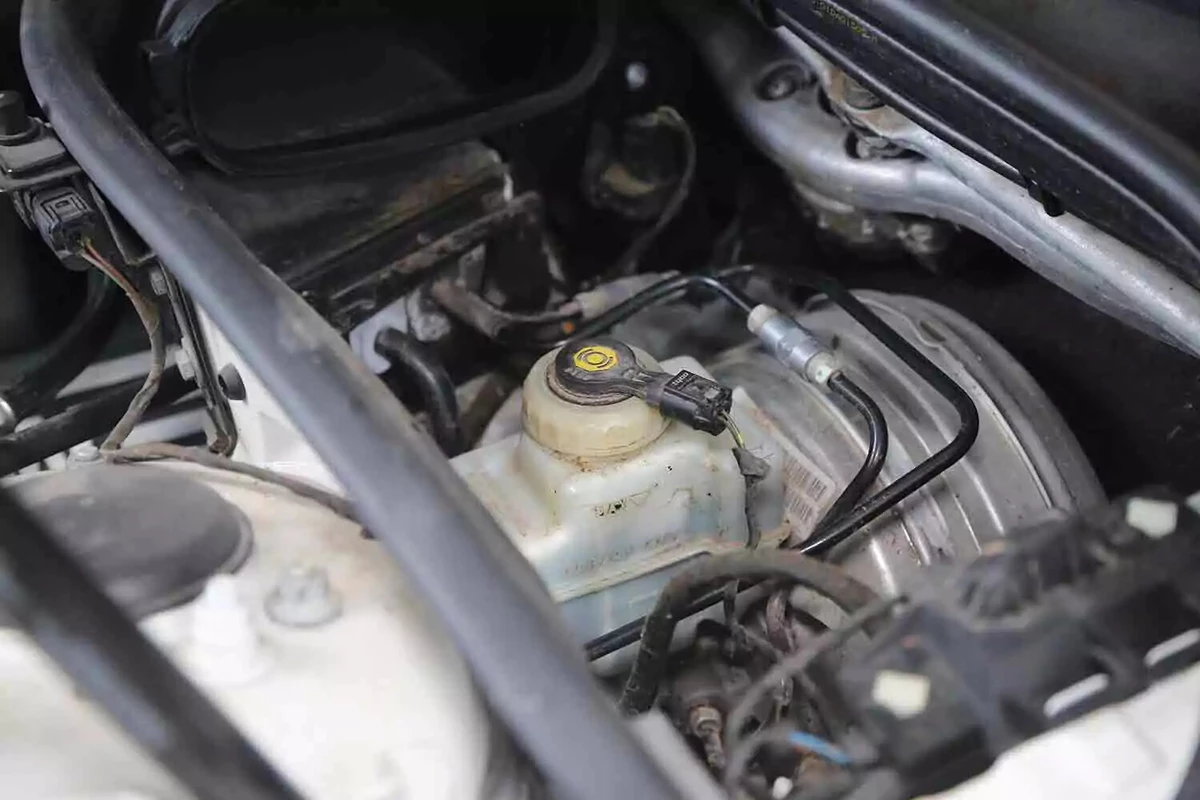
Open the hood to locate the brake master cylinder. It is typically on the firewall in front of the brake pedal. Most vehicles have a large brake booster on the firewall. The master cylinder is mounted to it.
The reservoir may be mounted on top of the master or is integral to the master cylinder body. In rare cases, you might need to remove a trim panel or air box to access the reservoir. Our demo vehicle, a German luxury performance vehicle, has an air filter housing covering the brake master, which we removed.

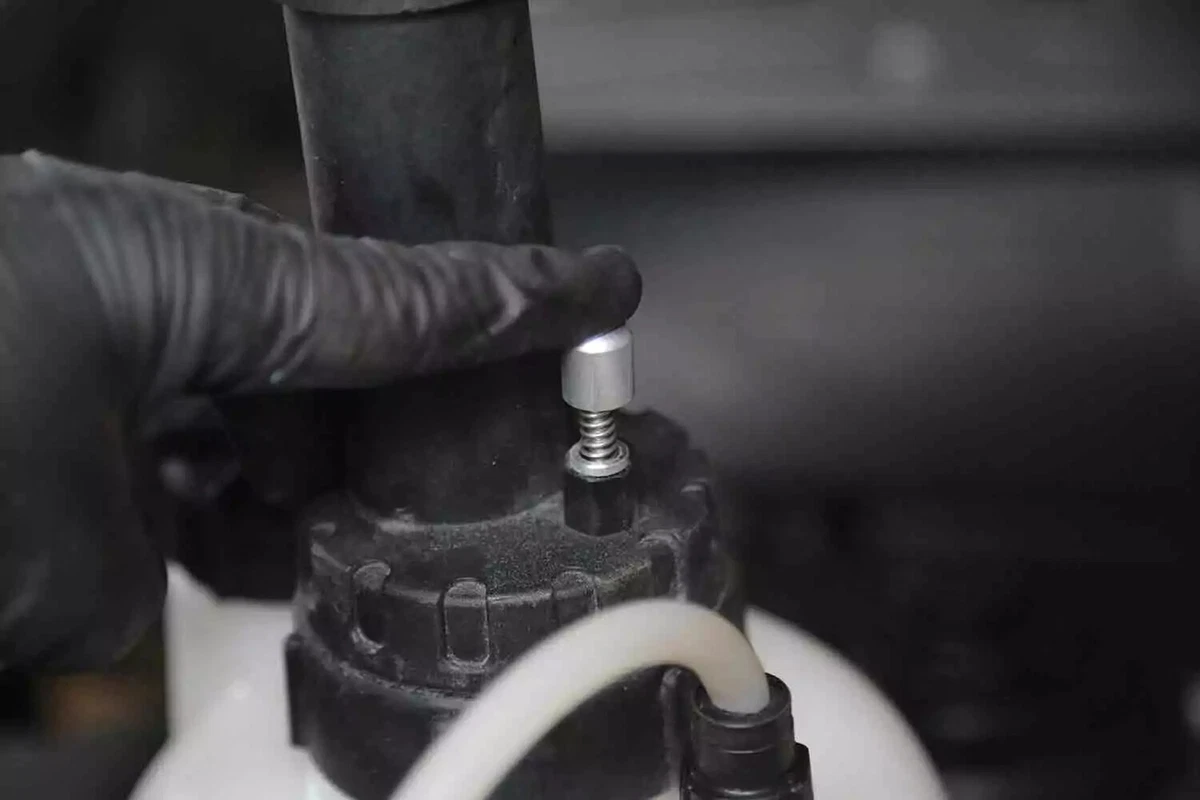
Dip a test strip in the reservoir and follow the strip instructions.
Most of them require dipping a strip for one second, waiting 60 seconds, and then reading the result in no more than 30 seconds.
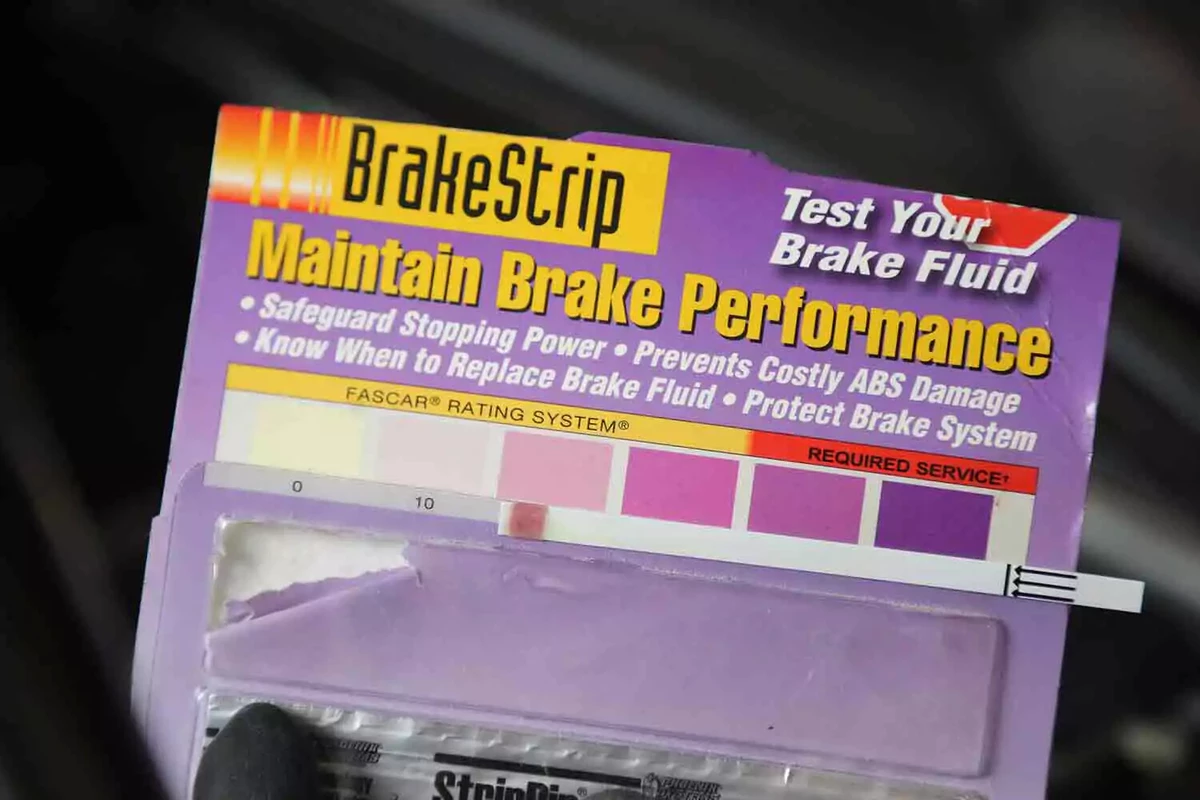
Place the test strip against the color chart provided with the strip. If your fluid is extremely dirty, the color may be slightly different. In our test, the fluid measured in the 100 ppm range, which warrants a flush.
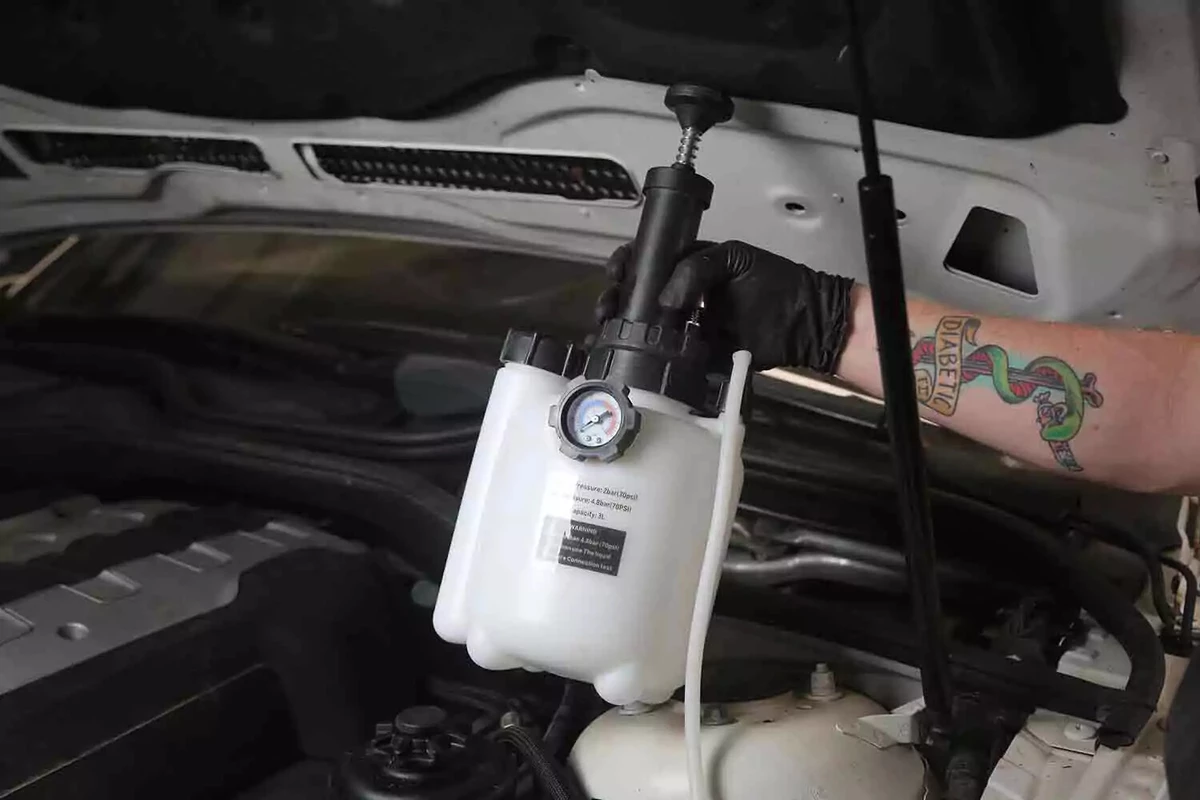
Position the bleeder tank under the hood or on a stand next to the vehicle.
We used a pressure bleeder, which is a large tank with a hand pump, pressure gauge, and hose. Our kit has a full set of cap attachments which cover most vehicles.
Most vehicles built since the late 1980s have a plastic reservoir with a thread-on cap. Some older models have integral reservoirs requiring a universal flat plate adapter. Those adapters use J-bolts or chains to secure them in place.
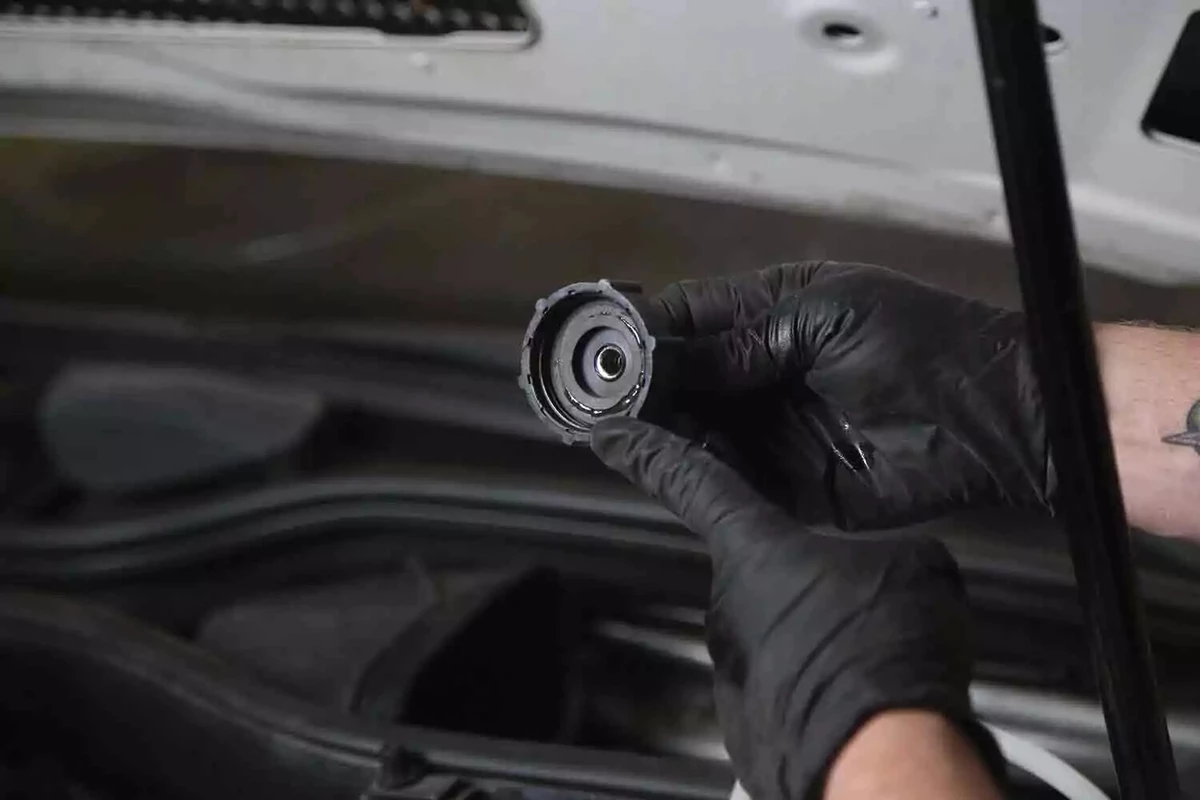
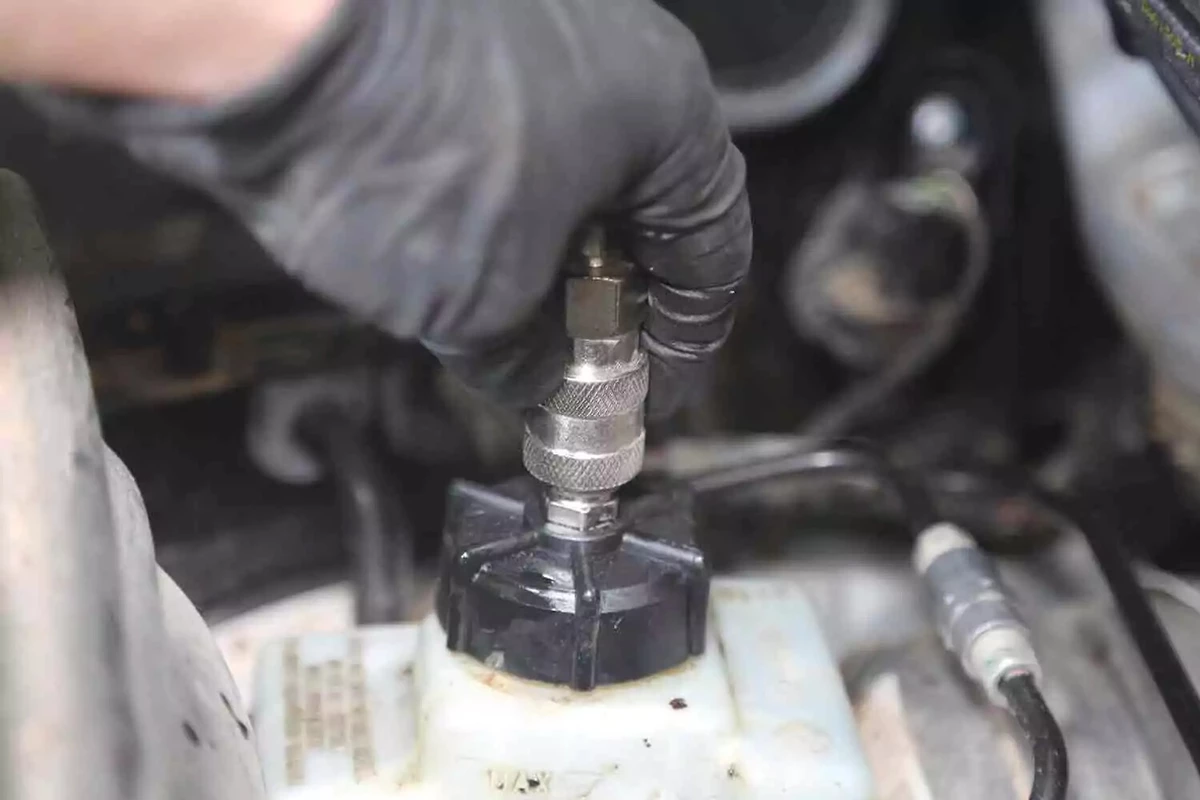
Select the cap that matches your reservoir’s threads. If your kit does not have a cap that fits, use a universal cap and threaded rods/chains to lock it down.
Attach the cap. Ensure it is tightly sealed.
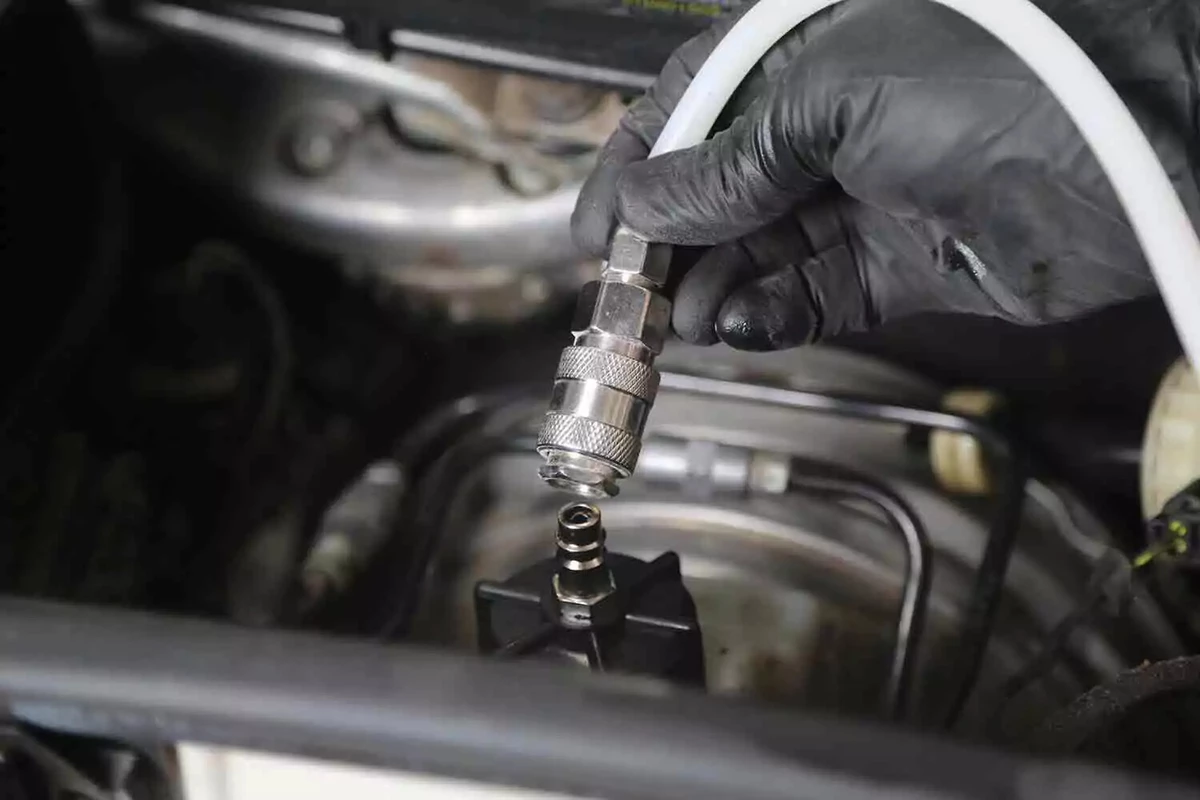
Attach the bleeder hose to the cap. Most kits use a quick-connect like the one shown here.
It looks similar to an air-hose connector, but it’s not the same. These are larger than air tool connections.
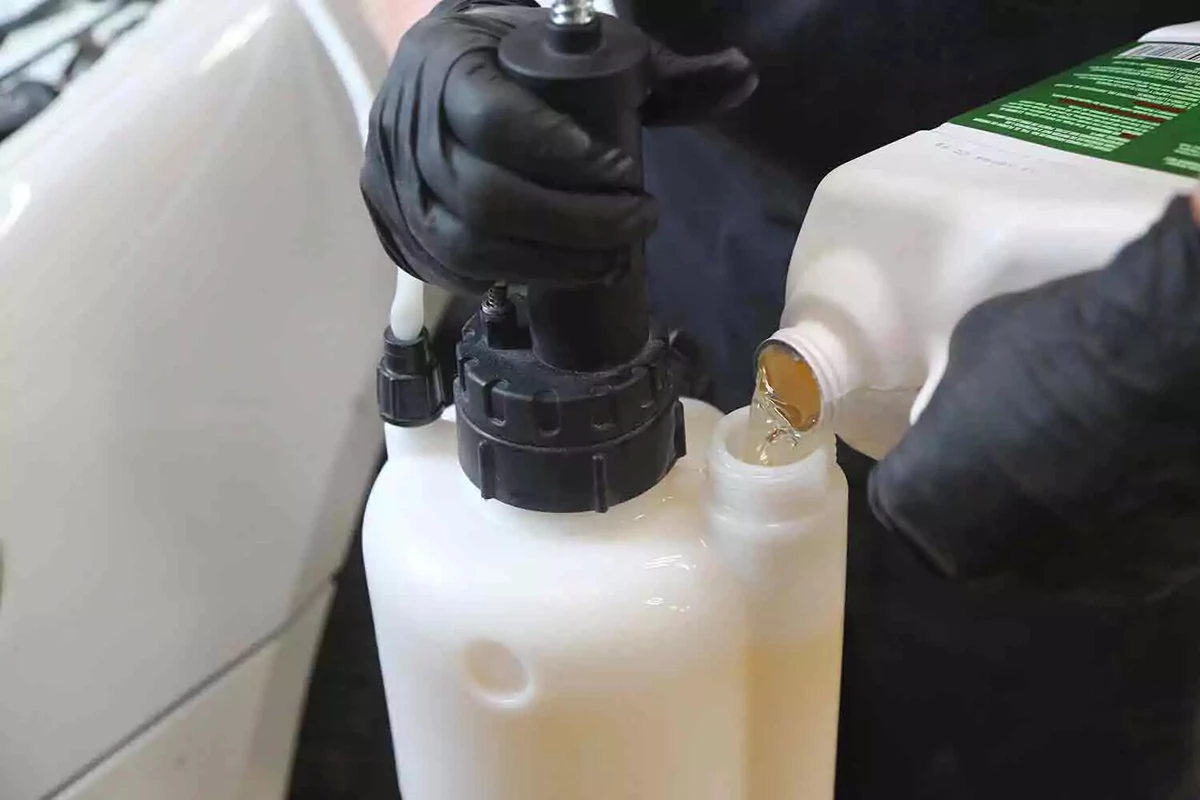
Fill the tank with fresh brake fluid. Check your owner’s manual to confirm the recommended fluid type.
For most cars, you should lift the vehicle to gain access to the bleeder screws.
For trucks and SUVs, you likely have enough room to slide under the vehicle’s rear to get to the bleeders. For easier access, turn the front wheels sharply to either side.
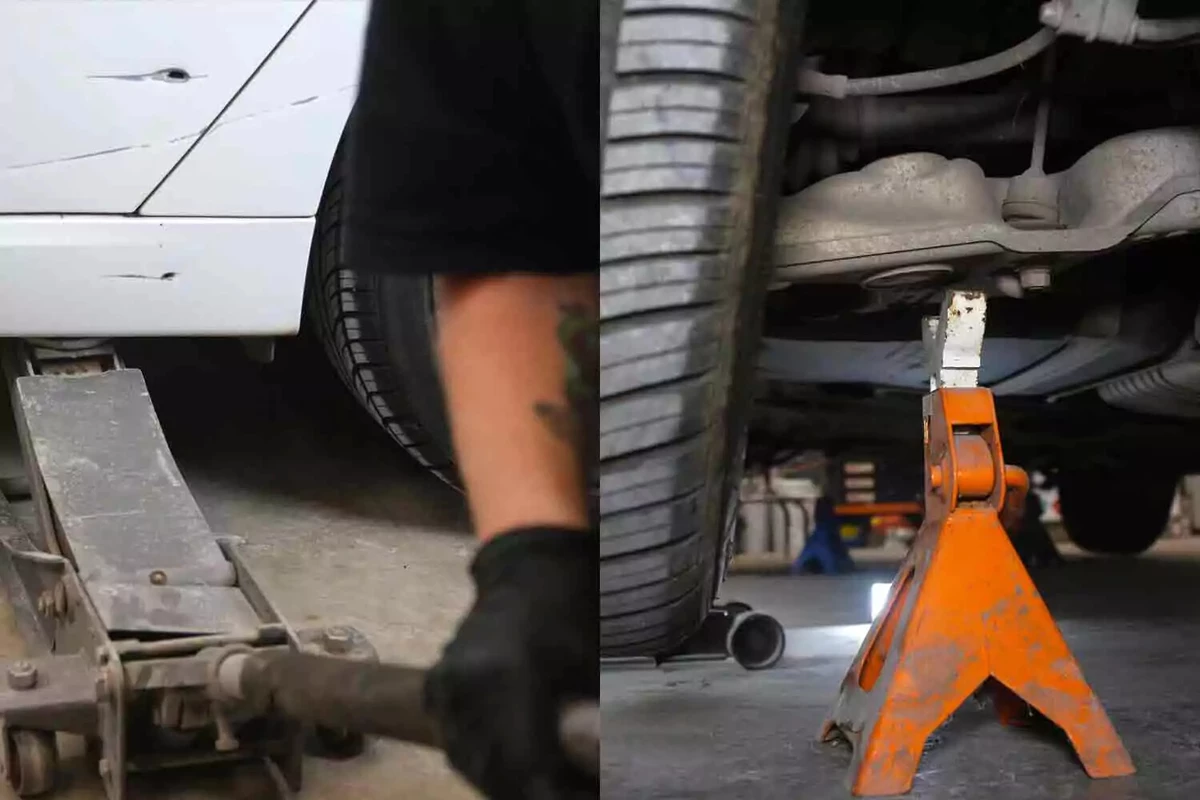
This project requires working safely under the vehicle. You will need a floor jack, and jack stands, ramps, or wheel cribs to support the vehicle.
Locate the factory jacking points just behind the front wheels or just in front of the rear wheels. The jacking point is a metal section with two V notches about two inches apart. Check your owner’s manual to confirm the lift location.
Never use jack stands on dirt, gravel, or asphalt. If you do not have access to a concrete work surface, use wheel cribs, solid-base ramps, or wide-base wood supports to support the vehicle. Never use cinder blocks or bricks as supports.
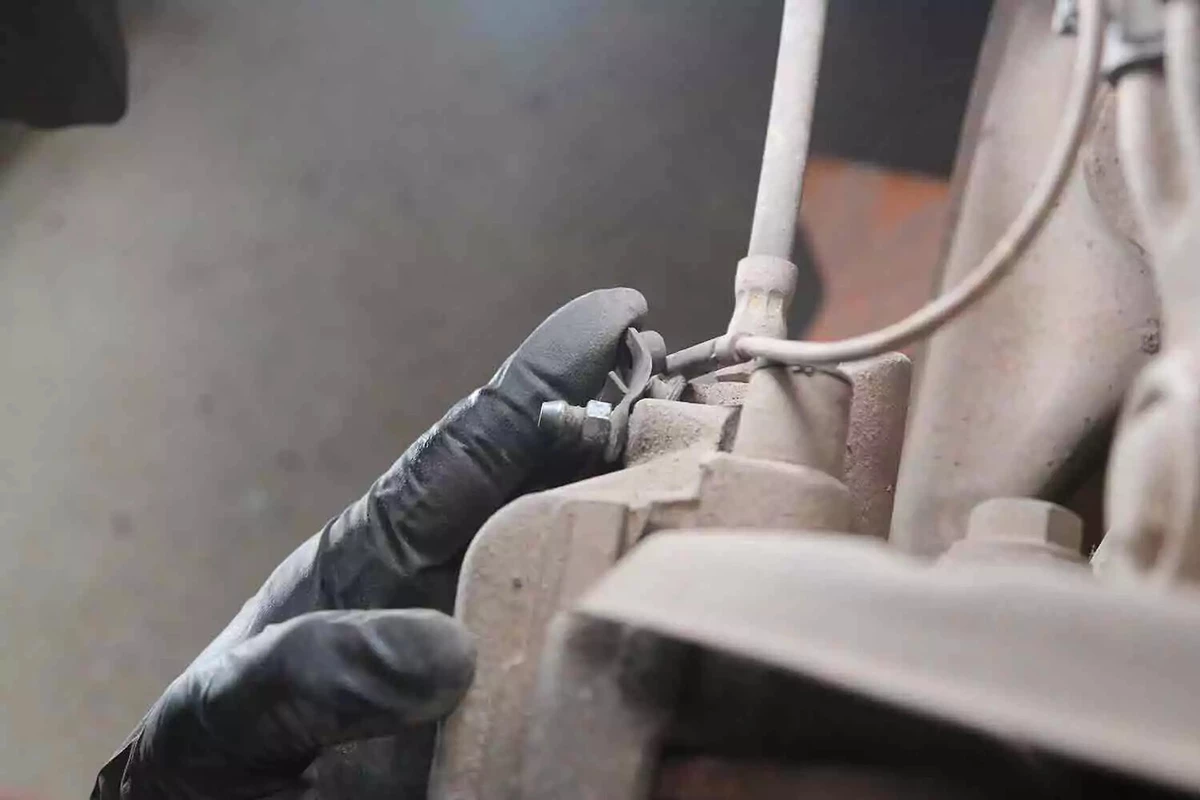
Start at the wheel furthest from the brake master cylinder. Locate the bleeder screw, which may be capped with a rubber cover.
The bleeder should be at the top of the brake caliper, above where the brake hose enters the caliper.
If your calipers have more than one bleeder, which is common for aftermarket and OEM performance brakes, only use the top-most bleeder. Using a lower position bleeder can allow air to get trapped, which makes your brakes less effective.
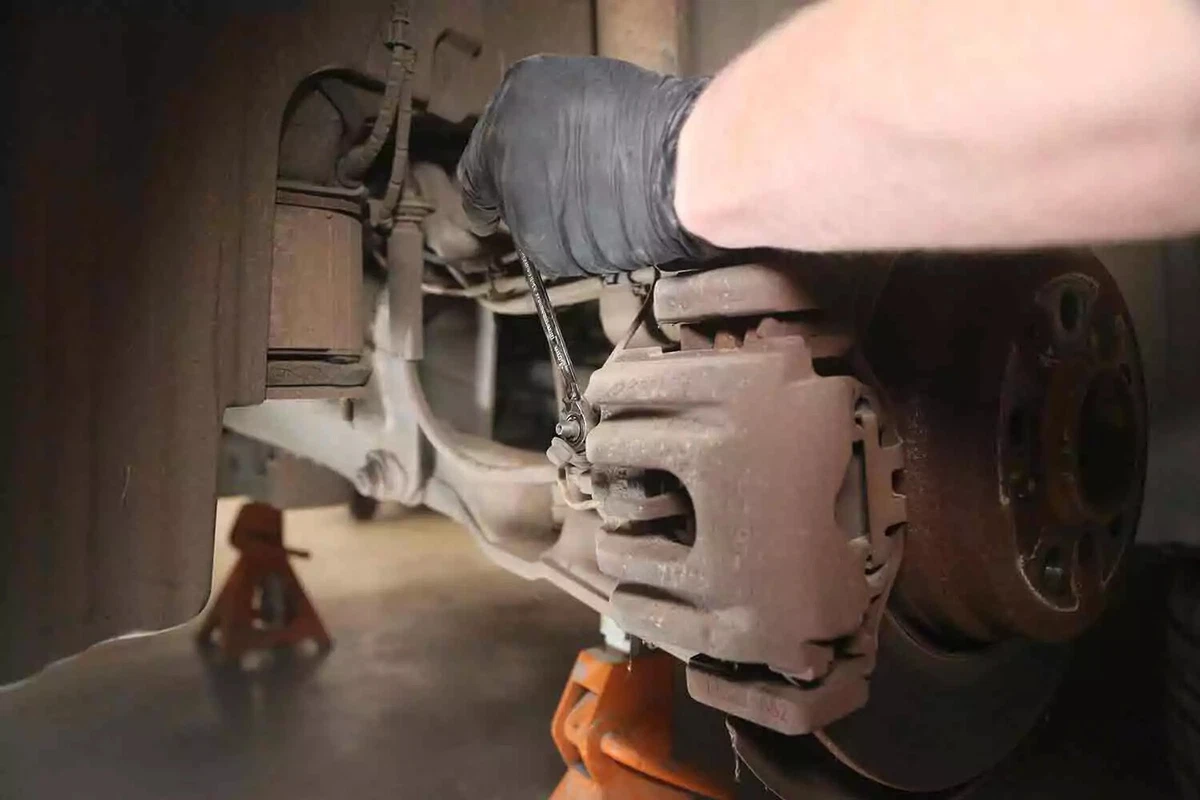
Use a line wrench, box wrench, or socket and ratchet to open the bleeder about a half-turn.
Do not use an open-end wrench, which could strip the hex. If your bleeder is hard to turn, spray it with penetrating fluid. Wait five to 10 minutes before turning it. Lightly tap it with a hammer to loosen any corrosion that makes it hard to turn.

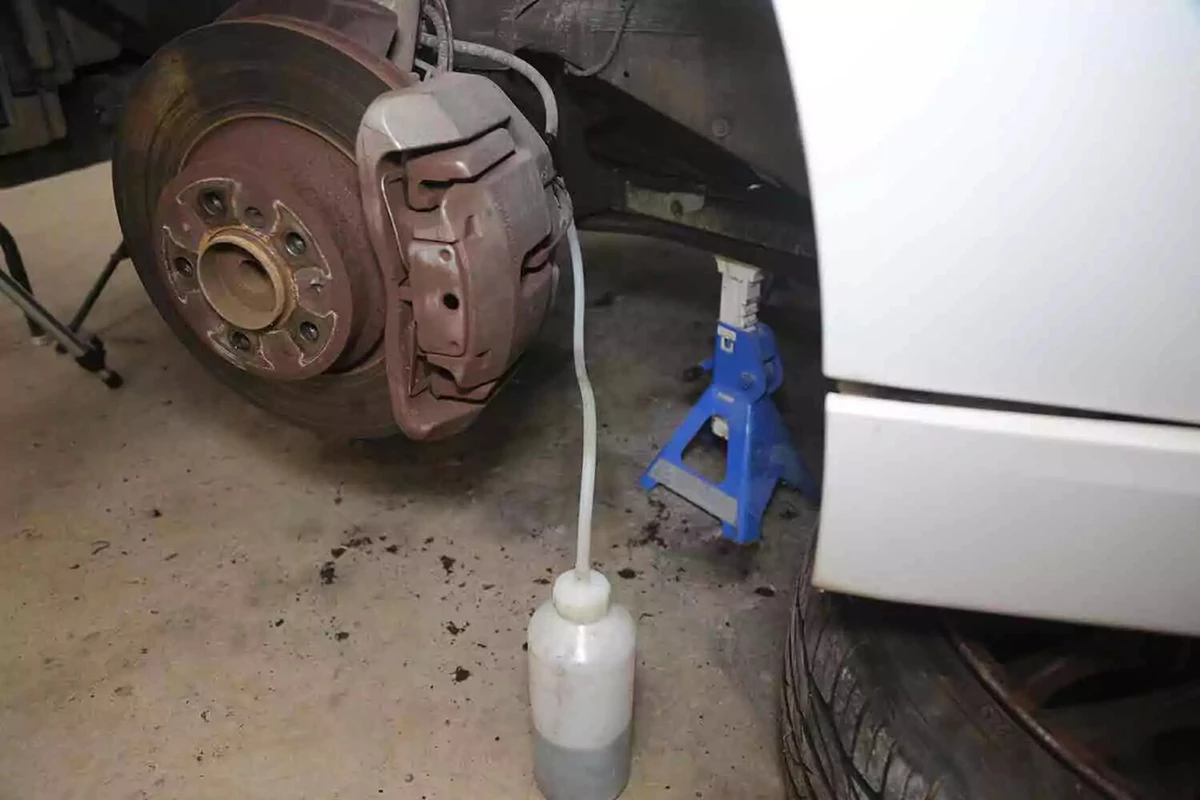
Pressure bleeders have a drain bottle and hose that attaches to the bleeder screw. The bottle and hose allow you to see when clean fluid starts coming out of the line.
The first caliper you bleed will produce the most dirty fluid. For each consecutive position, the fluid will not be as dirty.
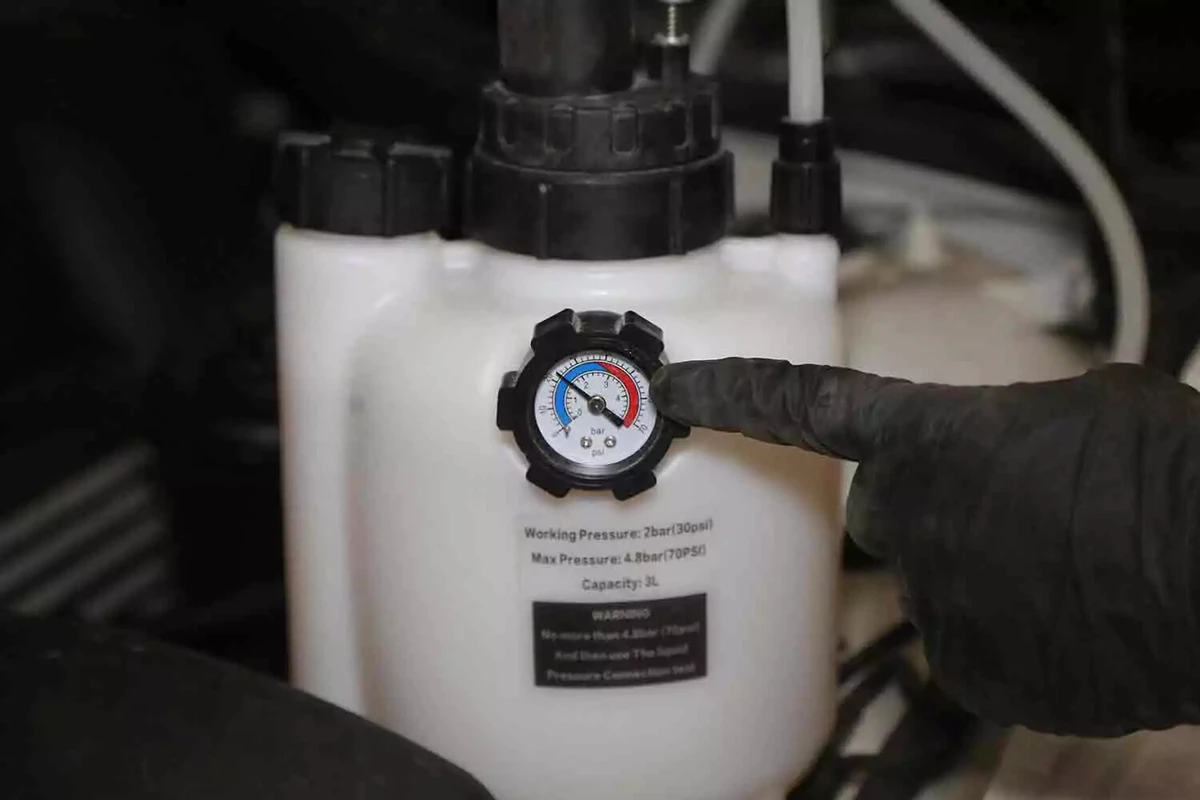
Pump the tank to the recommended pressure. For most systems, that’s 20 to 30 psi. Most vehicles bleed quickly at 20 psi.
Don’t over-pressurize the system, which could cause leaks or damage ABS systems.
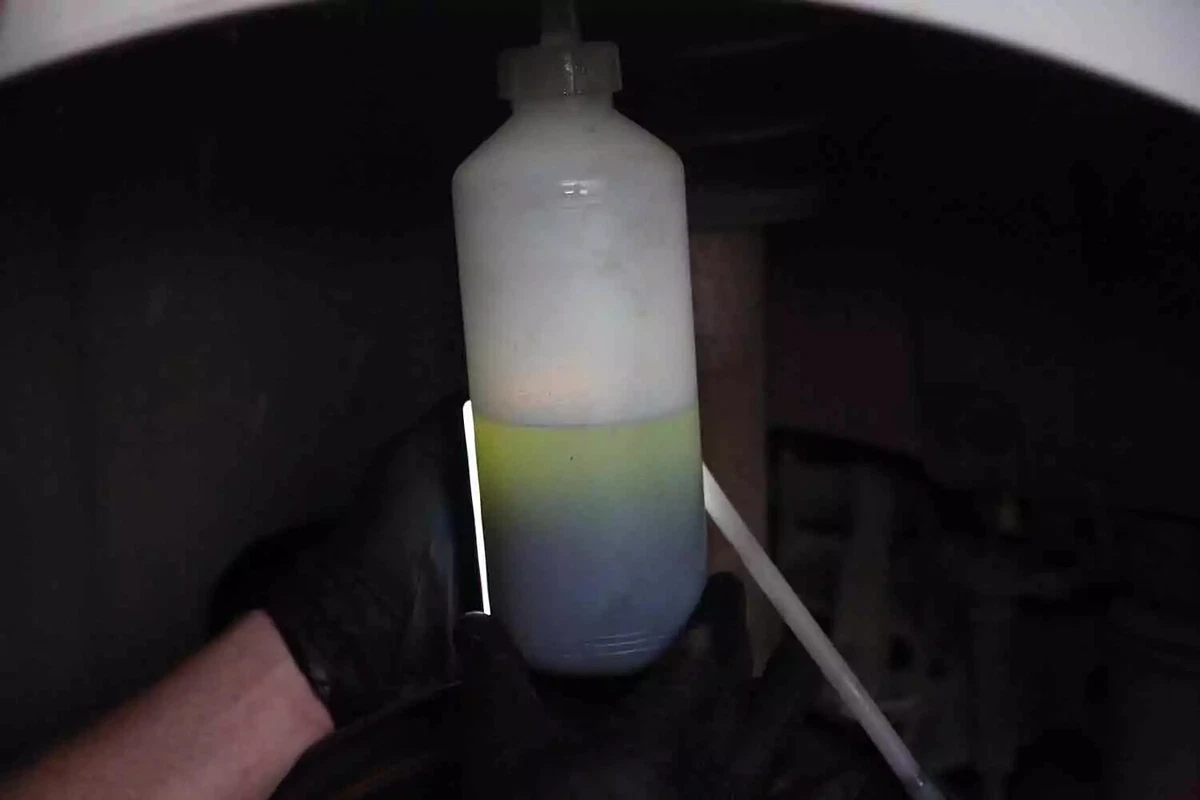
Return to the wheel being bled (or have an assistant help). Allow the bottle to fill about one-quarter.
Examine how the fluid changes color. In this photo, you can see dark fluid at the bottom. That’s contaminated. The light green fluid is fresh, indicating that the brakes on this wheel are done.
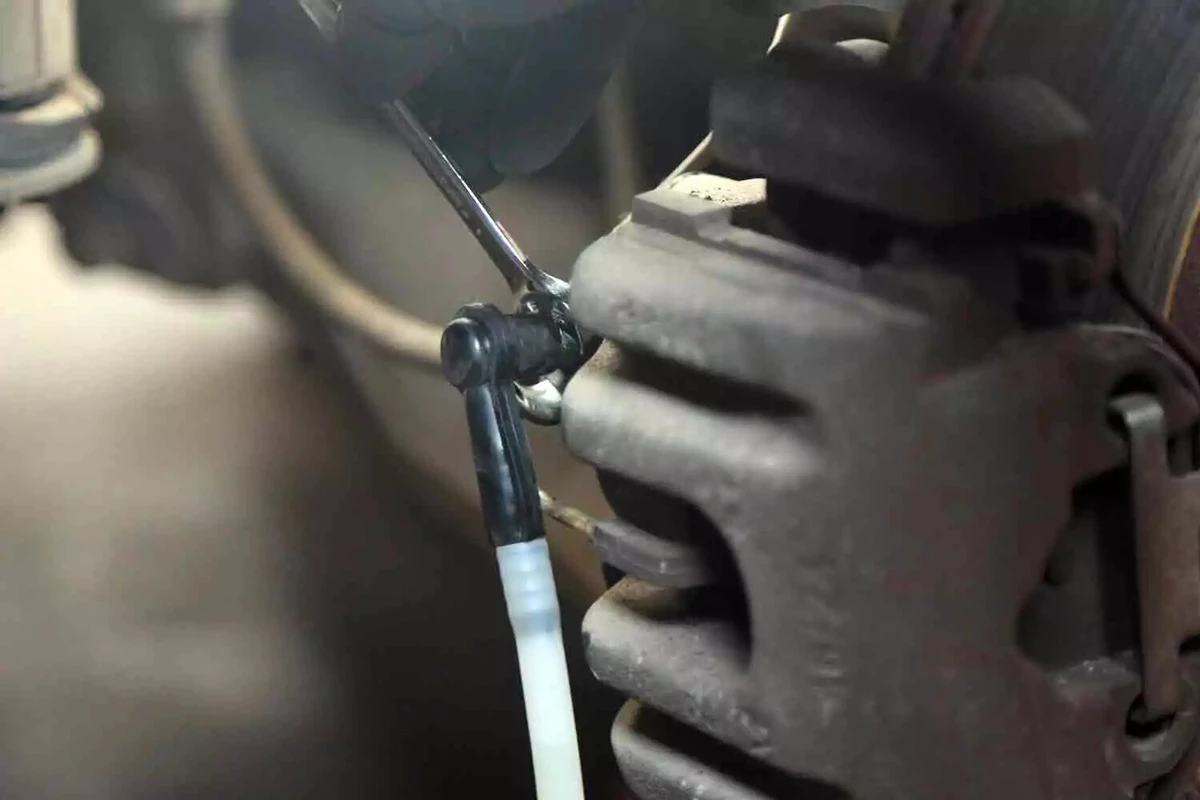
While the system remains under pressure, close the bleeder and remove the drain hose. Do not remove the drain hose or release the pressure at the tank until the bleeder is closed. That can allow air to re-enter the system.
After the bleeder is closed, press the tank’s purge valve to release the pressure.
The pressure must be released before you move to the next wheel. Otherwise, there could be leaks around the reservoir cap, resulting in fluid squirting out when the next bleeder is opened.
Repeat steps 9 through 15 for each wheel.
It’s usually not necessary to remove the wheels for this process. However, removing the wheel might be helpful for some vehicles. We removed them to make it easier to demonstrate the process.
Once all four brake positions are bled, purge and disconnect the tank from the reservoir cap. Then, remove the cap.
The reservoir might now be filled to the brim with fluid. To make room, which is necessary, use a clean paper towel or squeeze bulb to remove some fluid. Remove enough so the level is below the “Max” line. If a line is not provided, remove enough fluid to leave at least 1/8-inch of space at the top.
Reinstall the original cap. Replace any items removed to gain access to the reservoir.
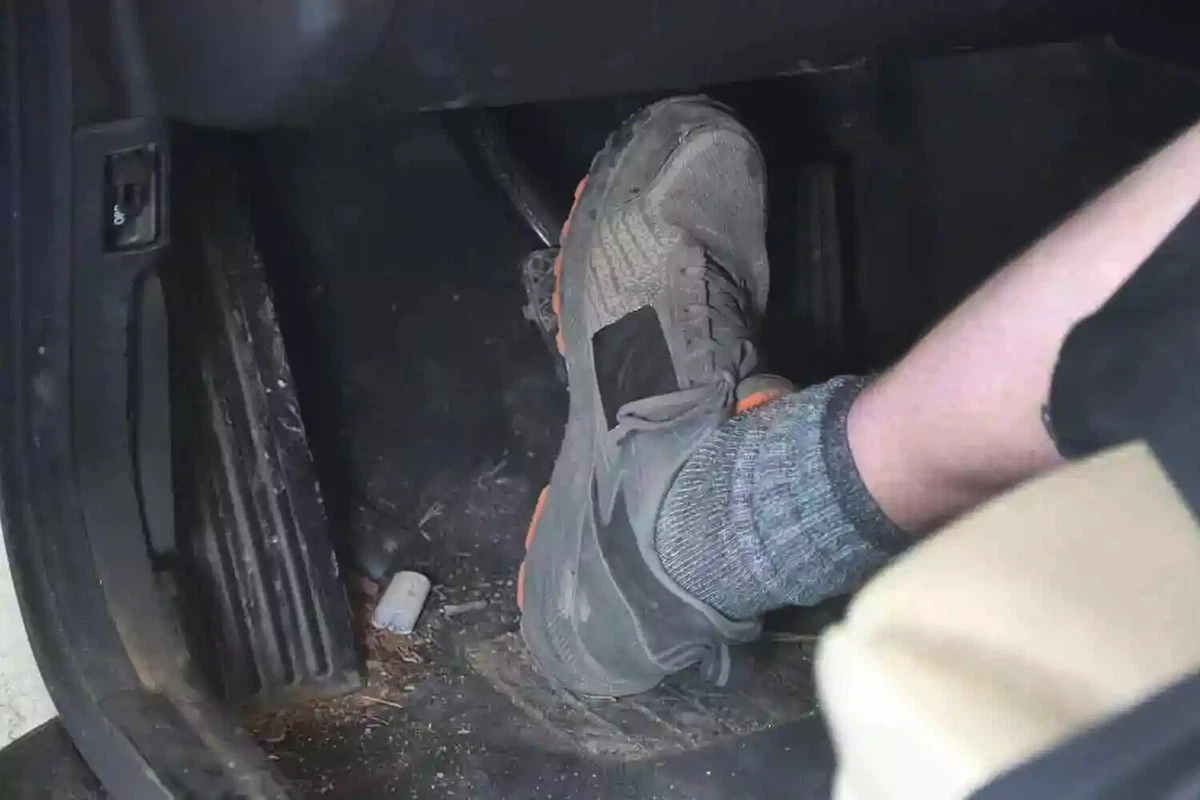
Get into the vehicle and step on the brake pedal. The brake should feel firmer than before.
If the pedal is soft, spongy, or goes to the floor, there is an open bleeder or air in the system.
If the pedal gets firmer after a few pumps, there is an air pocket. Repeat steps 10 to 18 to eliminate the air.
If the brake fluid in the reservoir got too low at any time before or during this process, you may need to use a scan tool to bleed the ABS pump.
Perform a strip test for water and copper contamination annually.
About the author

Share your feedback
This article is meant to provide general guidance only. Automotive maintenance, repair, upgrade, and installation may depend on vehicle-specifics such as make and model. Always consult your owner's manual, repair guide for specific information for your particular vehicle and consider a licensed auto-care professional's help as well, particularly for advance repairs.
Recommended for you
Find answers and inspiration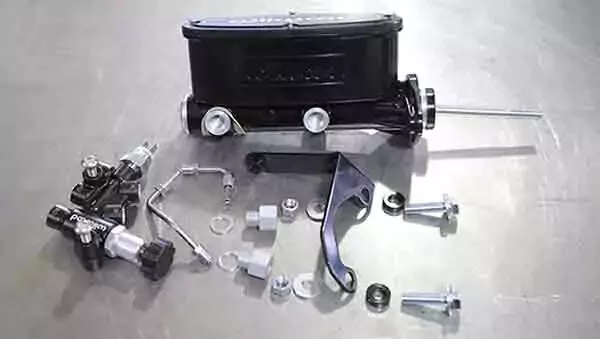
Buying the Right Brake Master Cylinder
6 min read
How to Buy the Right Brake Rotors
4 min read
Brake Calipers 101
4 min read
Brake Master Cylinder Replacement: Step-by-Step
10 min read
How to Replace Brake Rotors
7 min read
How to Find the Best Brake Pads for Your Vehicle
6 min read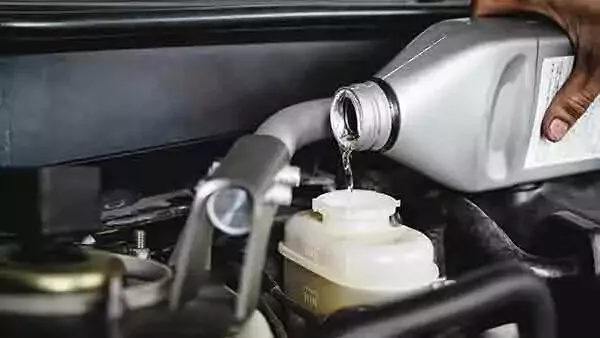
Choosing the Right Brake Fluid for Your Vehicle
5 min read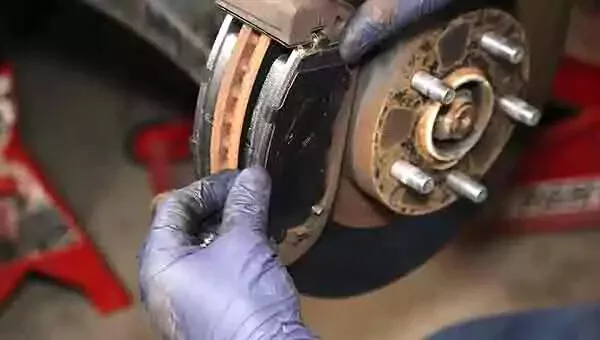
Brake Pads 101
7 min read
How to Replace a Brake Caliper
7 min read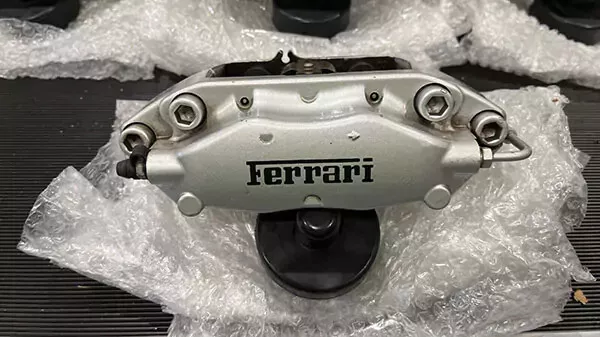
Buying the Right Brake Calipers
7 min read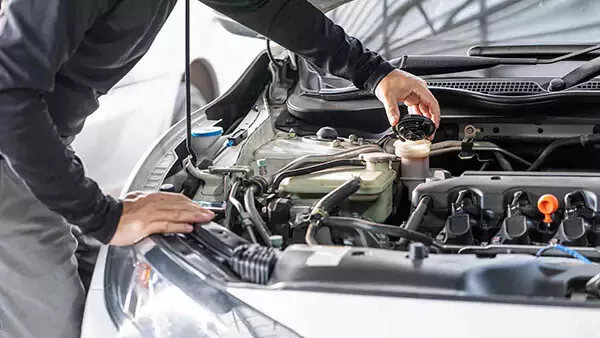
When to Replace Your Brake Fluid
5 min read
How to Change Disc Brake Pads
8 min read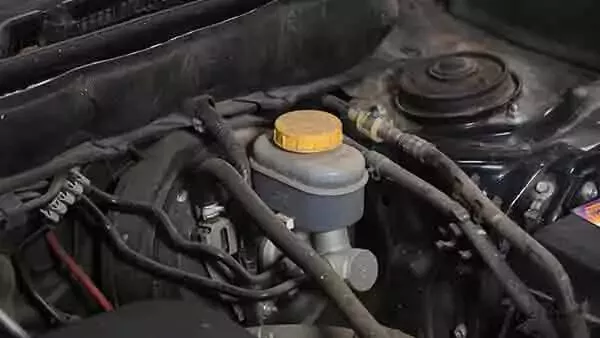
An Introduction to Brake Master Cylinders
6 min read
Explore more projects

How to Repair a Chipped Windshield
1 to 2 hours
Beginner
7 min read

How to Replace an Ignition Coil
Less than 30 minutes
Beginner
6 min read

How to Replace a Radiator Hose
Less than 30 minutes
Beginner
5 min read
How to Replace Brake Rotors
1 to 2 hours
Beginner
7 min read

How to Replace a Serpentine Belt Tensioner
Less than 30 minutes
Beginner
4 min read

How to Replace a Drive Belt
Less than 30 minutes
Beginner
5 min read

How to Rotate Your Tires
30 to 60 minutes
Beginner
5 min read

How to Refill Windshield Washer Fluid
Less than 30 minutes
Beginner
4 min read

How to Replace an Oxygen Sensor
30 to 60 minutes
Beginner
5 min read

How To Replace Differential Fluid
Less than 30 minutes
Beginner
8 min read

How to Replace Sway Bar End Links and Bushings
30 to 60 minutes
Beginner
6 min read

How to Replace Transmission Fluid and Filter
1 to 2 hours
Beginner
11 min read

How to Replace a Cabin Air Filter
Less than 30 minutes
Beginner
5 min read
How to Change Disc Brake Pads
30 to 60 minutes
Beginner
8 min read

How to Replace a Valve Cover Gasket
Less than 30 minutes
Beginner
7 min read

How to Change Windshield Wipers
Less than 30 minutes
Beginner
3 min read

How to Replace an Engine Air Filter
Less than 30 minutes
Beginner
5 min read

How to Clean Fuel Injectors
1 to 2 hours
Beginner
8 min read

How to Replace Shock Absorbers
30 to 60 minutes
Beginner
8 min read

How to Change a Car Battery
Less than 30 minutes
Beginner
6 min read
Automation How to Change a Car Battery
Less than 30 minutes
Beginner
6 min read

How to Replace a Mass Air Flow (MAF) Sensor
Less than 30 minutes
Beginner
7 min read

How to Replace a Clutch Master Cylinder
1 to 2 hours
Beginner
11 min read

How to Flush and Change Engine Coolant
30 to 60 minutes
Beginner
6 min read

How to Replace a Distributor Cap and Rotor
30 to 60 minutes
Beginner
5 min read

How to Check Tire Pressure and Change a Tire
Less than 30 minutes
Beginner
9 min read

How to Replace a Fuel Filter
30 to 60 minutes
Beginner
7 min read

How to Replace a PCV Valve
30 to 60 minutes
Beginner
6 min read
How to Replace a Brake Caliper
1 to 2 hours
Beginner
7 min read

How to Replace an Idler Pulley
30 to 60 minutes
Beginner
4 min read

How to Change a Headlight Bulb
Less than 30 minutes
Beginner
6 min read

How to Replace an Exhaust Gasket
1 to 2 hours
Beginner
9 min read

How to Replace a Throttle Body
30 to 60 minutes
Beginner
6 min read

How to Change Oil in a Car
Less than 30 minutes
Beginner
8 min read

How to Replace an Alternator
1 to 2 hours
Beginner
11 min read

How to Replace an EGR Valve
30 to 60 minutes
Beginner
5 min read

How to Jump Start a Car
Less than 30 minutes
Beginner
9 min read