A fuel pump moves fuel from your vehicle's tank to the engine. Most vehicles built since the late 1980s with electronic fuel injection (EFI) use pumps located inside the fuel tank. This DIY guide shows you how to replace an in-tank electric fuel pump typical of modern vehicles.
Older vehicles with carburetors use engine-driven mechanical fuel pumps or, occasionally, inline electric fuel pumps mounted under the vehicle. This article doesn’t focus on these low-pressure pumps.
Signs of a Bad Fuel Pump
The most common symptoms of a faulty fuel pump are difficulty starting and reduced engine performance. Your check engine light might illuminate.
How Long Does It Take To Change a Fuel Pump?
Replacing an in-tank fuel pump can take two to five hours depending on your vehicle, how easily you can access the fuel tank, and other factors.
Our demo vehicle has an access panel that makes changing the fuel pump without removing the tank a breeze. The fuel tank in this car is located in the trunk, behind the rear seat. Other vehicles have an access panel underneath the rear seat or in the trunk. If your vehicle does not have an access panel, don’t worry. You can still reach the tank, but it requires more time and effort. This article doesn’t cover removing the tank.
DIY Fuel Pump Replacement Tips and Tricks
- Many vehicles built starting in 2000 use a replaceable fuel pump module or housing, where the entire assembly, including the fuel level sender, is replaced. The process below is much the same for a fuel pump housing/module replacement as for an individual pump replacement, with the housing replacement requiring fewer steps.
- If your fuel tank is full, it’s crucial to siphon the fuel using a siphon kit. This ensures your safety and the safety of your vehicle. Remove the fuel and store it in gas cans until you’ve installed the new pump and tested for leaks.
- Gasoline is dangerous. Always wear gloves and eye protection, avoid smoking near gasoline, and keep a fire extinguisher nearby. If any gas spills on your clothes, change them immediately. Gasoline causes severe chemical burns, especially around waistbands or socks.
What you’ll need
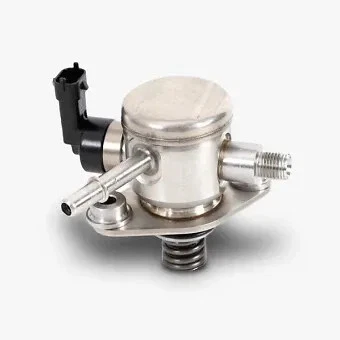 Siphon kit$25 - $255price range
 Screwdrivers$1 - $130price range
 Sockets and ratchet$1 - $185price range
- New fuel pump$25 - $255price range
 Zip tie$1 - $70price range
 Wire crimpers$1 - $195price range
- Wire cutters$1 - $195price range
 Stainless steel brush$1 - $70price range
 Latex gloves$1 - $105price range
 Safety goggles$1 - $65price range

Shop this step
The first step for many auto repair jobs is disconnecting the vehicle’s battery. It’s a simple task. Remove the ground clamp from the battery’s negative post. Plus (+) and minus (-) signs are usually molded into the plastic battery case near the post.
Removing the negative terminal first ensures the vehicle is no longer connected to a live battery. This prevents sparks, electrical shorts, or components (such as fans) from unnecessarily coming on.
Pull the terminal off the battery for a close inspection. If there is corrosion, loose wires, or physical damage, consider replacing the battery terminal or cable.
Move the terminal away from the battery into a position where it can’t accidentally touch the battery post.
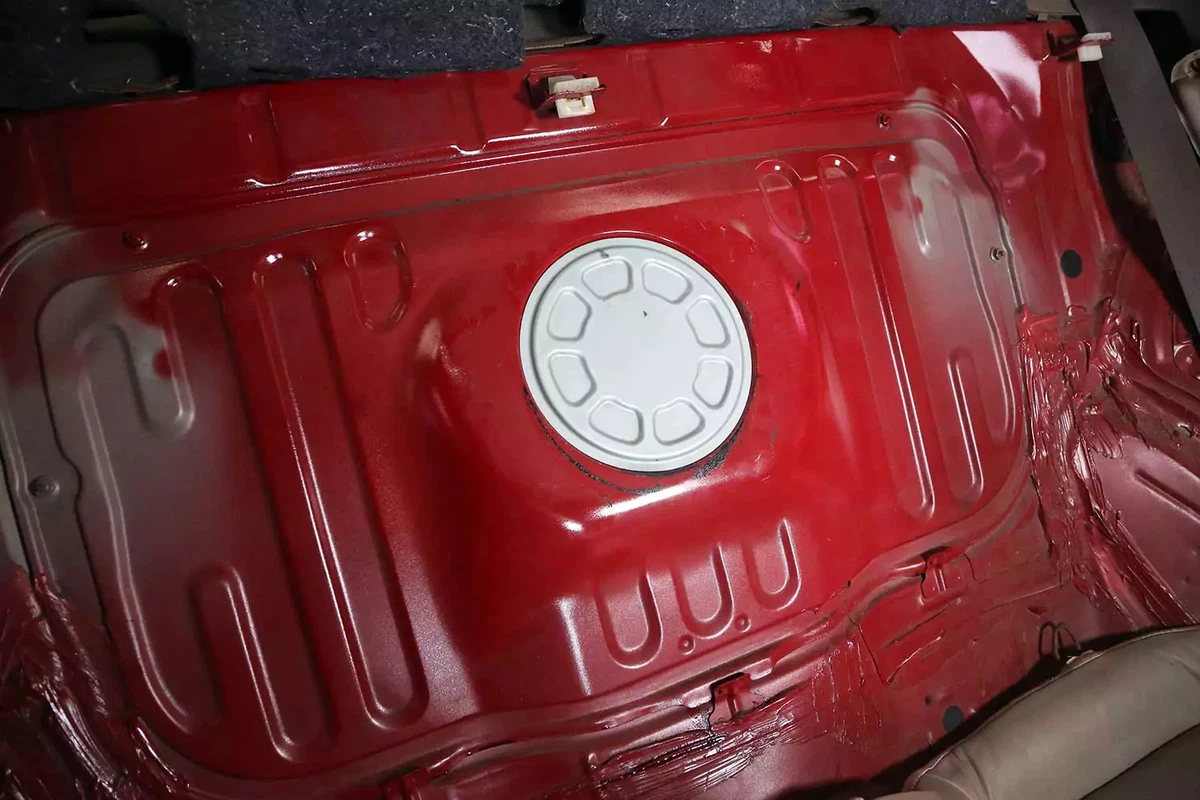
A fuel tank is most often under the vehicle. However, the tank for some cars is in the trunk. We removed the rear seat to access the fuel pump cover door. That’s the round silver cover.

Shop this step
Using a flat-blade screwdriver, remove the access door. Sometimes, these are bolted in, but this one was held in place with a sticky tape seal.

This car uses a bolt-on cover to secure the fuel pump in the tank. Most vehicles have an integrated fuel pump module serving as the tank’s seal cover. Save the original hardware for reuse.
The other common fuel pump mount is a slip ring that uses friction to seal the tank. For these, you would use a small flat-blade screwdriver and hammer to tap the ring out in a counterclockwise circular motion until the lock ring disengages the outer ring.

For our demo vehicle, the fuel pump assembly connects to the output line inside the tank. Remove the hose clamps before removing the module from the tank. Most fuel tanks integrate the fuel lines into the sealing cover.
If your tank uses the one-piece module, disconnect the hoses before removing the cover.

Unbolt the pump assembly from the tank. If your tank has a one-piece module, you can skip this step.
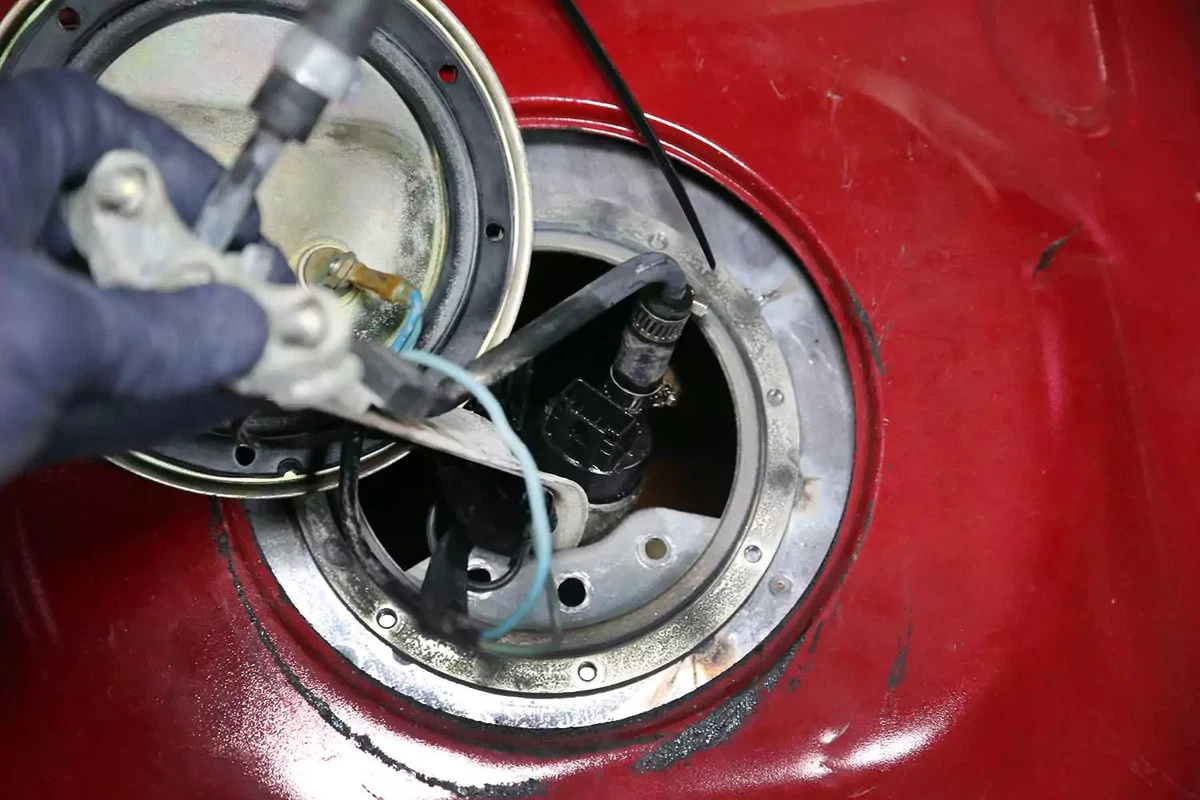
Carefully lift the pump assembly out of the tank. You may need to roll and twist the assembly to maneuver the pump through the opening. Have rags handy because you will likely spill some fuel. Keep the area well-ventilated.
The fuel-level sending unit will likely be attached if you have an integrated pump module. It’s a long lever with a float at the end. Be careful not to damage the fuel-level unit, which provides information to your fuel gauge.
This illustration shows the standard configuration of an integrated fuel pump module.

Remove the wiring plug from the fuel pump. Most newer vehicles use a plastic plug, but some older vehicles—from the mid-1980s to the late 1990s—have threaded studs with ring terminals.
Remove the nuts and washers. Slide off the ring terminal if so equipped.

Shop this step
Use a screwdriver or socket and ratchet to loosen and remove the fuel line from the pump. For the spring clamps, use pliers.
If you’re replacing the entire fuel pump module, the fuel connections are external to the tank.

Gently lift on the pump. Pry the pump base (where the filter sock is located) to pull the pump away from the sending unit.

New fuel pumps come with a sock filter, which keeps debris inside the tank from damaging the pump. Snap the new sock filter onto the bottom of the pump. It’s retained by either a metal snap-fit washer or a built-in tab on the sock.
No sock inside the box with the pump? We recommend getting one.

The new fuel pump should come with a small section of fuel line. Always replace this hose because the old hose can crack and split, causing leaks within the fuel system.
Use the original section of the hose as a guide to cut a new piece from the supplied hose.

Shop this step
Slip the new hose and clamps on the pump and then on the sending unit hardline. Tighten the hose clamps.

We recommend securing the pump to the sending unit, even if it has a lower pump support like this one. To prevent the pump from coming off the base support, add a large hose clamp—or an additional couple of zip ties.

The new pump will probably plug into the existing harness.
Some replacement pumps may have a different electrical connector style. If so, they should come with a new terminal that you’ll need to splice onto the vehicle side. Cut one wire at a time to ensure you don’t get the wires mixed up. Verify the plug’s polarity. The colors will likely not be the same, so examine the wires. The ground wire will connect to the pump’s mounting assembly or the top of the sending unit (tank sealing cover). The hot wire will go from the pump to the cover’s electrical connector. Often, the ground wire is black, but not always.
If you can’t figure out the wire setup, check your vehicle’s repair manual.

Shop this step
Strip away about ¼-inch of insulation from the wires and slide them into a butt connector (typically supplied with a new pump). Then, crimp both ends with a wire crimping tool.
Concerned about the safety of electrical wiring inside the tank full of gasoline? It's fine. Gasoline doesn’t conduct electricity, and there isn’t enough oxygen in a fuel tank for it to ignite from a spark. Exposed wiring is common inside a fuel tank. Just don’t leave any wires bare where they could touch other wires or metal.

Connect the plug to the fuel pump and secure the wires to the assembly with zip ties.
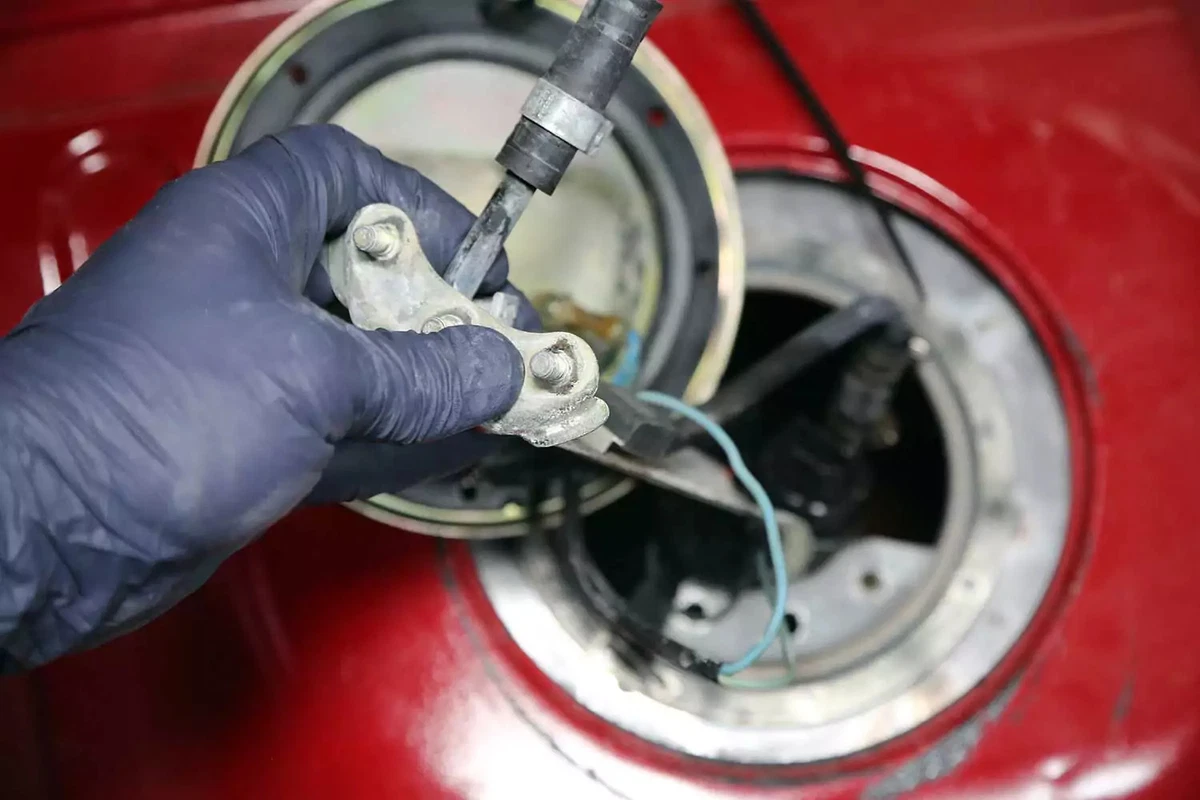
Slip the assembly with the new pump into the tank. Ensure the new pump is in the same position as the old one.
Some tanks have baffles or a plastic box that holds fuel for when the tank is low. If your vehicle has this feature, double-check that your pump is positioned correctly.
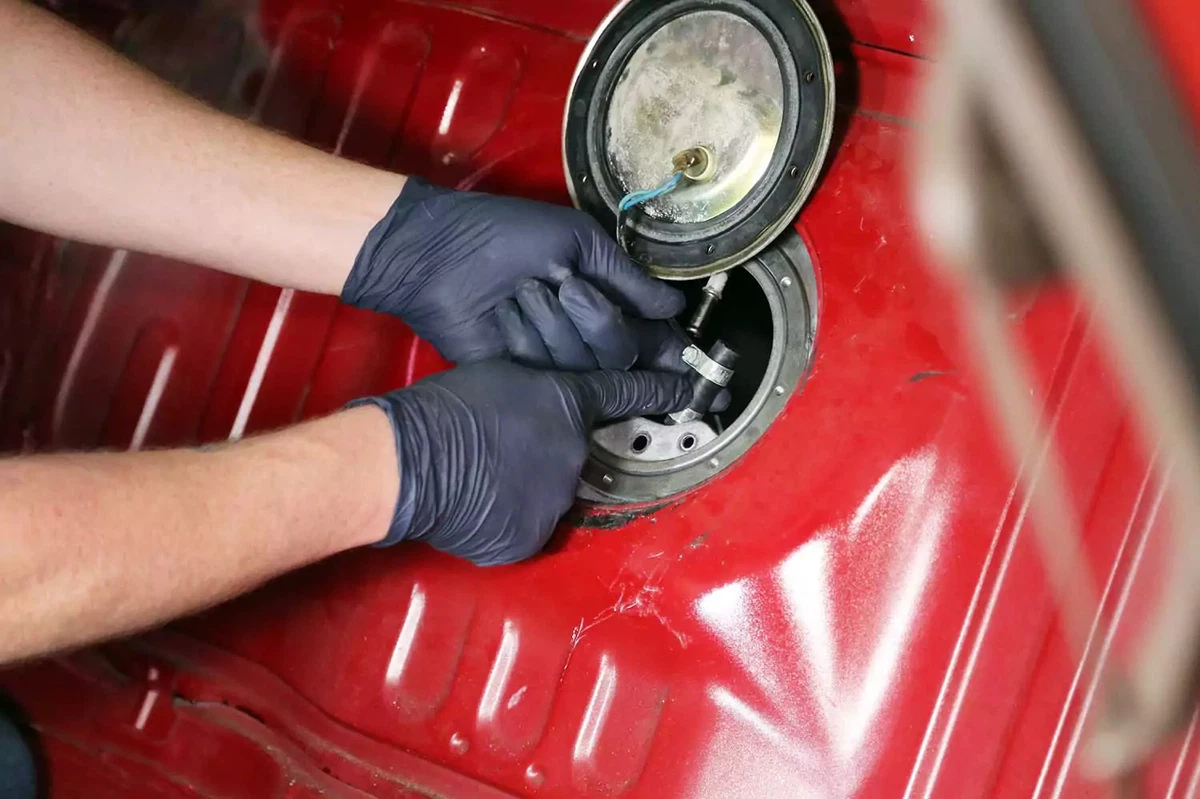
If your pump has an intermediate fuel line connection (as this one does), replace the hose and tighten the clamps.

Reinstall the tank cover. Tighten the bolts by hand.
If your tank has a friction ring (instead of a bolted flange), reinstall the completed module with a new O-ring. Press down hard on the sending unit and use a hammer and flat-blade screwdriver to tap the locking ring into place. This locking ring type tends to pop out of the groove, so be diligent.

If your tank is in the vehicle, reinstall the access cover. Our demo vehicle’s cover uses sticky tape to seal, which is in good shape. If needed, you can use new thin, double-sided tape or mastic rope (sticky sealing rope) for a strong seal.
If you had to remove the fuel tank, reinstall it now. That includes reattaching the fuel lines and wiring.

Shop this step
Finally, reconnect the battery negative terminal. Your installation is complete at this point. However, you still need to test the system and might need to add a few gallons of gas.
Cycle the key to the run position, but don’t start the vehicle. If your car or truck has a start button instead of a key, don’t put your foot on the brake or start the vehicle.
Listen for the pump to turn on. The fuel pump should run for about five seconds and then shut off. You may need an assistant to operate the key while you listen to the tank. The pump should make a light “whirring” sound.
Look for leaks in any place you’ve worked on, whether it’s a new or old piece of hose. If you smell gas or see a leak, stop immediately. Disconnect the battery, and then go back over to your installation. If you do not have leaks and can hear the pump, try starting the engine. It may take a couple of cranks before fuel reaches the engine. After the car fires up, it should start and run.
After the engine is running, check one more time for leaks.
About the author

Share your feedback
This article is meant to provide general guidance only. Automotive maintenance, repair, upgrade, and installation may depend on vehicle-specifics such as make and model. Always consult your owner's manual, repair guide for specific information for your particular vehicle and consider a licensed auto-care professional's help as well, particularly for advance repairs.
Shop project essentials
- Siphon kit$25 - $255price range
- Screwdrivers$1 - $130price range
- Sockets and ratchet$1 - $185price range
- New fuel pump$25 - $255price range
- Zip tie$1 - $70price range
- Wire crimpers$1 - $195price range
- Wire cutters$1 - $195price range
- Stainless steel brush$1 - $70price range
- Latex gloves$1 - $105price range
- Safety goggles$1 - $65price range
Recommended for you
Find answers and inspiration

Expert Advice for Checking Your Vehicle’s Engine Oil Level

6 Ways to Dress Up Your Engine

Symptoms of a Bad Crankshaft Sensor

Diagnosing and Replacing a Bad Car Starter

How to Replace Engine Mounts
4 min read
The Right Tools to Clean Your Fuel Injectors
6 min read
How to Replace an Exhaust Gasket
9 min read
How to Buy the Best MAF Sensor
4 min read
Ignition Wire Buying Guide
6 min read
A Complete Guide to Cylinder Heads

Purpose of the Engine Mount and Signs of Failure

A Quintessential Monster Miata with a Mustang V-8

How to Buy the Right Ignition Coils
7 min read
Chevrolet LS9: The Ultimate LS-Series Engine

Squeaks, Clangs and Rattles: Car Noises That Need Attention

Why Regular Care of Your Fuel Pump Is a Must

All About Crankshafts and How They Work

Interpreting Engine Codes Is Easy With Right OBD Reader

How to Clean a Carburetor

A Quick Guide to Valve Cover Gaskets
6 min read
How to Replace a Fuel Filter
7 min read
Finding the Best Engine Air Filter for Your Car
4 min read
How to Replace a Throttle Body
6 min read
Do You Have a Faulty Mass Air Flow Sensor?
4 min read
What to Do About a Dirty Oxygen Sensor
4 min read
Buying the Best Portable Car Battery Jump Starter
6 min read
What You Should Know About O2 Sensors
6 min read
Understanding Your Car's Idler Pulley
4 min read
How to Test an Alternator (And Fix It!)

How To Fix a Crankshaft Position Sensor Wiring Harness
7 min read
Why Is Your Car Burning Oil?

When to Replace Your Exhaust Manifold Gasket
6 min read
An Overview of Car Engine Parts
5 min read
What Is a Camshaft Position Sensor?

4 Easy DIY Upgrades of Your Car's Ignition System

How to Replace a Distributor Cap and Rotor
5 min read
Identifying Common Engine Leaks

Ignition Coils Help Spark Horsepower

Everything You Should Know About Glow Plugs

P0420 Engine Code: What It Means and How to Fix It
5 min read
Everything You Need to Know About Fuel Filters
6 min read
Engine Mounts 101
4 min read
5 Small Car Maintenance Tasks To Prevent Big Problems Later

How to Replace a Serpentine Belt Tensioner
4 min read
Can a Cold Air Intake Add 30 Horsepower?

Spotting Intake Manifold Gasket Problems
7 min read
Symptoms and Fixes for a Bad Thermostat

How to Replace an Ignition Coil
6 min read
Custom Exhaust Tips: Make a Statement with Your Tailpipes

What to Expect From an Emissions Test

All About Cylinder Head Gaskets

All About Mass Air Flow Sensors

How to Fix Low Oil Pressure
4 min read
How to Find and Fix an Exhaust Leak

How Much Does an Alternator Cost?

Why Is a Hemi Engine So Special?

The Difference Between Camshafts and Crankshafts
4 min read
Get Your Classic Car Ready for Winter

Engine Air Filter Change 101

Engine Blocks: Everything You Need to Know

Troubleshooting a Car That Doesn’t Start

What Does the Check Engine Light Mean?

Deciding to Buy Original or Aftermarket Auto Parts: Quality and Selection

How Long Do Car Batteries Last?

How an Oil Pump Works

The Anatomy of a Spark Plug

How To Gap a Spark Plug

How to Replace an Intake Manifold Gasket
7 min read
Cabin Air Filter vs. Engine Air Filter: What’s the Difference?

Why Your Car Won’t Start

What You Should Know About Cylinder Heads

How to Replace Ignition (Spark Plug) Wires
5 min read
4 Types of Water Pumps

Signs of a Bad Car Battery vs. Alternator

What Is a PCV Valve? And How to Replace One

Engine Oil Flush 101

Online Videos Are a Game-Changer for DIY Car Repair

When to Replace Your Drive Belt
6 min read
How to Buy the Right O2 Sensor
5 min read
What Is a Catalytic Converter and Why Are People Stealing Them?

Synthetic Oil or Conventional Oil: What’s Best for Your Vehicle?

All About Engine Leak Down Testing
A Guide to Cleaning a Throttle Body

How to Remove Rusted Nuts and Bolts

Cleaning Your Engine Bay: Step-by-Step Instructions

Timing Belts 101
5 min read
How to Buy the Right Car Distributor
6 min read
How to Do an Engine Compression Test
5 min read
Choosing the Best Intake Manifold Gasket
7 min read
What Does the Dashboard Oil Light Warning Mean?
5 min read
The Brave New World of Ultra-Easy Fuel Injection

Your Complete Idler Pulley Buying Guide
5 min read
How to Replace an Alternator Belt

How to Choose the Best Oil Filter

Deciding to Buy Original or Aftermarket Auto Parts: The Online Transaction

How to Jump Start a Car Battery

Buying the Right Engine Mount
5 min read
Winter Car Prep: 5 Essential Articles

All About Exhaust Gas Recirculation (EGR) Valves

Five Signs Your Spark Plugs Need Changing
5 min read
How to Replace an Oxygen Sensor
5 min read
Make an Old Car Run Like New: Four Common Sense Tips

All About Your Distributor Cap and Rotor
7 min read
How to Replace a Valve Cover Gasket
7 min read
Easy DIY Project: Replace an Oxygen Sensor

Car Starter Motors and How Long They Last
How to Keep a Ford Flathead V-8 Alive
8 min read
How to Replace a Car Starter
7 min read
What to Check and What to Replace at 100,000 Miles
4 min read
How to Clean Fuel Injectors
8 min read
MAP Sensors and Managing Air Flow

How Long Does an Oil Change Take?

The Weirdest Oddball Car Engines of All Time

How to Choose the Best Spark Plugs
5 min read
All About Vehicle Emission Systems

Tax Refund on the Way? It’s Time to Think About Supercharging
How to Replace an Engine Air Filter
5 min read
Signs That a Timing Chain Needs Replacement
5 min read
Brake Cleaners Versus Carburetor Cleaners

How to Replace an EGR Valve
5 min read
An Expert Guide to Exhaust Systems

How to Buy the Right Valve Cover Gasket
4 min read
Car Muffler Types and How They Change Your Exhaust Note

How Long Do Electric Car Batteries Last? And Other EV Questions

Explaining the Throttle Body and Position Sensor
4 min read
Ethanol Fuel Boosts Performance and Costs Less

The Alternator Is Your Car’s Little Electric Power Station

Spark Plugs 101
7 min read
One Day Project: Rebuild Your Carburetor

Should You Rebuild or Replace Your Carburetor?
4 min read
Which OBDII Scanner Do You Actually Need?
4 min read
Taking Your Car to the Track: The Ultimate Guide

Try a Catalytic Converter Cleaner Before an Expensive Repair

The Right Liquids for High-Performance Engines

In Age of Computerized Cars, Tuning Gets an Update

How to Buy the Right Timing Belt and Related Tools
5 min read
NASCAR Engines Versus What Powers Your Car

How To Choose the Best Supercharger

Understanding Battery Sizes (and Battery Group Size Charts)
7 min read
How to Buy the Right Exhaust Manifold Gasket
6 min read
History of the Rotary Engine: Past, Present and Future

How to Change a Timing Belt
12 min read
How to Buy and Build a Gen-1 Coyote Ford Mustang
7 min read
How to Buy the Right Throttle Body
5 min read
Clean Fuel Filters Are Critical for Performance

How to Change Your Oil: Visual Step by Step Guide

How a Car Engine Works

Why an Engine Overheats and How to Fix It

Everything You Need to Know About Car Starters
7 min read
Reduced Engine Power and What To Do About It
5 min read
Regularly Check These 4 Car Fluids

How to Buy the Right Car Starter
5 min read
Understanding Engine Horsepower vs. Brake Horsepower

Distributors 101
6 min read
How to Change Oil in a Car
8 min read
Cold Air Intake 101: How It Works

How to Clean Or Replace Your Air Filter

Top Candidates for an Affordable V8 Swap

Are Ticking Engine Noises a Warning? Or Just Annoying?

Types of Twin Turbos (And Why You Want One)

Carburetor 101: Maintenance and Cleaning
6 min read
How Solenoids Work in Starters and Automatic Transmissions

An Introduction to Cleaning Fuel Injectors
5 min read
Choosing a Supercharger Versus Turbocharger

How to Get Started with an LS Engine Swap

P0302 Engine Code: What It Means and How to Fix It
6 min read
The Dry Sump System Explained

How to Replace a Mass Air Flow (MAF) Sensor
7 min read
Facts About Diesel Exhaust Fluid

Protect Your Catalytic Converter with a Shield or Lock

What Octane Is Best for Your Car?
4 min read
Buying the Right Serpentine Belt and Tensioner
4 min read
A Performance Data Recorder (PDR) Adds Racing Analytics to Your Car

Deciding to Buy Original or Aftermarket Auto Parts: The Basics

What to Know About Your Vehicle's Throttle Body
6 min read
Diagnosing Your Serpentine Belt and Tensioner
6 min read
A Guide to Car Clutches
7 min read
Choosing the Best Drive Belt for Your Car
6 min read
How to Replace a Fuel Pump

Basic Car Maintenance Is Simpler Than You Think

The Importance of the Drive Belt Tensioner

Why You Should Add an Engine Oil Cooler

How to Replace a PCV Valve
6 min read
Buying the Right PCV Valve
4 min read
Hisses, Whines, and Rattles: What Your Car Is Trying to Tell You

Carburetors vs. Fuel Injection: For Show or Go?

Taking Vintage Cars Out of Storage: Planning for Spring

All About Exhaust Gaskets

Buying the Right Distributor Cap and Rotor
4 min read
How to Replace Spark Plugs
7 min read
What Is a Serpentine Belt and How Do You Change It?

How to Replace a Drive Belt
5 min read
Tips and Tricks to Manage Engine Heat

An Essential Guide to Timing Belts

How to Test Your PCV Valve
6 min read
Porsche Boxster IMS: What to Know
5 min read
How to Buy the Right 1970-74 Barracuda Trim Parts
4 min read
Everything You Should Know About EGR Valves
5 min read
A Deep-Dive Guide to Ignition Wires
7 min read
When to Replace Your Engine Air Filter
5 min read
Choosing the Right Fuel Filter for Your Vehicle
6 min read
How to Pick the Right “Parts Car”

How to Choose the Best Fuel Pump
6 min read
OBD Port Uses for Amazing Digital Car Hacks
What to Buy First for Your LS Chevelle Swap
9 min read
How to Use an Engine Timing Light

Causes and Cures for Oil Pan Leaks

ECU 101: What Is an Engine Control Unit?

How to Tune Your Exhaust Note
Choosing the Best Motor Oil
4 min read
How Do Ignition Coils Work?
5 min read
Fuel Pumps and How They Work
8 min read
What a Fuel Pressure Gauge Does and Why You Need One

4 Bolt-On Engine Power Upgrades That Add Crazy Combustion

How Does Engine Braking Work?

Changing Your Oil: 5 Things to Know
6 min read
How to Buy the Right EGR Valve and Gasket
6 min read
How to Choose the Best Motor Oil
8 min read
Big Block vs. Small Block: Which Engine Is Best?

A Double Whammy: Combining a Supercharger and Turbocharger
Explore more projects
How to Replace an Intake Manifold Gasket
2 to 5 hours
Intermediate
7 min read

How to Replace Power Steering Fluid
1 to 2 hours
Intermediate
8 min read

How to Replace a Power Steering Pump
1 to 2 hours
Intermediate
7 min read

How to Replace a Car Radiator
1 to 2 hours
Intermediate
8 min read

How to Replace a U-Joint
1 to 2 hours
Intermediate
14 min read
How to Replace Ignition (Spark Plug) Wires
30 to 60 minutes
Intermediate
5 min read

How to Replace a Transmission Mount
1 to 2 hours
Intermediate
7 min read
How to Replace Spark Plugs
1 to 2 hours
Intermediate
7 min read

How to Change Manual Transmission Fluid
Less than 30 minutes
Intermediate
4 min read
How to Replace a Steering Gearbox
2 to 5 hours
Intermediate
8 min read

How to Replace a Heater Core
More than 5 hours
Intermediate
12 min read
How to Replace a Car Starter
1 to 2 hours
Intermediate
7 min read

How to Replace Wheel Bearings
1 to 2 hours
Intermediate
7 min read

How to Change Automatic Transmission Fluid
Less than 30 minutes
Intermediate
6 min read

How to Change a Thermostat
30 to 60 minutes
Intermediate
7 min read
How to Replace Engine Mounts
1 to 2 hours
Intermediate
4 min read

How to Replace Tie Rod Ends
30 to 60 minutes
Intermediate
7 min read

How to Replace a Distributor
1 to 2 hours
Intermediate
7 min read

How to Change a Water Pump
1 to 2 hours
Intermediate
8 min read