When your water pump leaks coolant, it needs to be replaced quickly. Most engines have an external water pump that is easy to access.
How long does it take to replace a water pump?
Changing a water pump is a beginner DIY task. It usually takes one or two hours depending on the configuration of your vehicle’s drive belt and how accessible your water pump is.
Allow time for your engine to cool down completely before touching the drive belt.
The water pump is typically located in the center of the accessory drive on the front of the engine. The drive belt—whether serpentine or V-belt—drives the water pump to keep the coolant flowing through the system.
On some engines, the water pump is located behind the engine front cover as part of the timing belt drive system. Replacing those water pumps is different and not covered here.
Learn how to find signs of a bad water pump - opens in new window or tab.. And check out our guide to buying the right water pump for your car - opens in new window or tab..
Tips and tricks for DIY car water pump replacement:
- If you have never replaced the water pump’s drive belt—or there are signs of excessive wear—replace the belt when you change the water pump. If the water pump has seized and isn’t spinning, you must replace the belt.
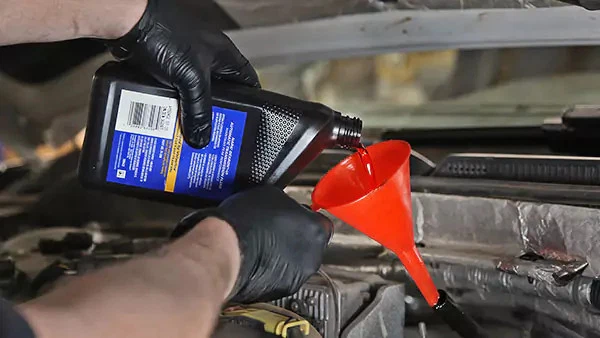
- Double-check that you are using the correct coolant for the vehicle. The classic green fluid is incompatible with newer coolants. If you are unsure about the type, use an all-makes, all-models hybrid antifreeze.
- We suggest using a 50/50 premixed coolant, which has distilled water. It’s free of minerals that damage cooling systems. If you want to mix your own, you must use distilled water—not drinking or tap water.
- It’s important to properly dispose of the old coolant, which is toxic.
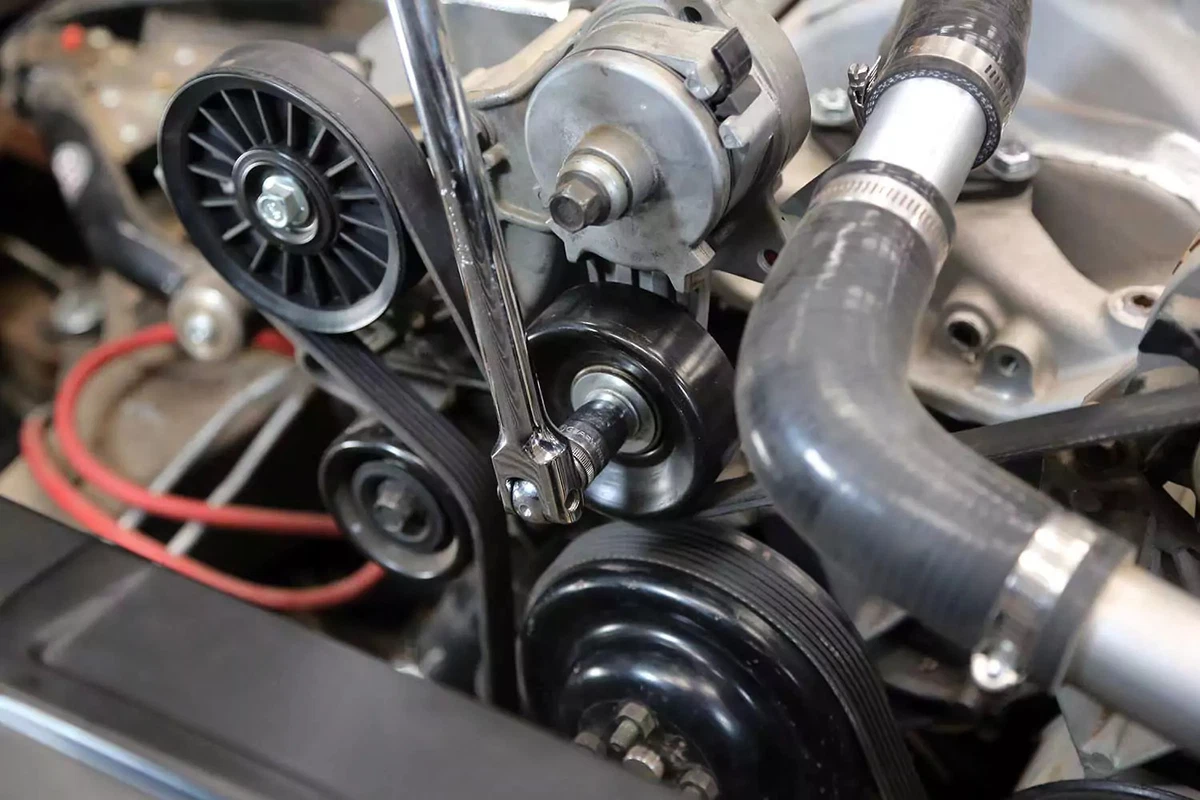
Let your engine cool down fully, and then remove the accessory drive belt. Most modern engines use a single serpentine belt, but older engines (and some newer ones) use multiple belts.
Take a picture of the belts before removing them so you have a good reference for routing them later on. If your engine has a mechanical fan, you may need to remove it before removing the belt.
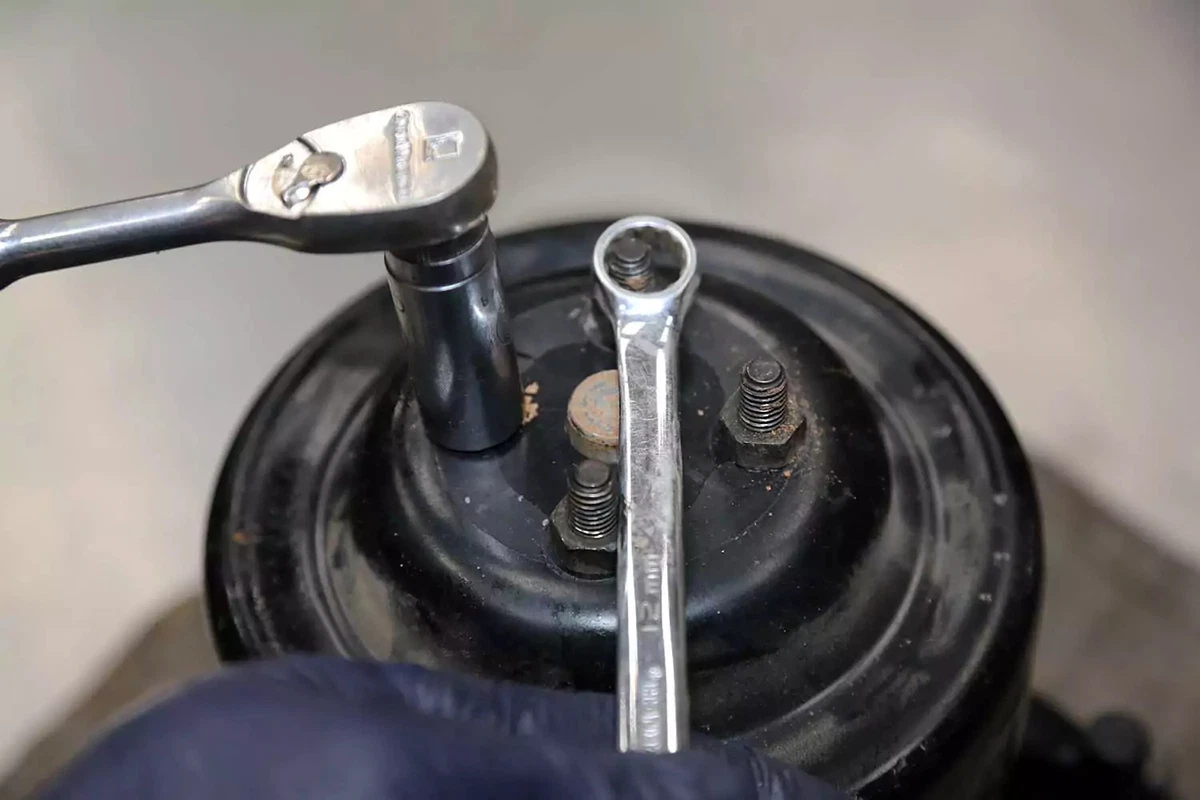
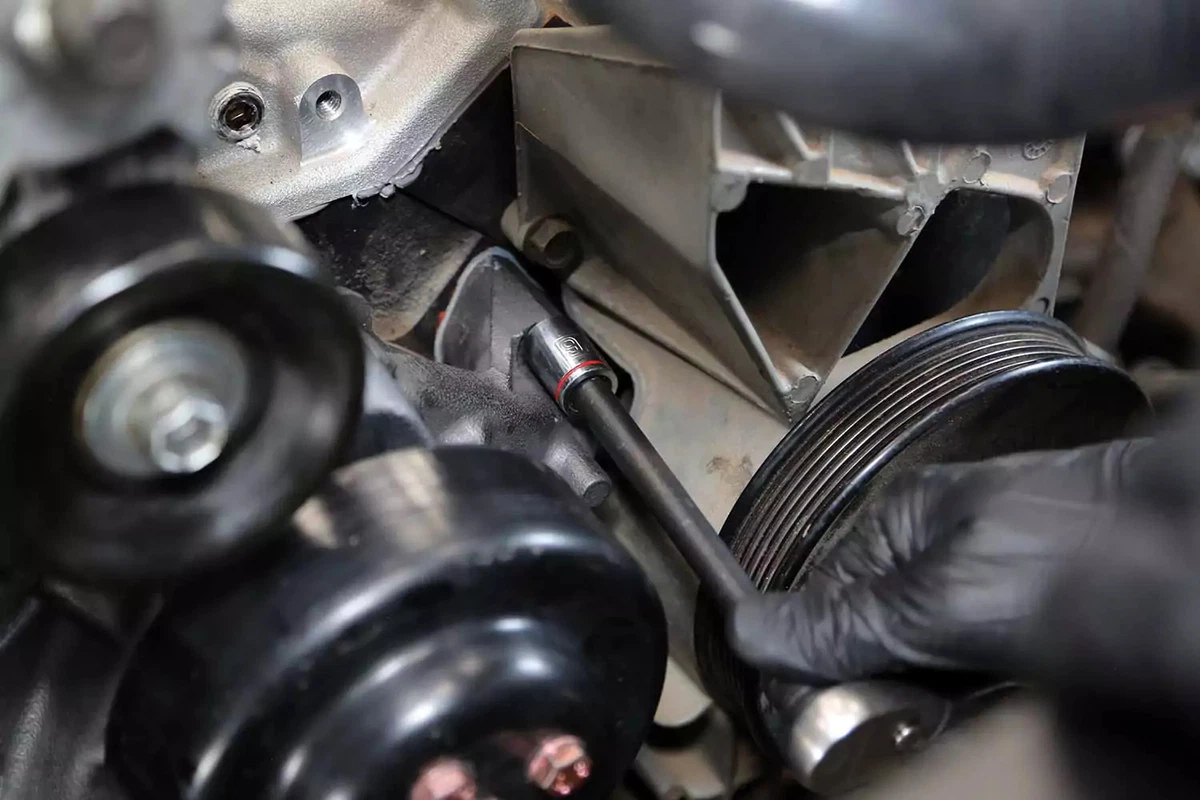
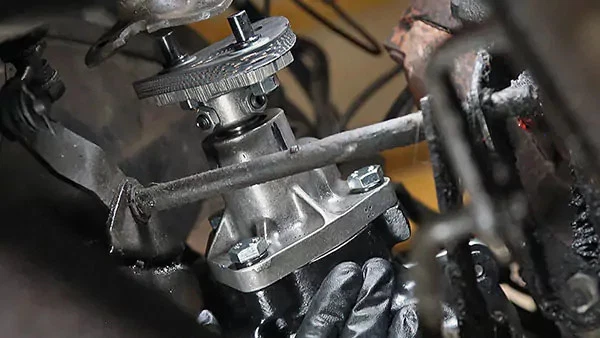
There are multiple tensioner types, but most engines use a spring-loaded automatic tensioner to allow the belt to flex under heavy instant load. Use a ratchet or breaker bar to loosen the tensioner. Some use a 3/8-inch or 1/2-inch square drive hole, while others require a socket.\
This step is vital because antifreeze is slippery. The tensioner can be challenging to release with slippery hands.
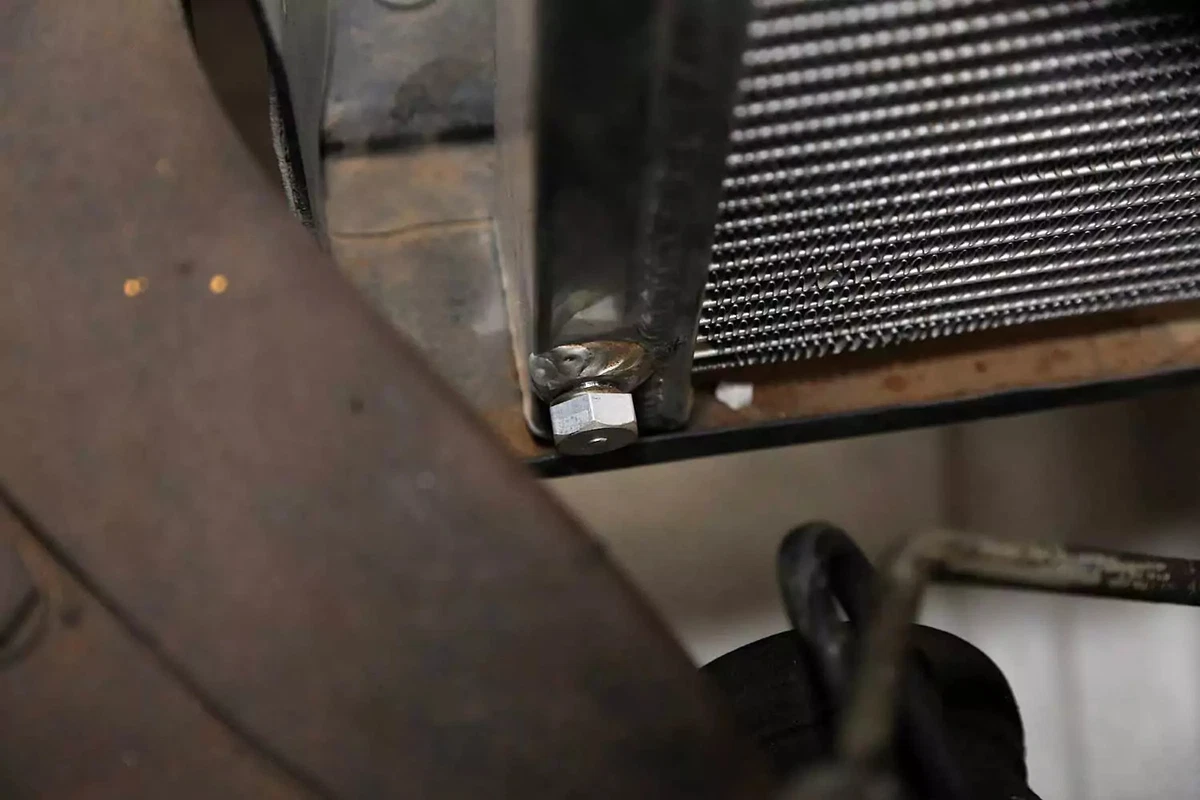
Some radiators have petcocks and a small hose attached for easy draining, while others have an open port. You might get coolant on the floor, so be prepared with towels.
Locate the radiator’s drain port. Place a drain pan under the port and then open it. Leave the port open until all of the coolant is drained.
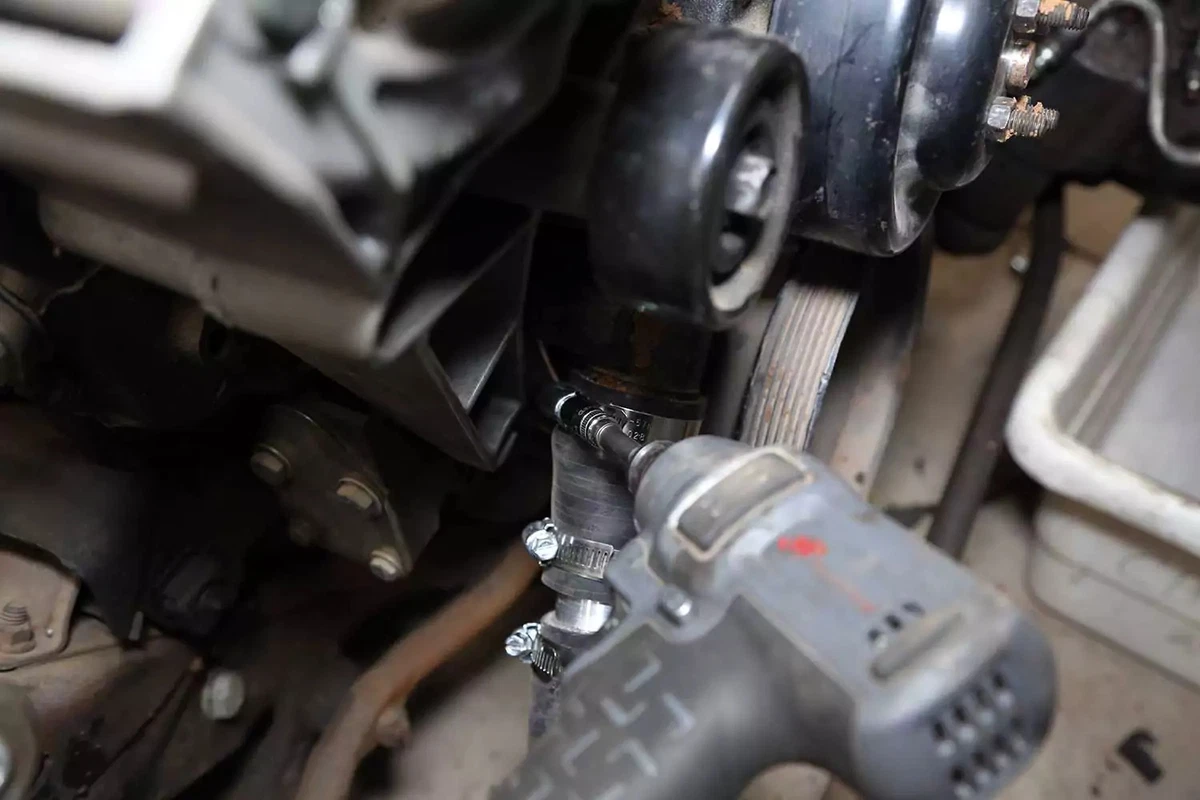
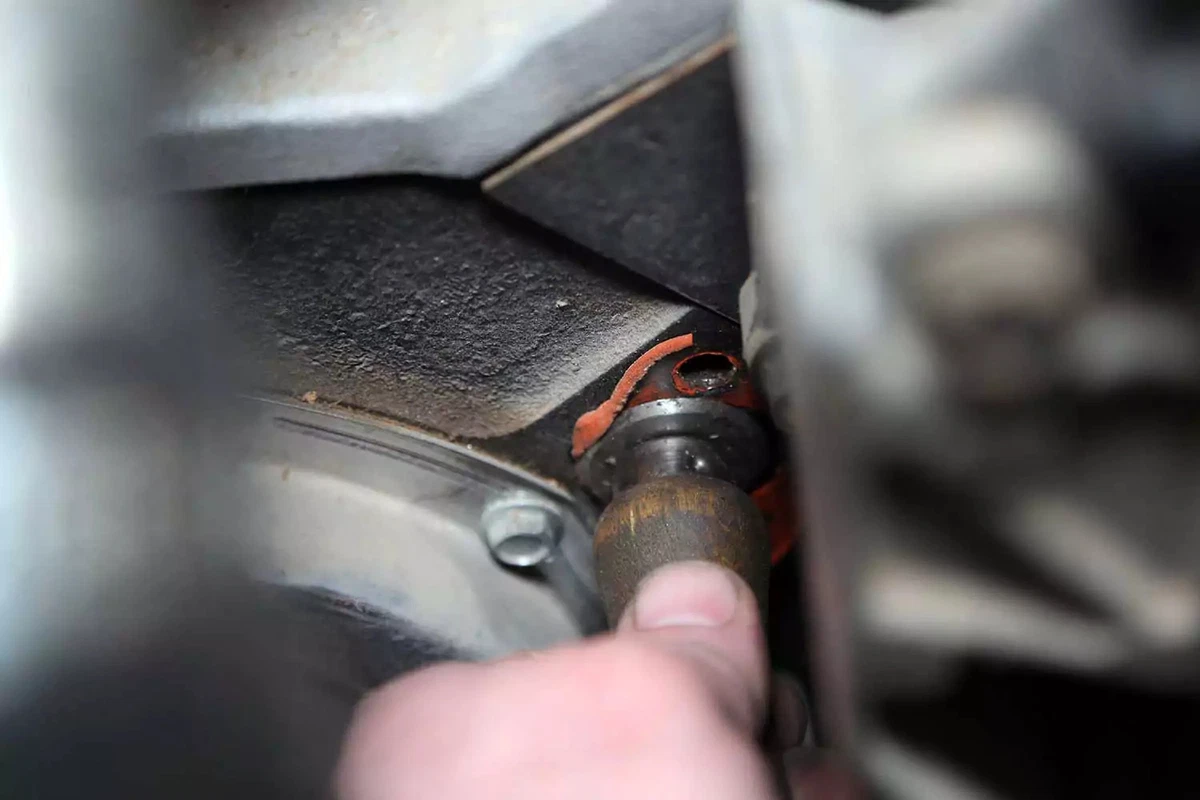
Loosen the hose clamp on the inlet hose connecting the radiator to the water pump. If your engine has a spring-band clamp, use pliers or a hose clamp tool to remove the clamp from the hose.

Remove the lower radiator hose from the water pump to drain as much coolant as possible out of the engine block. There will be a small amount of coolant left in the engine.
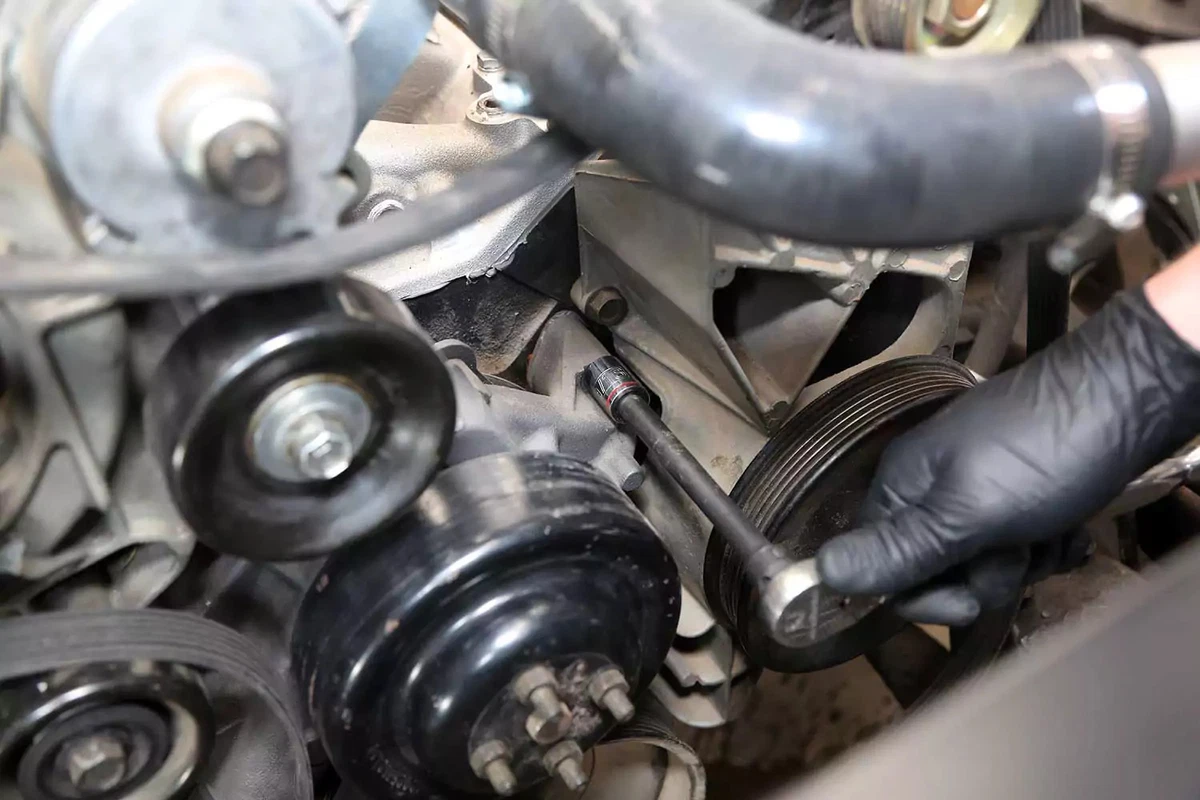
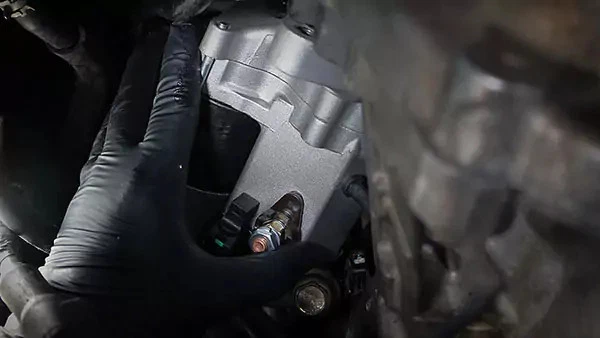
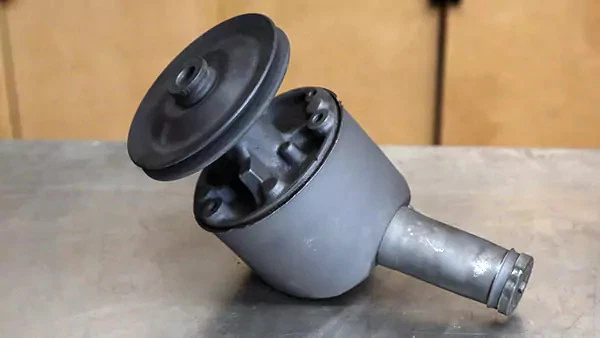
Most water pumps are held in place with four to eight bolts. Our demo vehicle uses four bolts.
Pull the bolts and remove the water pump. If your engine uses a replaceable pump module that installs into a housing, then spin the pulley to access each bolt.
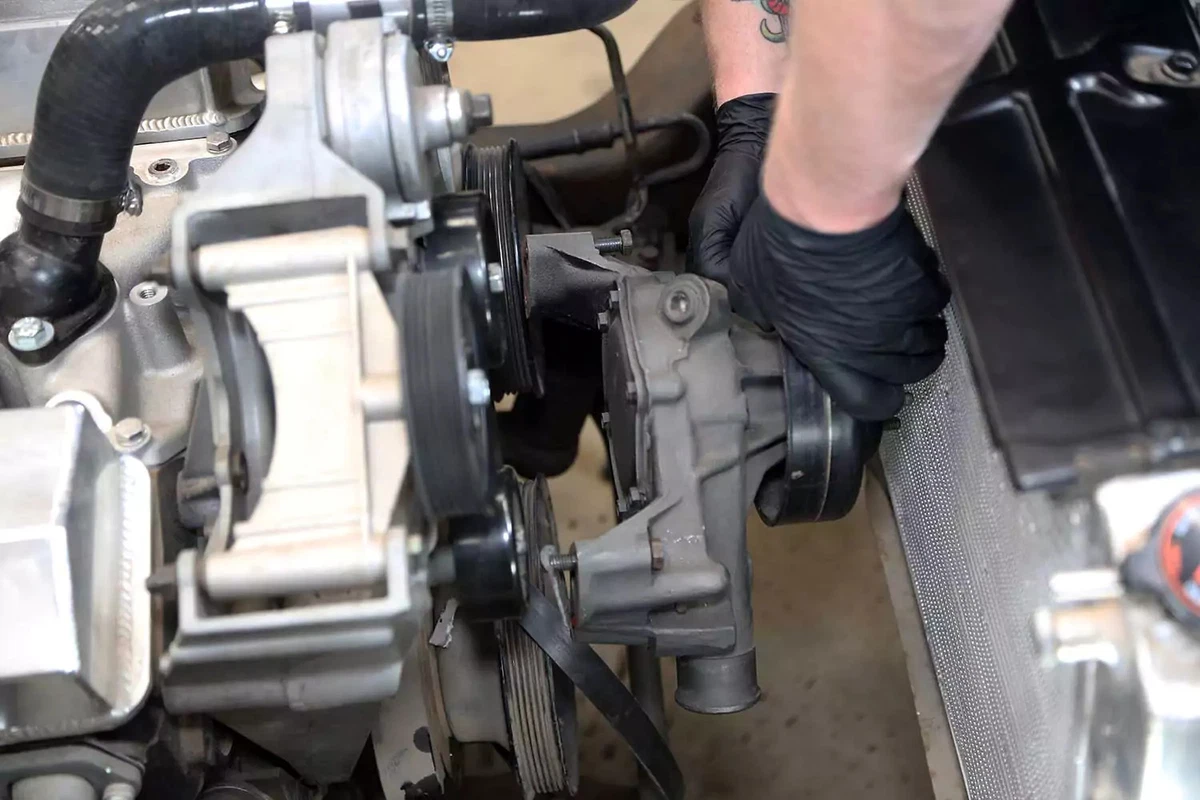
You will probably need to use some force to pull the pump off the engine. The pump in our vehicle had been installed with a silicone sealer and no gasket, so it was stuck in place.
Some engines use the water pump housing as part of the accessory drive, so you might need to remove more than just the water pump.
With the pump removed, clean the block with a gasket scraper to remove any silicone or gasket material. Use a razor blade for stubborn gasket material.
If you need to loosen the gasket, apply a small amount of brake cleaner.
If your water pump has a bolt-on pulley like this one, use a wrench to hold the pulley in place while removing the bolts with a socket or impact wrench.
Many vehicles use a mechanically driven fan that uses the water pump as its axle. However, our demo vehicle was upgraded to electric radiator fans, leaving a pulley bolted to the pump. The mechanical fan was originally mounted to the studs protruding from the pulley.
Some water pumps have a non-removable pulley, while others require you to reuse the original.
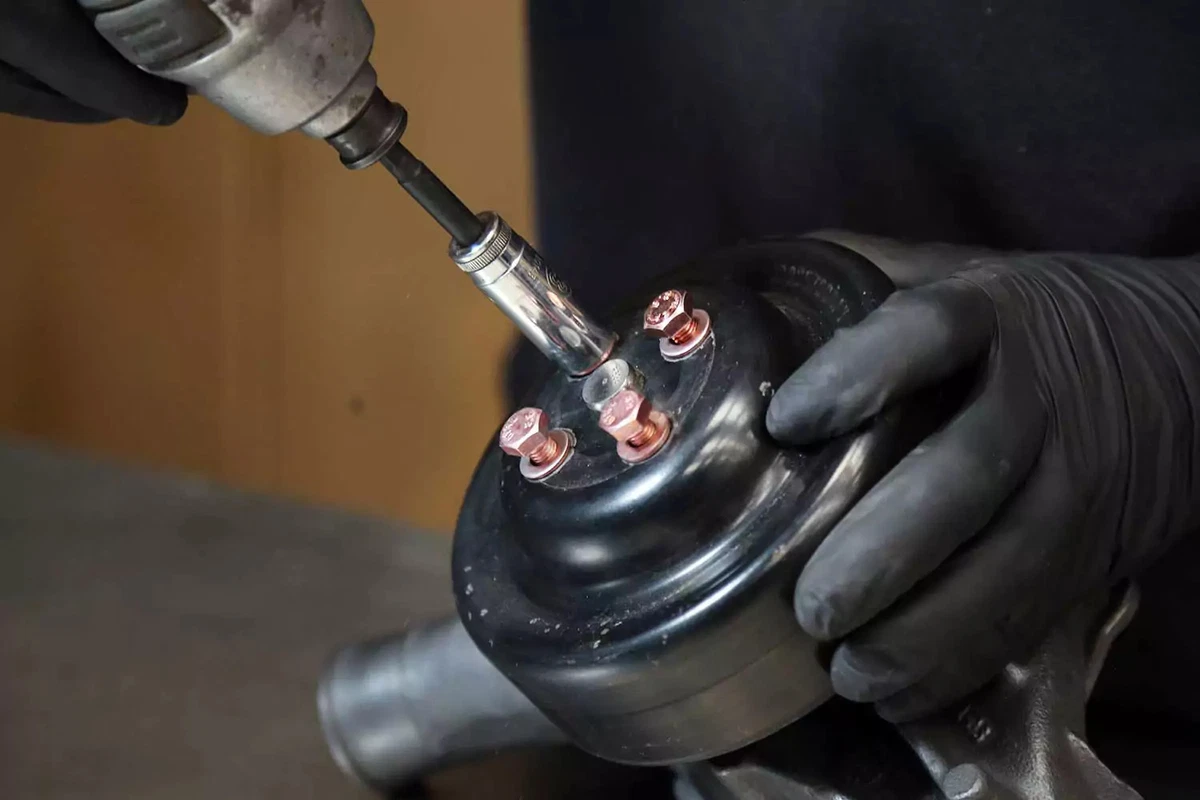
We installed the original pulley on the new water pump. If you have an impact wrench, you can fasten the bolts on or use a pair of wrenches like the method described in the previous step. Don’t over-torque the bolts, which could strip the threads.
We replaced the original fan studs with new bolts. This engine uses an electric fan, which is uncommon.
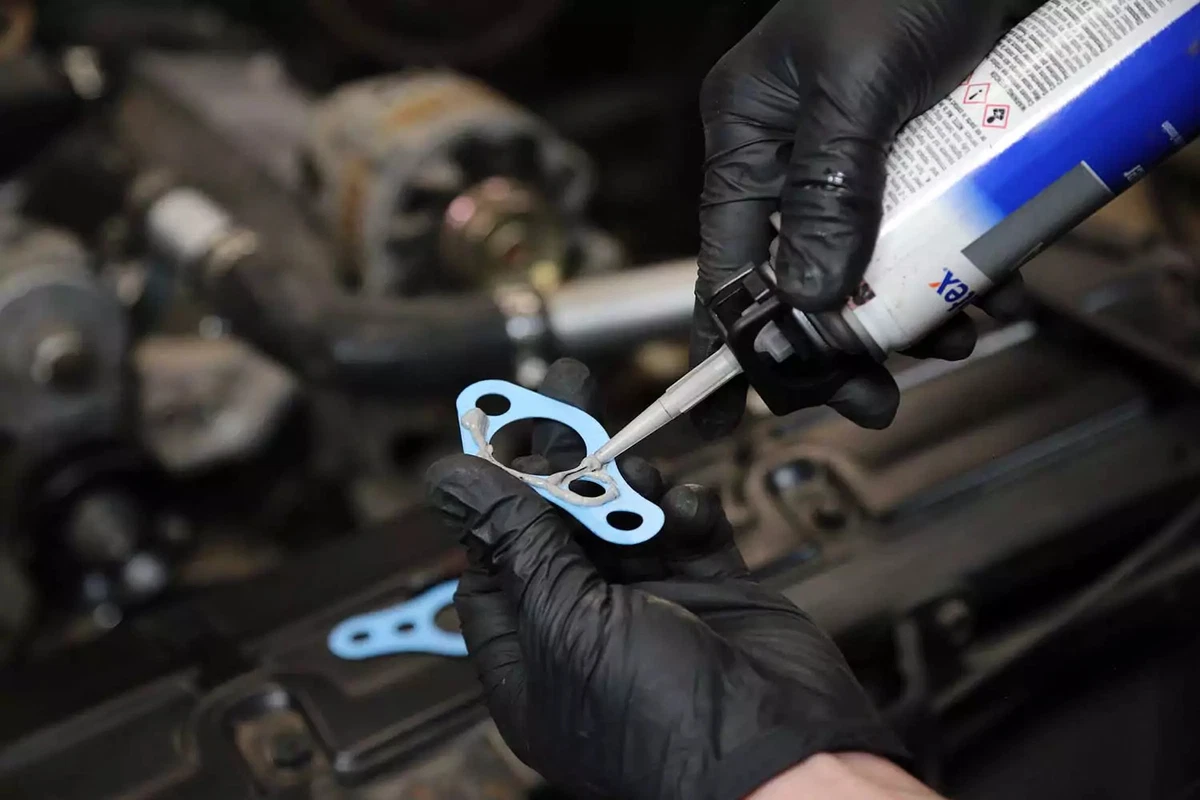
Water pump gaskets come in a range of materials, from basic paper and O-rings to aluminum with silicone beads. Install the gaskets using the bolts to hold them in place.
If your engine block is pitted or prone to leaking around the pump, silicone room-temperature vulcanizing (RTV) gasket sealer will help the gaskets seal. If necessary, spray the gaskets with adhesive to hold them in place.
This step is optional for paper gaskets but should not be used for other gasket styles. Never use gasket sealer on an O-ring type of seal.
We used gray RTV silicone to seal the gaskets to this pump. Use a sparing amount of gasket sealer to avoid squeezing any excess into the coolant passages. Eventually, those RTV worms will clog the radiator or heater core.
Be sure to use an automotive-grade RTV that’s rated for coolant. Bathroom caulk is not an acceptable substitute.
The new water pump should slip into place on the block like the original. You will probably need to use some force to pull the pump off the engine. The original hardware is usually sufficient but should be replaced if the bolts are rusty and pitted.
The bolts should be tightened in two steps to avoid damaging the pump. First, thread each bolt and cinch them down hand-tight. Then, use your engine’s recommended torque specifications to tighten the bolts in a criss-cross pattern (flange to flange) to ensure the pump is correctly seated. If you torque one side before the other is tightened, the housing can distort or crack. It could also cause misalignment inside the pump.
Be careful when tightening bolts in aluminum blocks. The threads strip out more easily than with cast-iron blocks.
Coat the threads with anti-seize to keep them from rusting or getting stuck in the engine block.
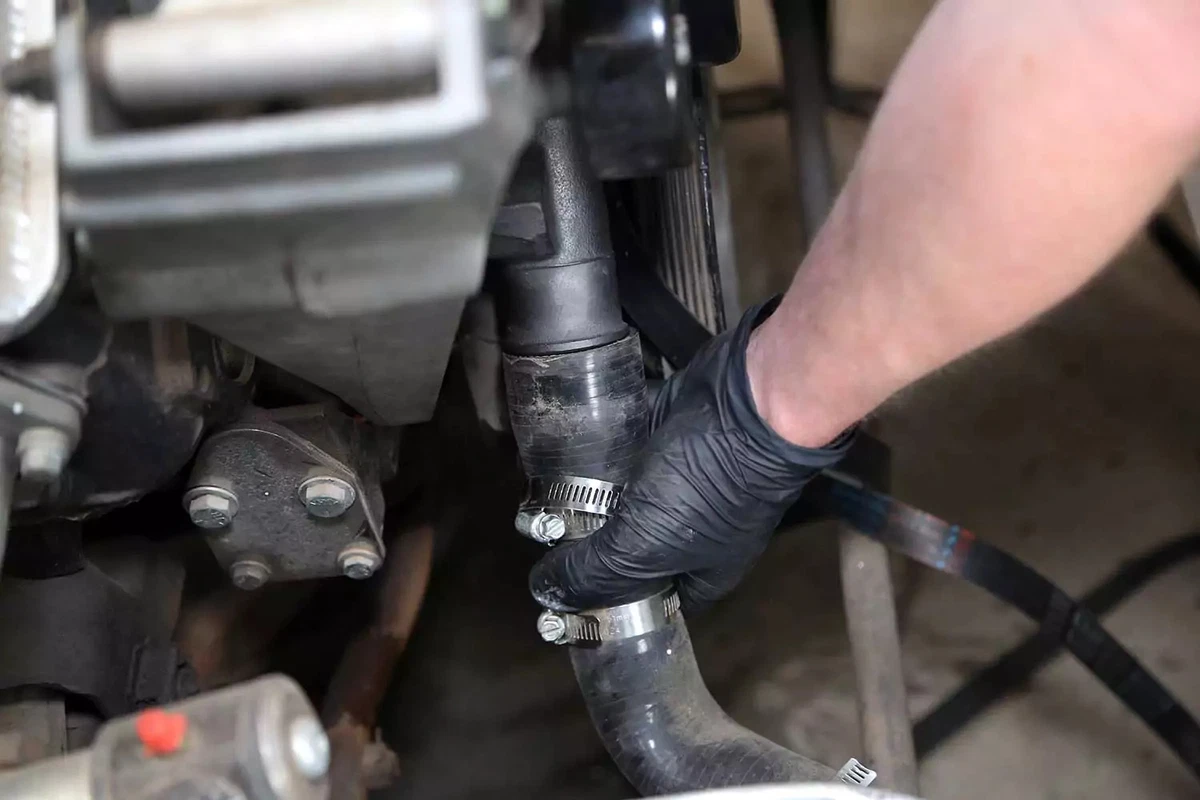
After the pump is mounted, reinstall the lower radiator hose and tighten the hose clamp. Don’t overtighten the clamp. The rubber should not bulge through the clamp gear holes or be cut by the edges of the clamp.
These hoses wear out over time. This is an excellent time to replace them, especially if they are original to the vehicle.
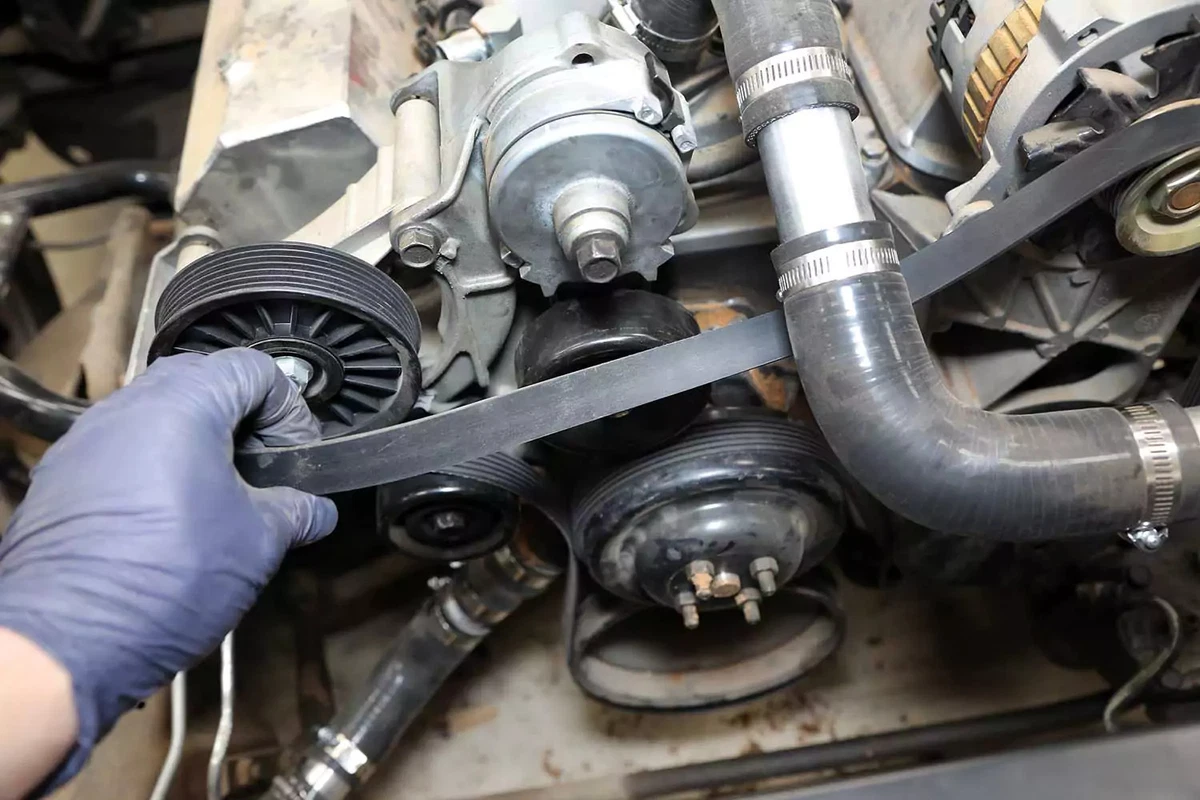
Reinstall the belts and any accessories that were removed to gain access to the pump.
Thread the belt back onto the pulleys. Route the belt as required, leaving one pulley off. Put some slack on the tensioner, slip the belt over the last pulley, and then release the tensioner onto the belt.
Ribbed belts must be fully seated into the grooves on every pulley. If they are off by a single rib, the belt will shred or walk off the pulleys.
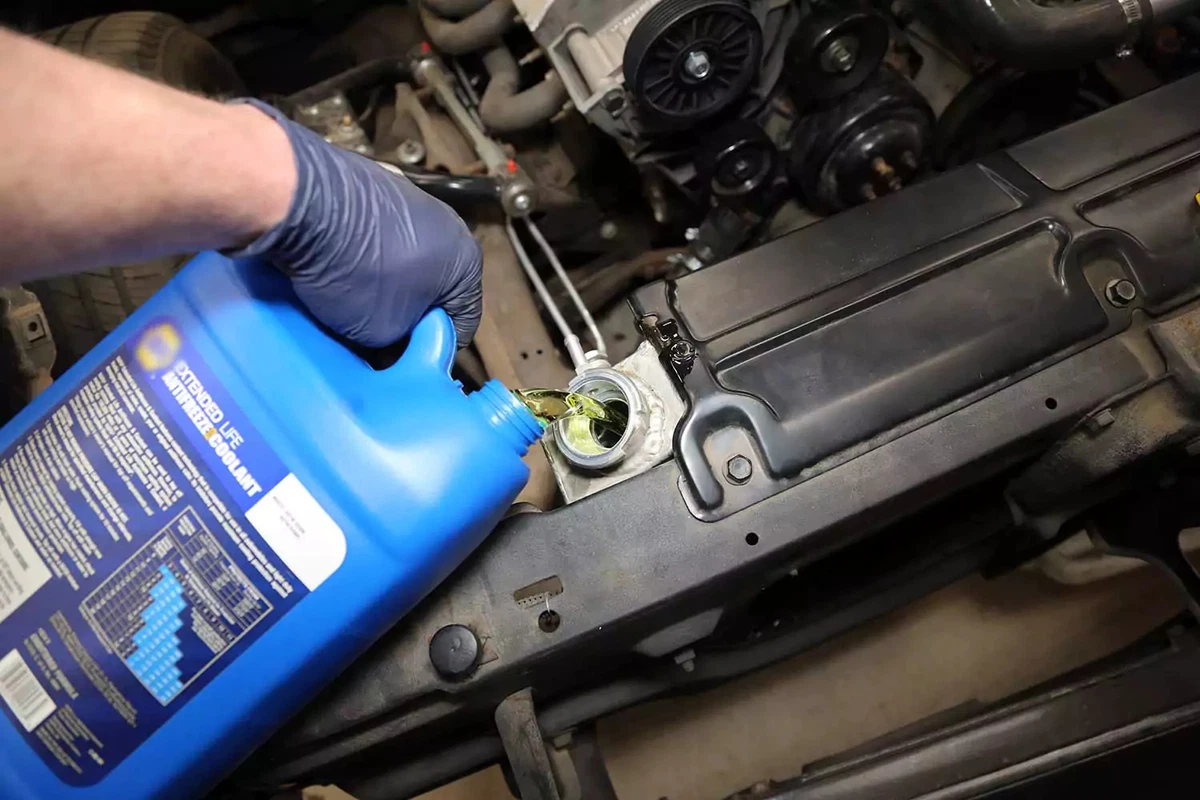
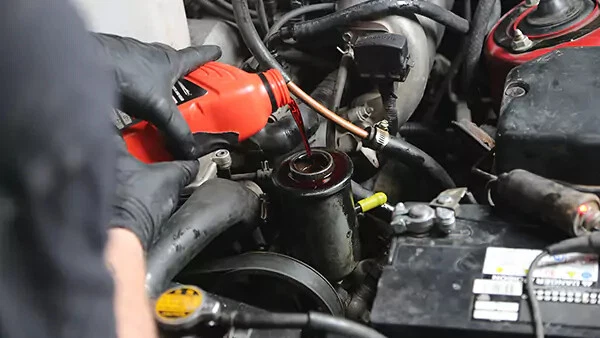
Finally, fill the new radiator with a 50/50 mix of coolant and distilled water. It is easier to buy pre-mixed coolant. Avoid using tap water, which has minerals and salts that can cause sediment to build up and corrode inside your cooling system and engine.
At this stage, your radiator will only take so much coolant. In other words, the cooling system won’t fill up until the engine reaches its normal operating temperature (usually 180 to 205 degrees Fahrenheit) and the thermostat is hot enough to open.
To properly fill the radiator, follow these steps:
- Start the engine and let it idle for a few minutes until the system reaches its operating temperature.
- Once the engine is warmed up to the point where the thermostat opens, the coolant will start to move, and the level will drop. Also, the upper hose will get hot.
- Continue adding the coolant-water mix until it is once again at the top.
- Turn the heater all the way up so the heater core fills with fresh coolant as well.
- Replace the radiator cap and fill the expansion or recovery tank to the hot fill line on the reservoir's side. Turn off the engine and allow it to cool for at least an hour.
- Check the fluid level again. It will probably be low. Top it off another time. Do this for the next couple of days (after driving the vehicle) until the system is full. Never open a hot radiator. That’s dangerous.
- You might need to remove the remaining air from the system by burping your radiator. This typically requires running the car with the radiator pressure cap off for several cycles, allowing the air to escape. Consult your repair manual for details.
About the author

Share your feedback
This article is meant to provide general guidance only. Automotive maintenance, repair, upgrade, and installation may depend on vehicle-specifics such as make and model. Always consult your owner's manual, repair guide for specific information for your particular vehicle and consider a licensed auto-care professional's help as well, particularly for advance repairs.
Recommended for you
Find answers and inspiration
How to Change a Thermostat
7 min read
How to Replace a Radiator Hose
5 min read
How to Flush and Change Engine Coolant
6 min read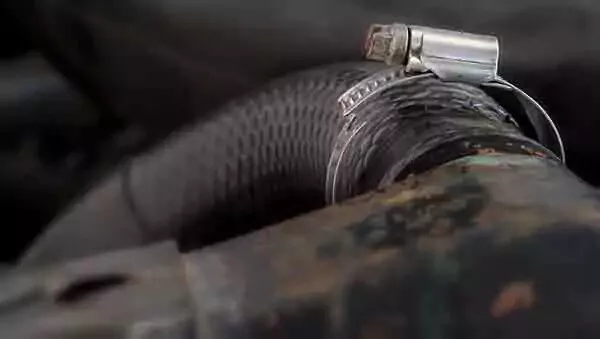
Everything You Need to Know About Radiator Hoses
6 min read
What You Should Know About Your Car Radiator
6 min read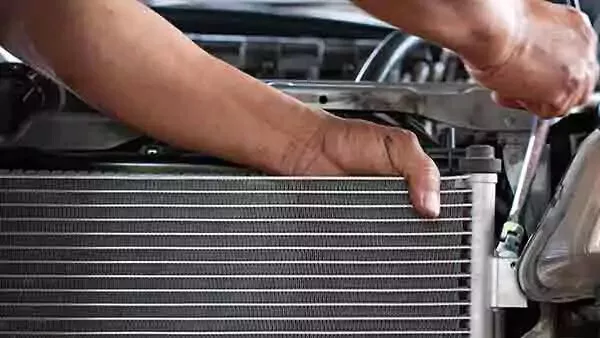
How to Find the Right Radiator For Your Vehicle
6 min read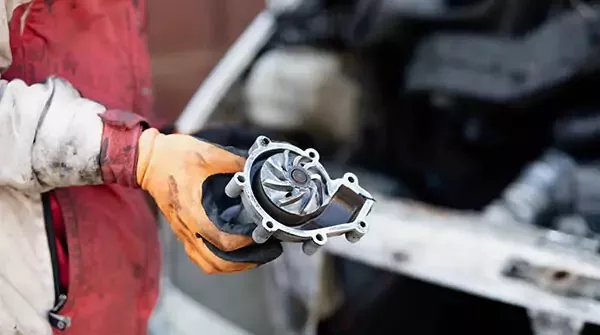
A Quick Guide to Your Car's Water Pump
6 min read
How to Buy the Right Heater Core
5 min read
How to Choose a Thermostat for Your Vehicle
5 min read
How to Replace a Heater Core
12 min read
Diagnosing a Bad Heater Core
5 min read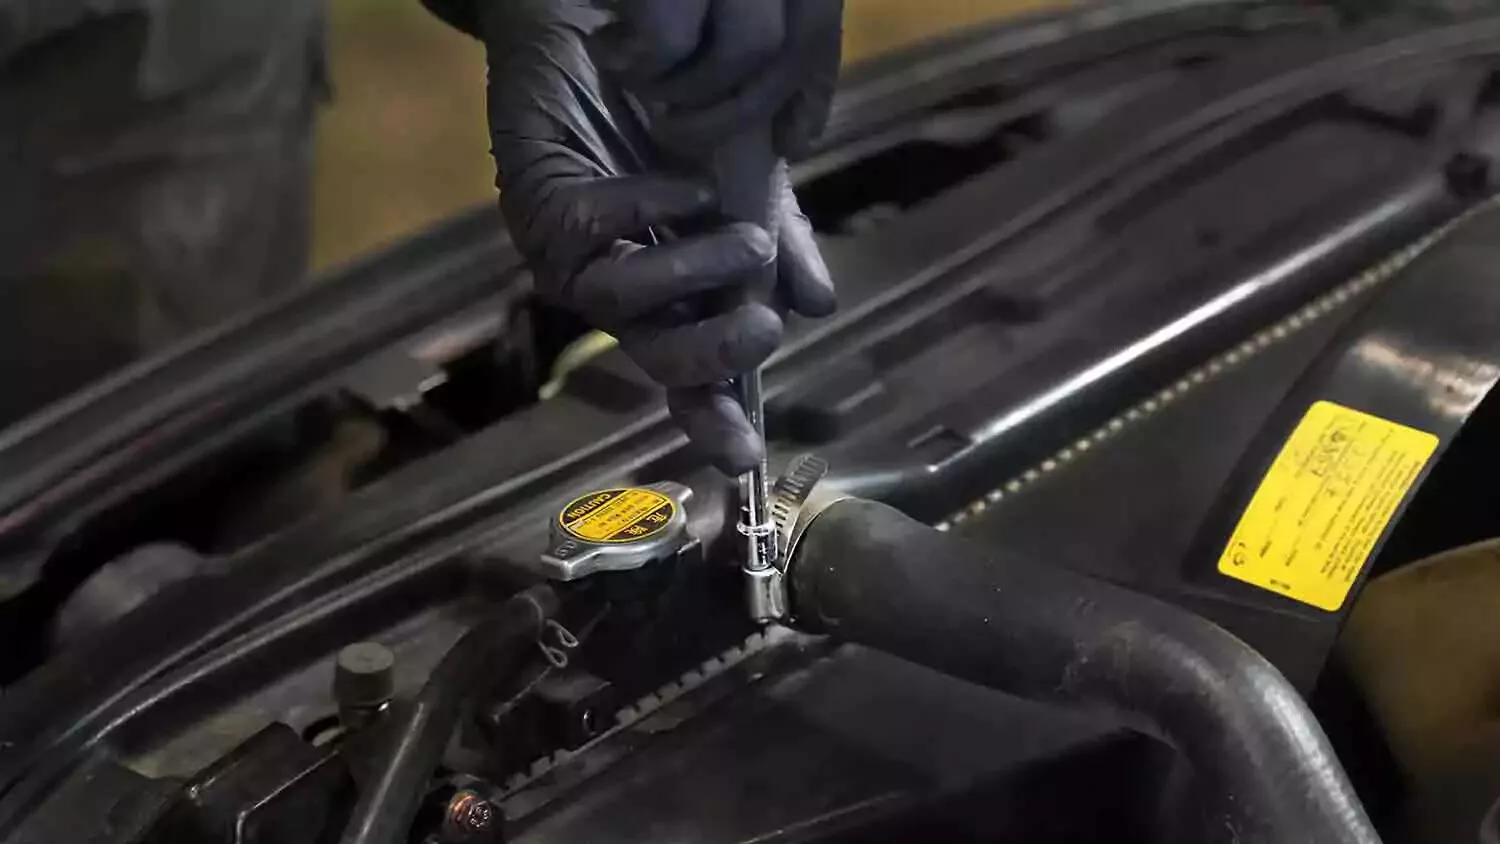
What to Consider When Buying a Radiator Hose
5 min read
Buying the Right Water Pump for Your Car
5 min read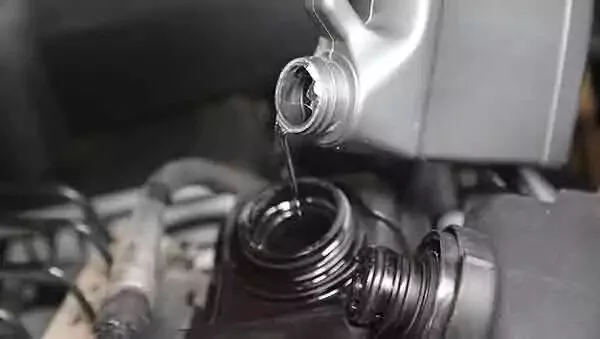
Selecting the Right Coolant for the Next Flush
5 min read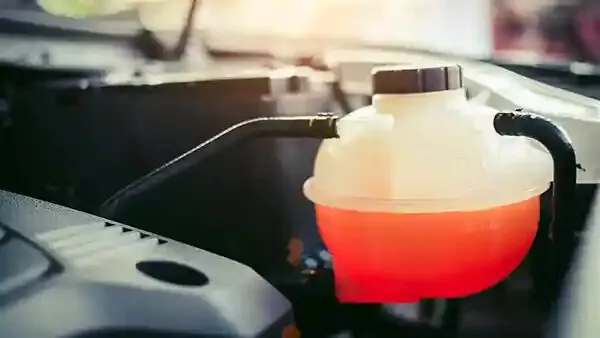
The Essentials of Engine Coolant
5 min read
Everything You Need to Know About Car Thermostats
6 min read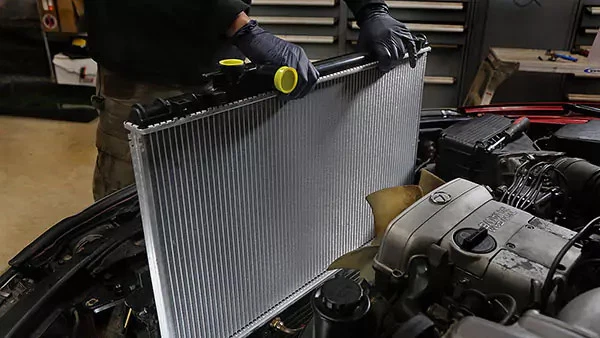
How to Replace a Car Radiator
8 min read
Explore more projects
How to Change a Thermostat
30 to 60 minutes
Intermediate
7 min read
How to Replace a Car Starter
1 to 2 hours
Intermediate
7 min read

How to Replace Spark Plugs
1 to 2 hours
Intermediate
7 min read
How to Replace a Transmission Mount
1 to 2 hours
Intermediate
7 min read
How to Replace Engine Mounts
1 to 2 hours
Intermediate
4 min read

How to Change Manual Transmission Fluid
Less than 30 minutes
Intermediate
4 min read
How to Replace an Intake Manifold Gasket
2 to 5 hours
Intermediate
7 min read
How to Replace Wheel Bearings
1 to 2 hours
Intermediate
7 min read

How to Replace Tie Rod Ends
30 to 60 minutes
Intermediate
8 min read
How to Replace a Heater Core
More than 5 hours
Intermediate
12 min read
How to Replace a Power Steering Pump
1 to 2 hours
Intermediate
7 min read
How to Replace Power Steering Fluid
1 to 2 hours
Intermediate
8 min read
How to Replace a Steering Gearbox
2 to 5 hours
Intermediate
8 min read
How to Replace Ignition (Spark Plug) Wires
30 to 60 minutes
Intermediate
5 min read
How to Change Automatic Transmission Fluid
Less than 30 minutes
Intermediate
6 min read
How to Replace a U-Joint
1 to 2 hours
Intermediate
14 min read
How to Replace a Car Radiator
1 to 2 hours
Intermediate
8 min read

How to Change an In-Tank Fuel Pump
2 to 5 hours
Intermediate
9 min read