Replacing brake pads is an easy DIY task requiring minimal tools and skills. Once you've assembled your replacement parts and tools, it typically takes about 30 to 60 minutes to change your disc pad brakes.
This DIY guide describes how to replace the pads on your disc brakes. But on this type of brake, the rotors are often ready for replacement at the same time. Taking apart your brakes to change the pads is a convenient opportunity to check the condition of your rotors. Our brake rotor replacement guide - opens in new window or tab. shows you how to inspect your rotors, and install new ones if the time is right.
How Often Should Brake Pads be Changed?
Depending on your vehicle and your driving style, your brake pads should last 30,000 to 70,000 miles. Check the manual for your model's recommended brake pad change interval.
Tips and Tricks for DIY Brake Pad Replacement
- It is essential to change your brake pads before they are worn all the way down. Most pads have a built-in warning that emits a squeal when the pad is too low. At that point, the indicator warning could cause grooves in the rotors. If you wait too long, the brake pads could wear to the metal backing, destroying the rotor. That’s not safe because it could reduce or eliminate your braking power.
- If you hear a grinding noise when you step on the brakes, there’s a good chance you’ll need to replace the discs as well as the pads. Bottom line: Change your brake pads on a regular schedule.
- Use an aerosol brake cleaner to remove any greasy fingerprints from the disk before reinstalling the wheel.
What you’ll need
 Jack and jack stands$25 - $175price range
 Breaker bar$5 - $150price range
- Ratchet$5 - $150price range
 Torque wrench$10 - $30price range
- Wheel lug nut socket$10 - $30price range
 Big zip ties$10 - $35price range
 Disc brake lubricant$5 - $25price range
 New brake pads$25 - $180price range
 Brake pad clips$5 - $35price range
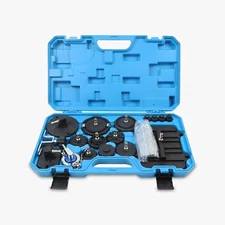 Brake caliper reset tool$25 - $85price range
 Aerosol brake cleaner$10 - $80price range
 Latex gloves$1 - $105price range
 Safety goggles$1 - $65price range

Shop this step
Before starting this job, wait at least 30 minutes after driving to allow the brakes to cool down.
This project requires working safely under the vehicle. You will need a floor jack, and jack stands, ramps, or wheel cribs to support the vehicle.
Locate the factory jacking points just behind the front wheels or just in front of the rear wheels. The jacking point is a metal section with two V notches about two inches apart. Check your owner’s manual to confirm the lift location.
Never use jack stands on dirt, gravel, or asphalt. If you do not have access to a concrete work surface, use wheel cribs, solid-base ramps, or wide-base wood supports to support the vehicle. Never use cinder blocks or bricks as supports.

Shop this step
Use an impact wrench to remove the lug nuts from the wheel. Alternatively, you can use a tire iron, socket, or wrench.
It doesn’t matter what order you remove the lug nuts. If you have locking lug nuts, be careful not to strip them.
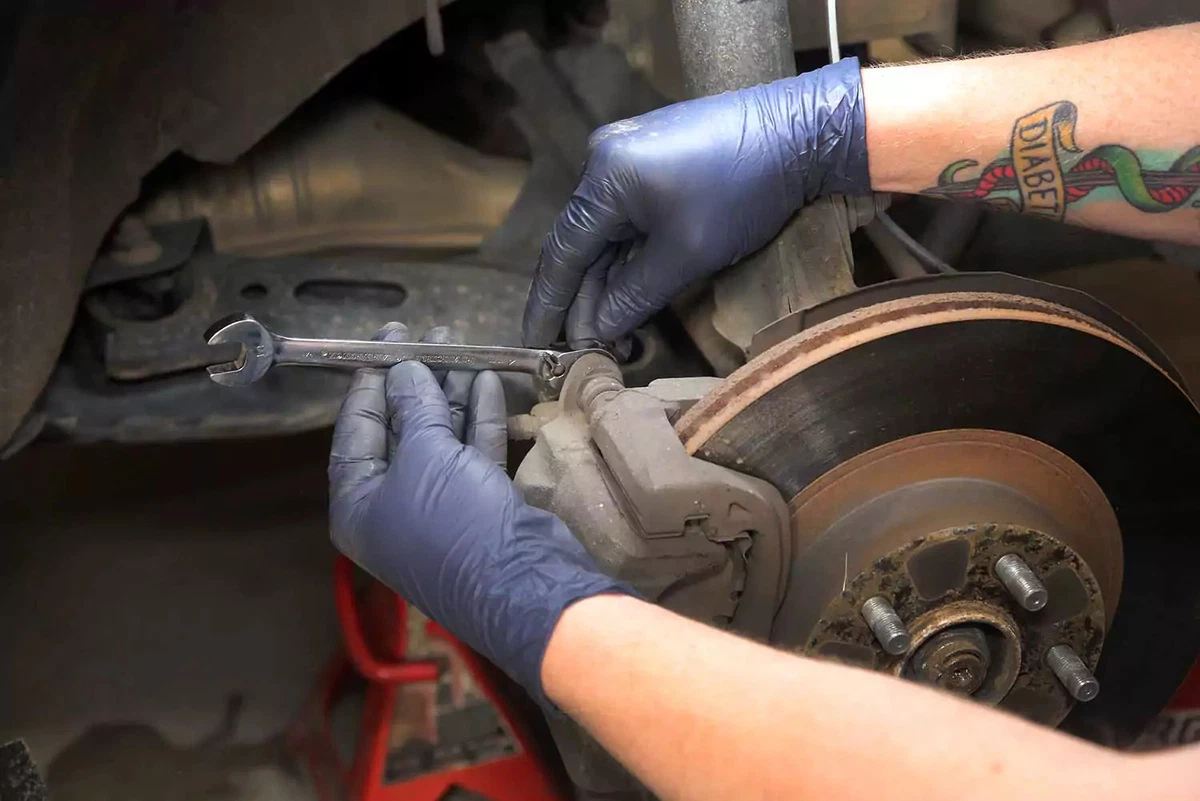
Most vehicles use two bolts to hold the brake caliper to the hub. Some use Allen-head bolts, while others use six- or 12-point bolts. In rare instances, vehicles might use Torx fasteners.
Retain the bolts for re-use unless they are damaged. There may be a rubber cap covering the bolts. Use a pick tool to remove the rubber cap.

Use a flat-blade screwdriver or pry bar to gently lift the caliper off the rotor and out of its mount.
Some brake pads have a small raised tab that keeps the pad from moving.
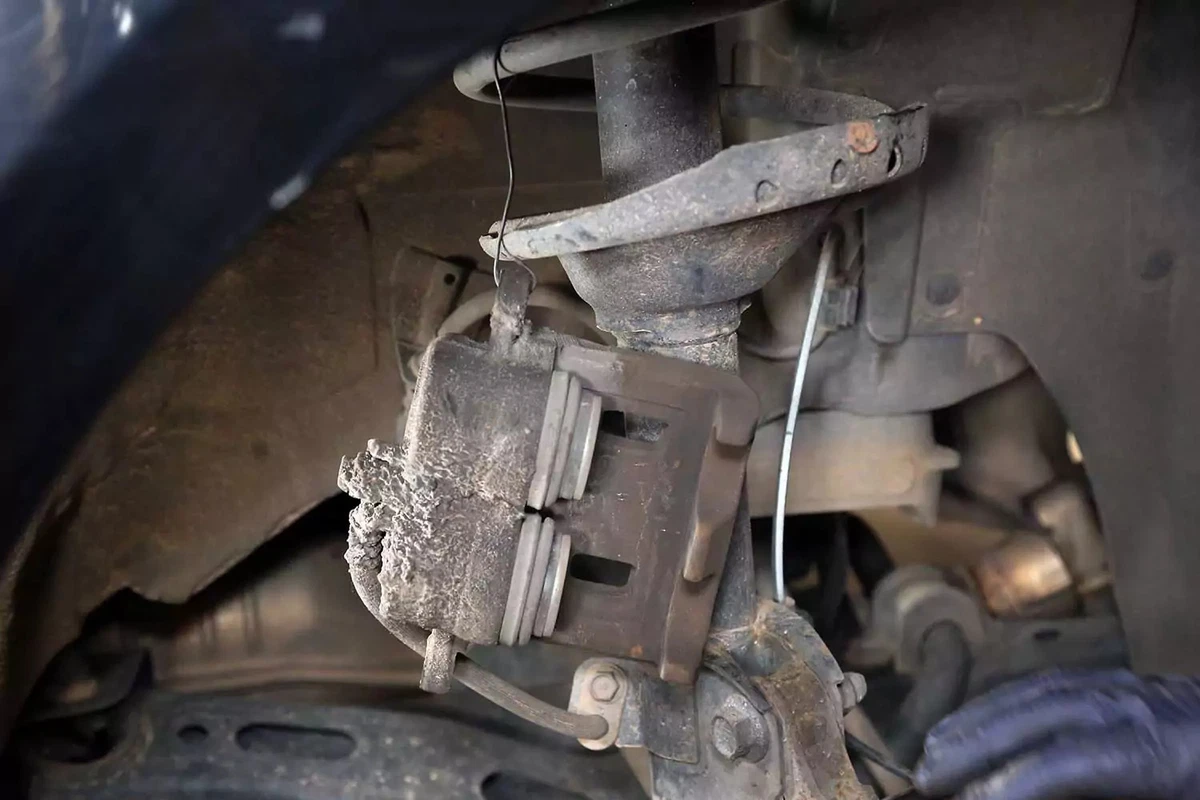
To remove the caliper, you might need to wiggle it to compress the piston.
Shop this step
While you’re working on the brakes, secure the caliper out of the way with a zip tie, baling wire, or a piece of a wire coat hanger. Sometimes, you can rest the caliper on the suspension. Regardless, do not let it hang by the hose.

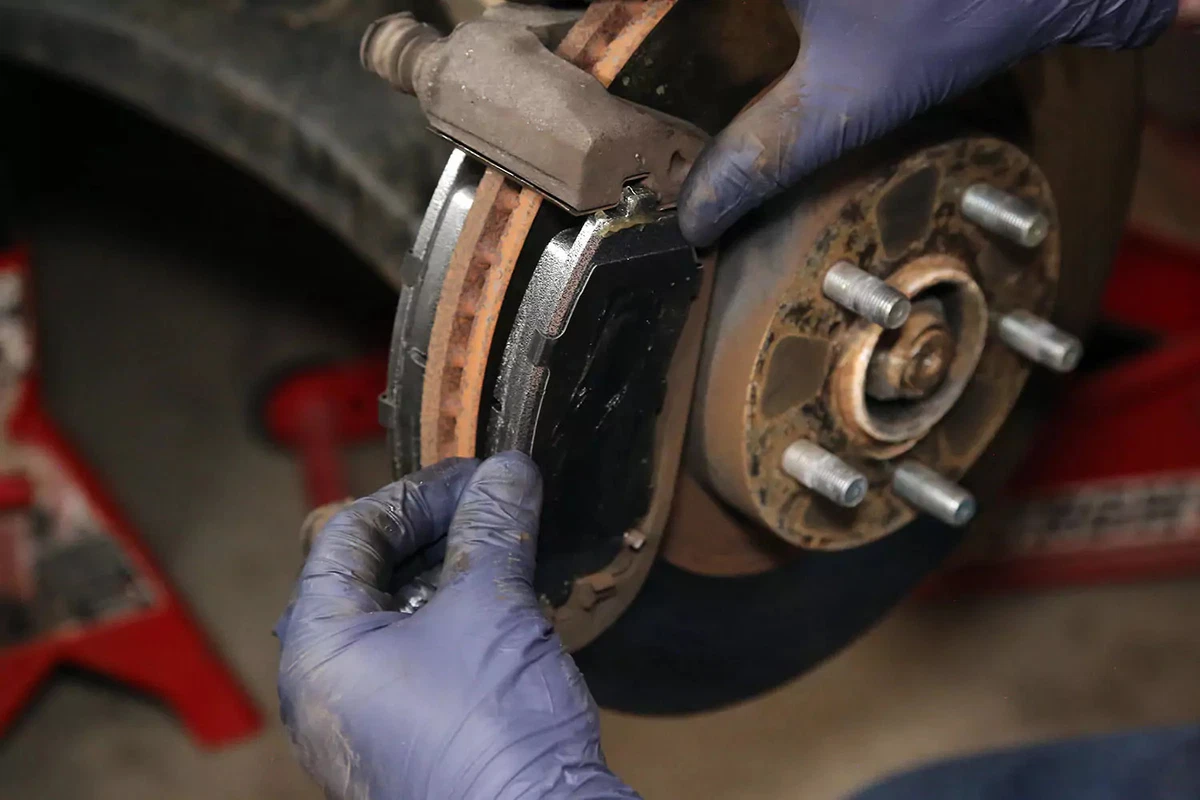
Here's how to remove your old brake pads. Remove the inner and outer brake pads from the caliper mount. You might need to use a small pry bar or screwdriver.
When removing the pads, note which pads came from the inner and outer positions. Some vehicles use specific inner and outer pads, but others use the same pad for both. This varies by manufacturer and brake position. For example, our demo vehicle has specific inner and outer brake pads for the front. However, the rear pads are the same for inner and outer.
Some vehicles retain the pads in the caliper rather than in the bracket. Remove them in the same way.
In some cases, the carmaker uses an electronic sensor to warn the driver when it’s time to replace the pads. Unplug the wire from the suspension harness and plug in the wire from the new pads. You may need to purchase the sensor separately.

Some vehicles use clips that hold the pads to the caliper. Most brake pads using this type of retainer come with new clips.
Replace the spring clips on the caliper mounts, using the old ones if your new pads didn’t come with them. These clips snap onto the ears at the ends of the pads.

Shop this step
Most brake pads come with a packet of lubricant—enough to grease one set of four pads. Use it. This grease keeps the pads from squealing or dragging on the rotors. Apply brake pad lubricant to the back of the pad and anywhere the pad touches a moving surface, such as the tabs and caliper surface. Do not put anything on the actual pad or rotor surface.
Shop this step
Install the new brake pads into the caliper mount or caliper. This holds the pads in position so they don’t fall out. On some vehicles, spring clips or caliper mounting bolts hold the pads in place on the caliper (through large eyelets or hooks in the pad).
Make sure you install the pads in the correct position, as noted in Step 6.
Shop this step
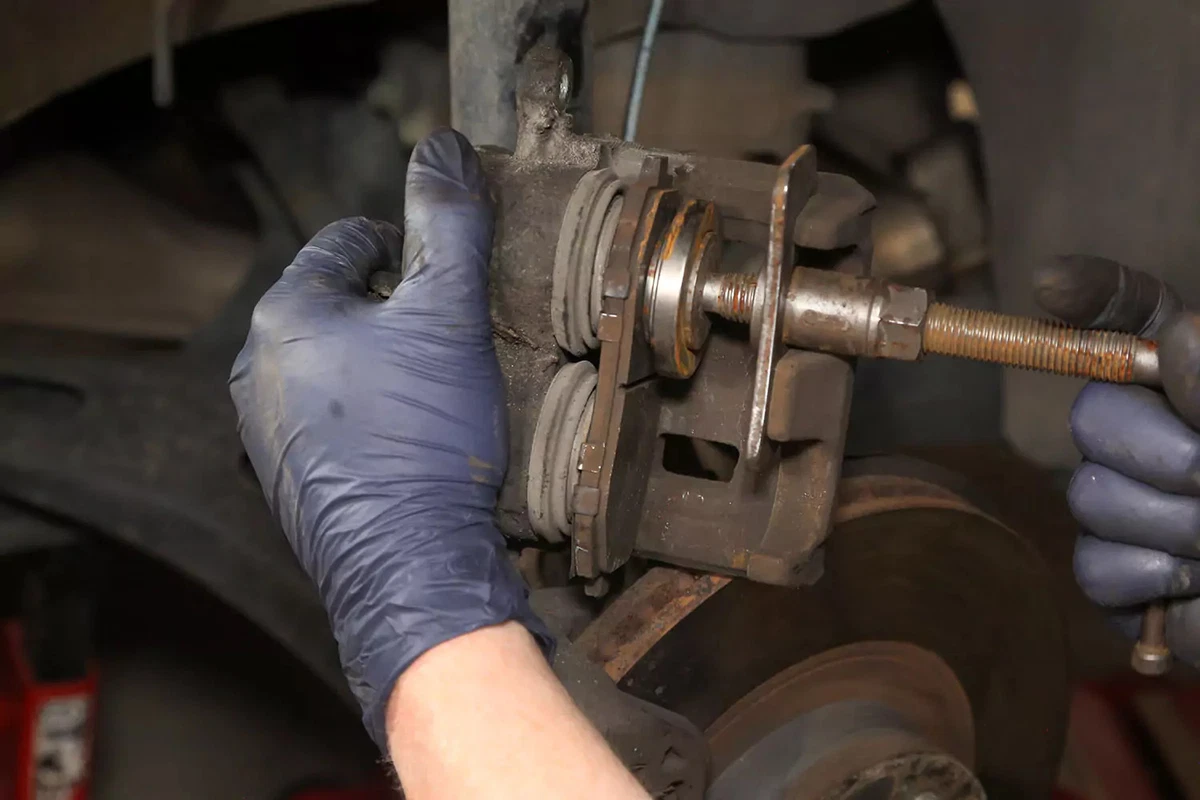
All disc brake calipers use a piston (or multiple pistons) to press the pads onto the rotor. The pistons do not automatically return to a home position, so you’ll need to compress them manually.
Most calipers use a clamp-style tool for compression. Others, usually the rear calipers—which often have a parking brake integrated into them—require that the pistons be rotated (typically counter-clockwise) to pull them back to their home position. A tool kit for the master brake caliper usually has the appropriate tool adapters to rotate the pistons back into place.
For multi-piston calipers, one piston might come out slightly when compressing the other with the common tool (as shown). Multi-piston caliper reset tools are available. Or, use your thumb or a small block of wood to stop a piston from pushing out. Take care to avoid pinching or tearing rubber seals.

The caliper slips back over the new pads into the caliper mount. To reduce dragging or squealing, put a little brake lubricant on the part of the bolt the caliper slides on. Grease any sliding surface and the sliding pin so the caliper moves freely.

Use the original hardware to bolt the caliper back to the hub. Torque the bolts to the manufacturer’s specifications. For our demo vehicle, these bolts are torqued to 20 pound-feet per bolt.

Shop this step
Now it’s time to reinstall the wheel and torque the lug nuts. Clean the hub surface and the back of the wheel so it runs true when tightened. Thread the lug nuts by hand until each lug is seated to the wheel.
On many vehicles, the wheel centers on the hub of the lug nuts, so this is an important step. Don’t tighten any lug nuts until they are all snug (by hand) to the wheel.
Next, use a tire iron, socket, wrench, or impact gun to tighten each lug nut. Do this in a crisscross pattern to spread the load on the wheel equally. Do not torque the lug nuts yet. Only tighten them to about 50 to 60 pound-feet.
Slightly lift the vehicle with your floor jack so you can remove the jack stands. Then, lower the vehicle to the ground.
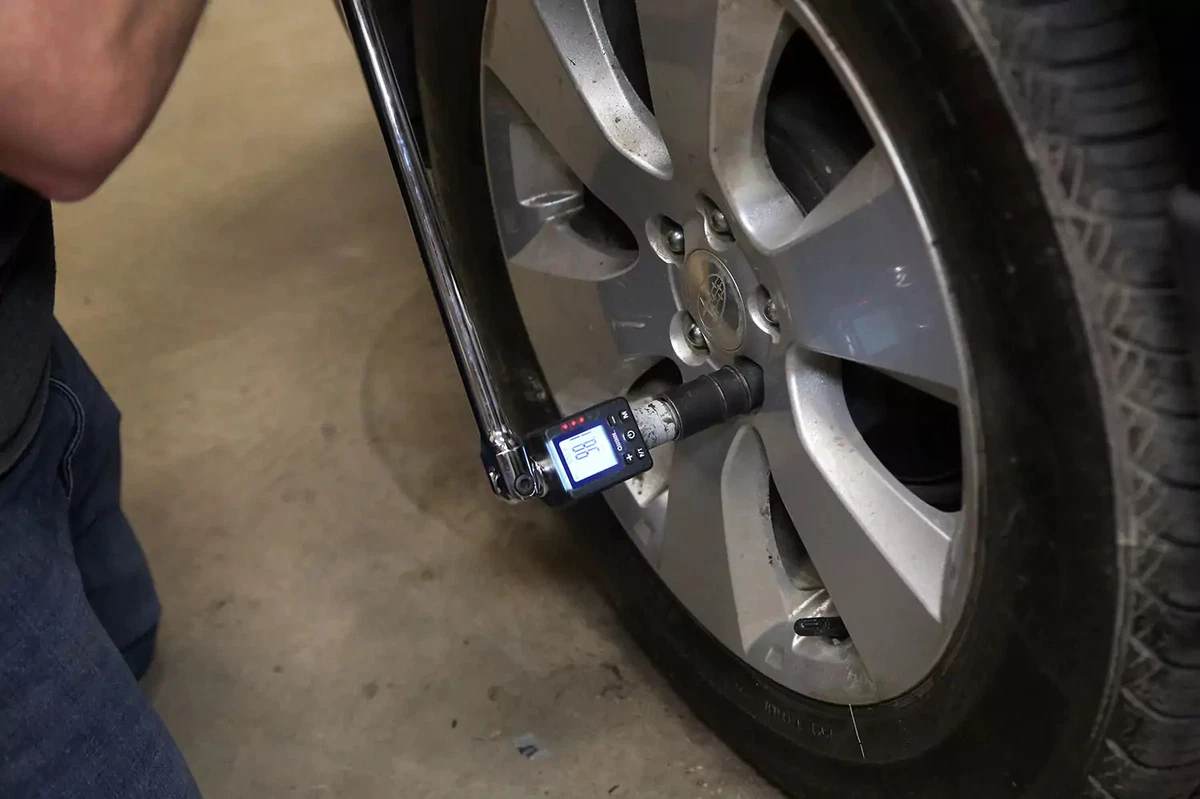
The final torque should be applied with a torque wrench set to the correct specification for your vehicle. Our demo vehicle has large lug studs, so we set the torque wrench to 140 pound-feet. Most passenger vehicles use 70 to 90 pound-feet, based on the size of the lug studs.
Large vehicles like ¾-ton trucks need 140 pound-feet of lug nut torque.
Heat cycles can cause the lug nuts to loosen. Recheck the lug nut torque after about 100 miles.

Shop this step
Pump the brake pedal a few times to push the pads to the rotor. This step is crucial.
If you change your brake pads correctly, you won’t need to bleed the brakes. But you should bed them—an easy process that extends their life. Drive the vehicle to 35 miles per hour and apply the brakes moderately to slow the vehicle to about 10 mph. Don’t come to a complete stop. Accelerate again to 35 mph, then slow to 10 mph. Repeat this five times.
Increase your speed to about 60 miles per hour and apply the brakes harder—although not a full panic stop—to bring the car to approximately 10 mph. Repeat these higher-speed stops three times. Now, you’re ready to drive and brake with confidence.
About the author

Share your feedback
This article is meant to provide general guidance only. Automotive maintenance, repair, upgrade, and installation may depend on vehicle-specifics such as make and model. Always consult your owner's manual, repair guide for specific information for your particular vehicle and consider a licensed auto-care professional's help as well, particularly for advance repairs.
Shop project essentials
- Jack and jack stands$25 - $175price range
- Breaker bar$5 - $150price range
- Ratchet$5 - $150price range
- Torque wrench$10 - $30price range
- Wheel lug nut socket$10 - $30price range
- Big zip ties$10 - $35price range
- Disc brake lubricant$5 - $25price range
- New brake pads$25 - $180price range
- Brake pad clips$5 - $35price range
- Brake caliper reset tool$25 - $85price range
- Aerosol brake cleaner$10 - $80price range
- Latex gloves$1 - $105price range
- Safety goggles$1 - $65price range
Recommended for you
Find answers and inspiration

Brake Booster Basics

How to Replace a Brake Caliper
7 min read
DIY: 2018-22 Honda Accord Brake Pads and Rotors
6 min read
An Introduction to Brake Master Cylinders
6 min read
What You Need to Know About Brake Fluid
What Are Common Brake Caliper Positions?

A Breakdown of Different Types of Braking Systems

What Are Jake Brakes and How Do You Use Them?

Choosing the Right Brake Fluid for Your Vehicle
5 min read
3 Types of Brake Pads To Consider
Understanding the Dual Master Cylinder Brake System

Deciding to Buy Original or Aftermarket Auto Parts: Quality and Selection
What Are Your Brakes Trying to Tell You?

Drum Brakes vs. Disc Brakes: What’s the Difference?
What Are Air Brakes and How Do They Work?

What to Check and What to Replace at 100,000 Miles
4 min read
A Guide to Brake Pedals
How To Remove Rust on Rotors

Enhance Your Car’s Performance with a Brake Upgrade

Buying the Right Brake Master Cylinder
6 min read
Brake Cleaners Versus Carburetor Cleaners

Brake Master Cylinder Replacement: Step-by-Step
10 min read
Deciding to Buy Original or Aftermarket Auto Parts: The Basics

Performance Mods for the Nissan Leaf

How to Buy the Right Brake Rotors
4 min read
Dress Up Your Ride With Brake Bling

Brake Rotor Comparison: Vented, Drilled or Slotted?

7 Common Mistakes When Bleeding Brakes

How to Replace Brake Fluid
10 min read
How to Diagnose and Repair Your Parking Brake

Taking Your Car to the Track: The Ultimate Guide

How to Repair Sticking Brake Calipers

Squeaks, Clangs and Rattles: Car Noises That Need Attention

Basic Car Maintenance Is Simpler Than You Think

Painted Brake Calipers Dress Up Any Ride

How to Install a Brake Controller

How to Find the Best Brake Pads for Your Vehicle
6 min read
Online Videos Are a Game-Changer for DIY Car Repair

Everything You Need to Know About Brake Rotors
5 min read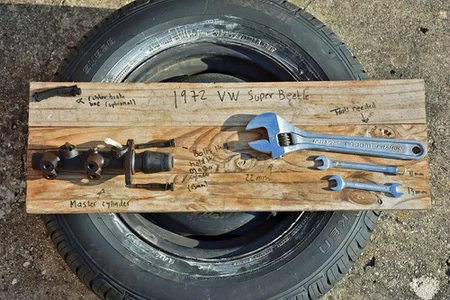
Easy Steps: How To Replace a Master Cylinder

The Ultimate Brake Dust Guide

Hisses, Whines, and Rattles: What Your Car Is Trying to Tell You

Anti-lock Braking (ABS): How Does It Work?

Maintaining Trailer Brakes for Towing Safety

Taking Vintage Cars Out of Storage: Planning for Spring

How to Replace a Brake Hose

How to Compress a Brake Caliper

How to Get Air Out of Brake Lines Without a Brake Bleeder
Bleeding Brakes: A Step-by-Step Guide
How to Pick the Right “Parts Car”

How to Customize Your Car for the Best Resale Value

Buying the Right Brake Calipers
7 min read
How To Buy New Old Stock (NOS) Parts on eBay

When to Replace Your Brake Fluid
5 min read
How to Replace Brake Rotors
7 min read
Tools You Need for Changing Brakes

A Beginner’s Guide to Hand Brakes

Converting From Drum to Disc Brakes: A Definitive Guide

Add a Third Brake Light to Increase Safety

Brake-Rotor Problems: Machining Versus Replacing

Brake Pads 101
7 min read
How to Check Your Car’s Brake Fluid
A Quick Guide to Changing Your Brake Fluid

Deciding to Buy Original or Aftermarket Auto Parts: The Online Transaction
How to Improve Braking Performance

Why Do Brakes Lock Up?

Regularly Check These 4 Car Fluids

Brake Pad and Rotor Replacement Costs: What to Expect
8 min read
Brake Calipers 101
4 min read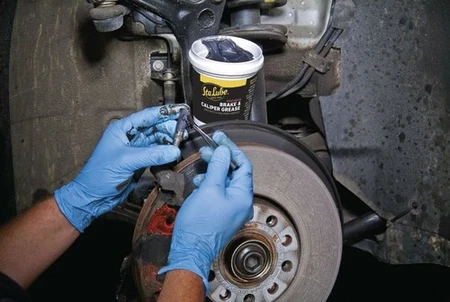
Why Should You Grease Brake Pads and How to Do It
Explore more projects

How to Replace a Fuel Filter
30 to 60 minutes
Beginner
7 min read

How to Replace Sway Bar End Links and Bushings
30 to 60 minutes
Beginner
6 min read

How to Replace a Throttle Body
30 to 60 minutes
Beginner
6 min read

How to Replace a Clutch Master Cylinder
1 to 2 hours
Beginner
11 min read
How to Replace a Brake Caliper
1 to 2 hours
Beginner
7 min read

How to Replace Transfer Case Fluid
Less than 30 minutes
Beginner
5 min read

How to Replace a Valve Cover Gasket
Less than 30 minutes
Beginner
7 min read

How to Change Oil in a Car
Less than 30 minutes
Beginner
8 min read

How to Jump Start a Car
Less than 30 minutes
Beginner
9 min read

How to Change a Car Battery
Less than 30 minutes
Beginner
6 min read

How to Repair a Chipped Windshield
1 to 2 hours
Beginner
7 min read

How to Replace Transmission Fluid and Filter
1 to 2 hours
Beginner
11 min read

How to Replace a Drive Belt
Less than 30 minutes
Beginner
5 min read

How to Replace a Radiator Hose
Less than 30 minutes
Beginner
5 min read

How to Replace a Cabin Air Filter
Less than 30 minutes
Beginner
5 min read

How to Clean Fuel Injectors
1 to 2 hours
Beginner
8 min read

How to Replace a Distributor Cap and Rotor
30 to 60 minutes
Beginner
5 min read

How to Change a Headlight Bulb
Less than 30 minutes
Beginner
6 min read

How to Replace a Mass Air Flow (MAF) Sensor
Less than 30 minutes
Beginner
7 min read

How to Refill Windshield Washer Fluid
Less than 30 minutes
Beginner
4 min read

How to Replace Shock Absorbers
30 to 60 minutes
Beginner
8 min read

How To Replace Differential Fluid
Less than 30 minutes
Beginner
8 min read
How to Replace an Engine Air Filter
Less than 30 minutes
Beginner
5 min read
How to Replace Brake Rotors
1 to 2 hours
Beginner
7 min read

How to Replace an Exhaust Gasket
1 to 2 hours
Beginner
9 min read

How to Replace an EGR Valve
30 to 60 minutes
Beginner
5 min read

How to Replace an Alternator
1 to 2 hours
Beginner
11 min read

How to Replace an Idler Arm
30 to 60 minutes
Beginner
5 min read

How to Replace Clutch Fluid
Less than 30 minutes
Beginner
6 min read

How to Replace a Serpentine Belt Tensioner
Less than 30 minutes
Beginner
4 min read

How to Check Tire Pressure and Change a Tire
Less than 30 minutes
Beginner
9 min read

How to Flush and Change Engine Coolant
30 to 60 minutes
Beginner
6 min read
How to Replace Brake Fluid
1 to 2 hours
Beginner
10 min read

How to Change Windshield Wipers
Less than 30 minutes
Beginner
3 min read

How to Replace an Ignition Coil
Less than 30 minutes
Beginner
6 min read

How to Replace an Oxygen Sensor
30 to 60 minutes
Beginner
5 min read

How to Replace an Idler Pulley
30 to 60 minutes
Beginner
4 min read

How to Replace a PCV Valve
30 to 60 minutes
Beginner
6 min read

How to Rotate Your Tires
30 to 60 minutes
Beginner
5 min read