Changing your engine oil is an easy DIY task that can save you money. A typical oil change at a service center costs around $100 to $150. Using this visual guide, you can change your oil for less than $30.
If you use conventional oil, you should change your engine oil every 3,000 miles. Synthetic oil, recommended for many modern vehicles, allows up to 15,000 miles between oil changes.
Check your owner’s manual to learn your vehicle's recommended oil type, how often to change you oil and filter, and how much oil your engine needs.
- A typical four-cylinder engine requires four to five quarts of oil.
- Six-cylinder engines use five to six quarts.
- Eight-cylinder engines typically require five to eight quarts.
Tips and Tricks for DIY Oil and Filter Change
Sometimes a vehicle can benefit from an engine oil flush - opens in new window or tab. before a routine oil change. This easy DIY task removes sludge from your engine components. If your vehicle is old, or has been idle for a long time, consider a flush first.
More Info
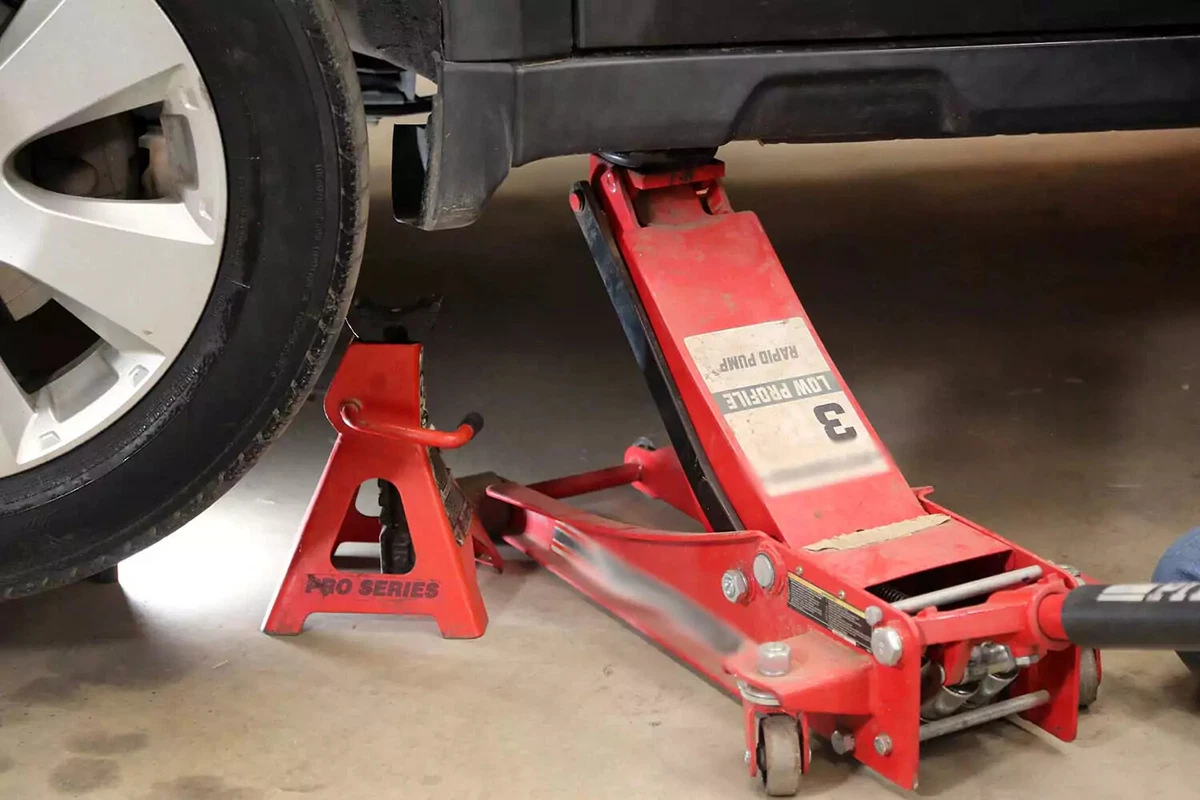
This project requires working safely under the vehicle. You will need a floor jack, and jack stands, ramps, or wheel cribs to support the vehicle.
Locate the factory jacking points just behind the front wheels or just in front of the rear wheels. The jacking point is a metal section with two V notches about two inches apart. Check your owner’s manual to confirm the lift location.
Never use jack stands on dirt, gravel, or asphalt. If you do not have access to a concrete work surface, use wheel cribs, solid-base ramps, or wide-base wood supports to support the vehicle. Never use cinder blocks or bricks as supports.
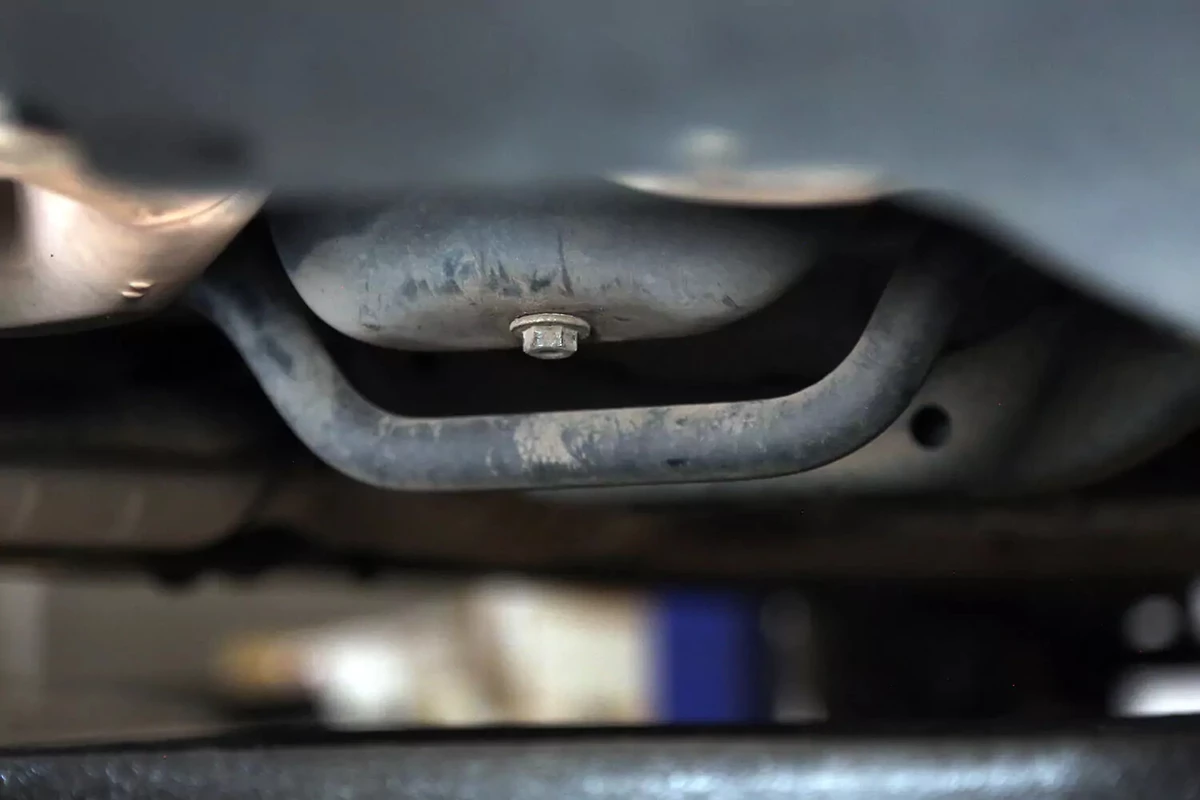
The oil pan drain plug is typically found near the rear of the engine oil pan at the lowest point. Sometimes, the plug is at the front or bottom of the pan.
If the pan is dirty, it is helpful to clean it. Now is an excellent time to examine it for damage. You could catch a potential oil leak before it affects your engine lubrication.
Related:

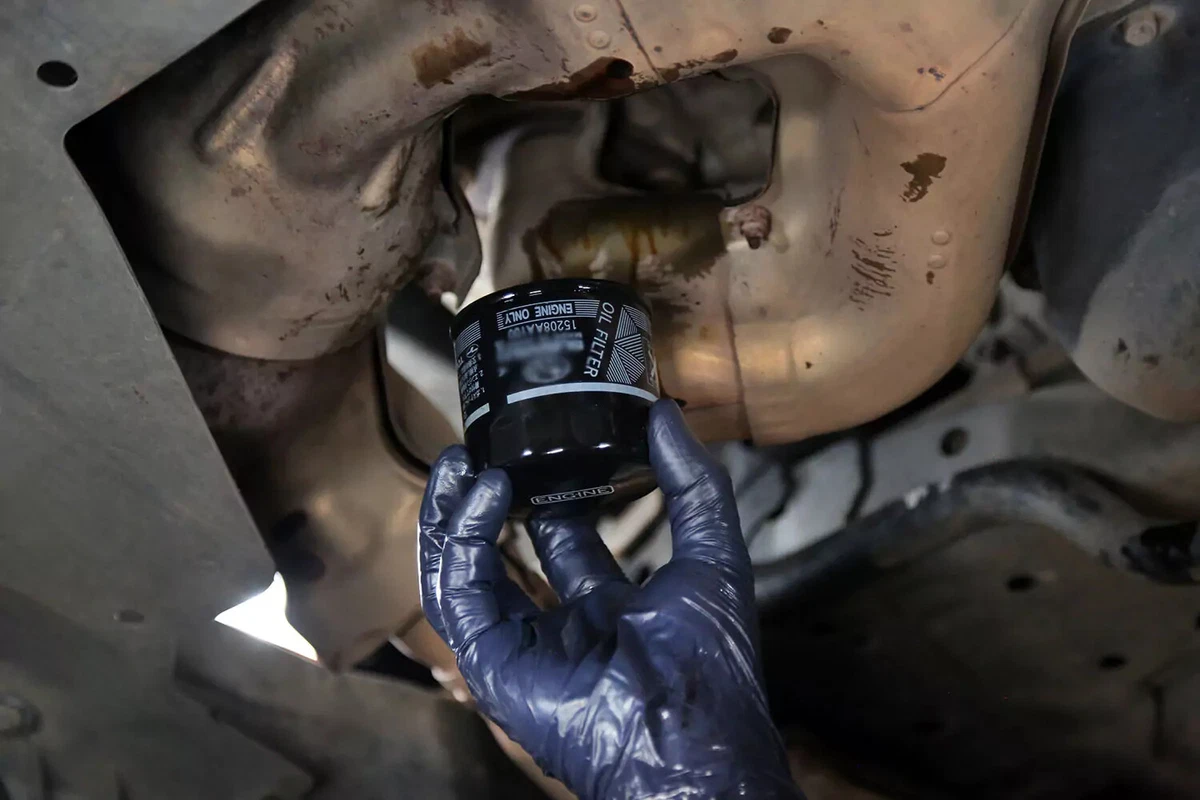
The oil filter, which looks like a large round can, is typically on the side of the engine block—either the front or rear. The blue filter shown here is on the passenger-side front of the engine, centered in an opening in the exhaust tubing.
The filter is either a canister (replaceable filter cartridge) or mounted in the engine bay. Check your owner’s manual for the type and location of your vehicle’s filter.
Sometimes the oil filter is hard to find or reach, especially on European cars. It might be hidden behind an engine splash guard, skid plate, or trim panel. While rare, some vehicles have a filter that’s mounted remotely and connected to the engine via hoses.
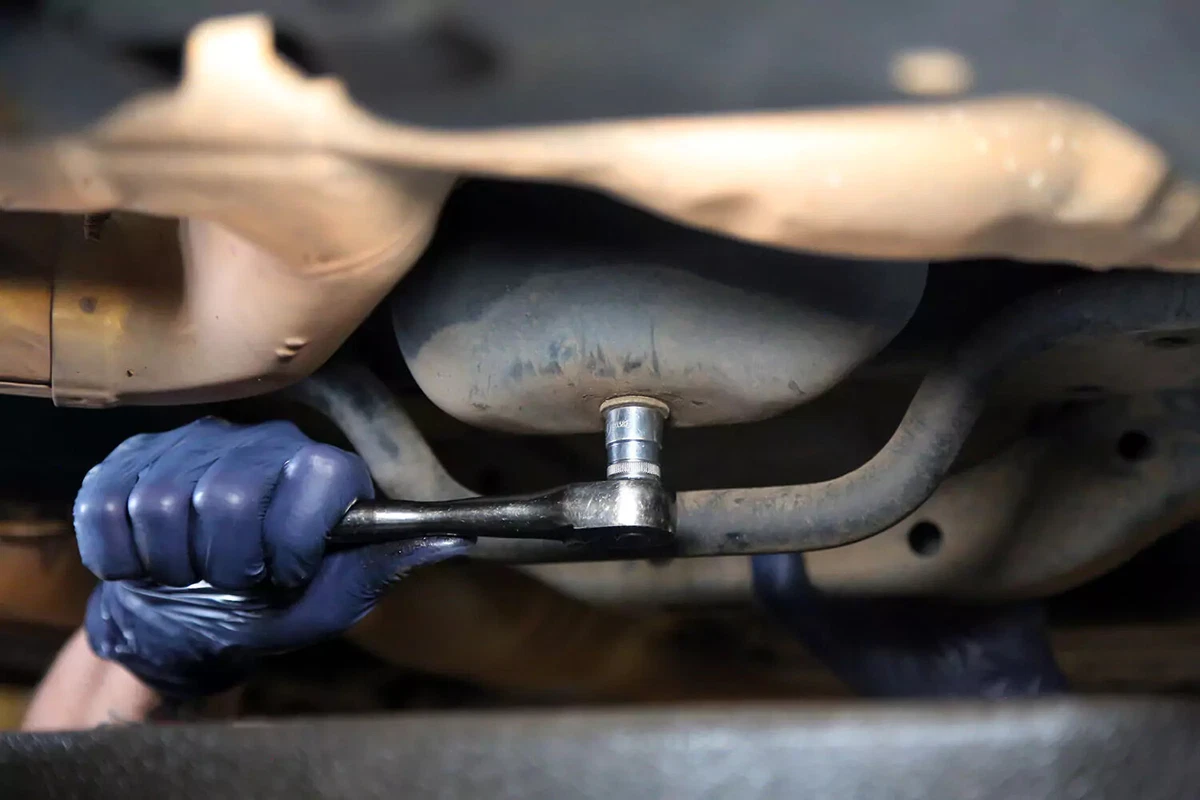
Place the drain pan under the oil drain plug. Use a socket and ratchet to loosen the plug. Once you loosen the plug to the point that it is ready to come out, slide the pan into position.
You may need to adjust the placement for the oil stream. The flow from the plug to the pan usually shoots out at first, then slows to a trickle as the pan empties. Ensure your drain is carefully placed to catch all the oil without being moved.
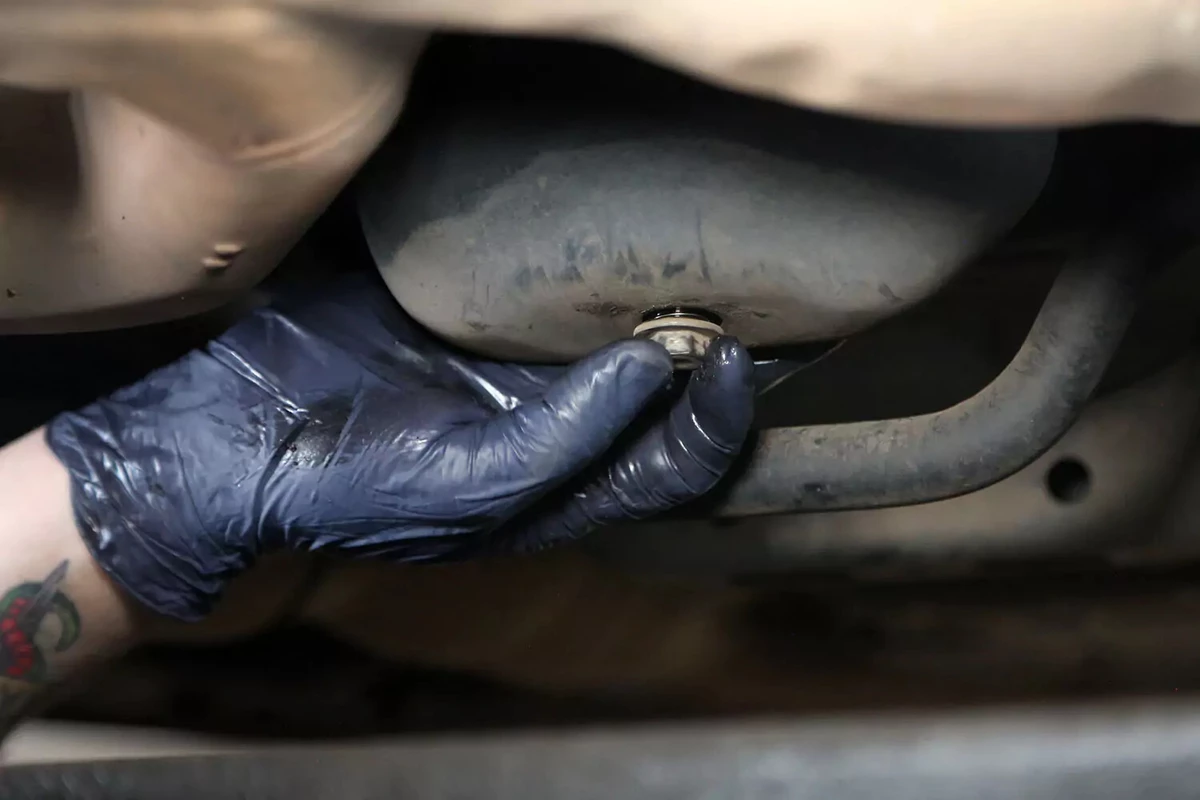
Remove the drain plug by hand to control the oil flow and ensure the plug doesn’t fall into the drain pan. Keep a couple of clean towels handy. Oil changes are messy.
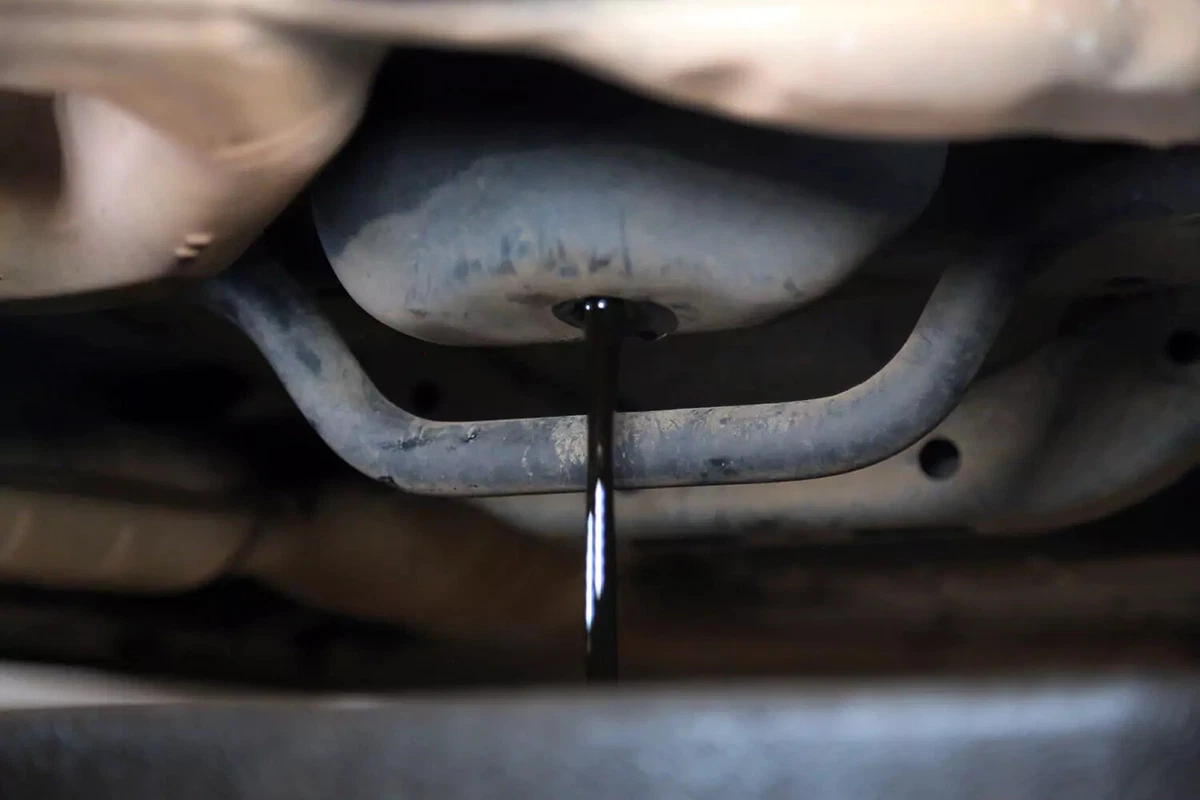
Allow all the oil to drain fully. Wait until the oil flow has stopped, or only a thin thread of oil is draining. This can take about five minutes, so prep the filter (Step 7) while the oil drains.
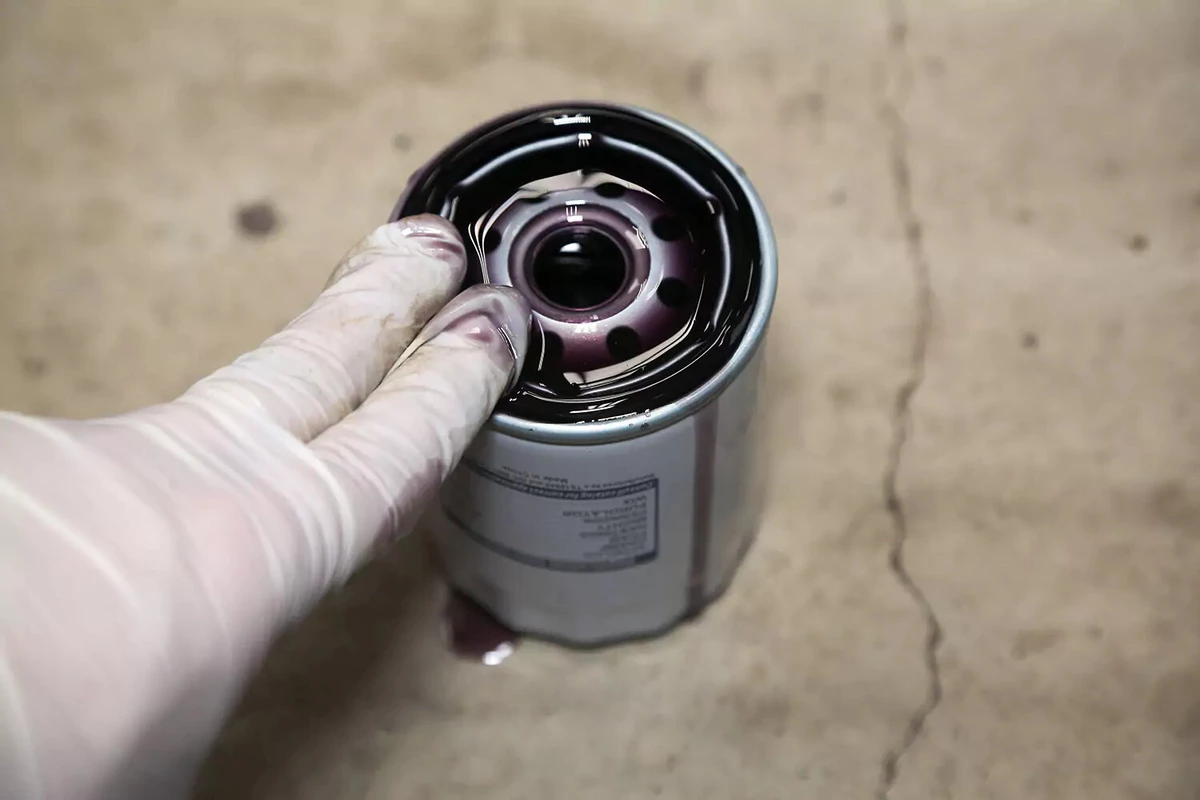
While the oil is draining, prep the filter. Using your finger, lubricate the oil filter gasket with some new oil. Be generous, but there’s no need to soak it. The gasket needs the oil to create the necessary grip. If you don’t lubricate the gasket, the filter gasket can stick when trying to remove it later. Or, the filter may fall off or become difficult to remove.
Pour oil into the large center hole to fill the filter about halfway. This reduces the chance of a dry engine start. This step could be messy, so we recommend cleaning the filter after prepping it.
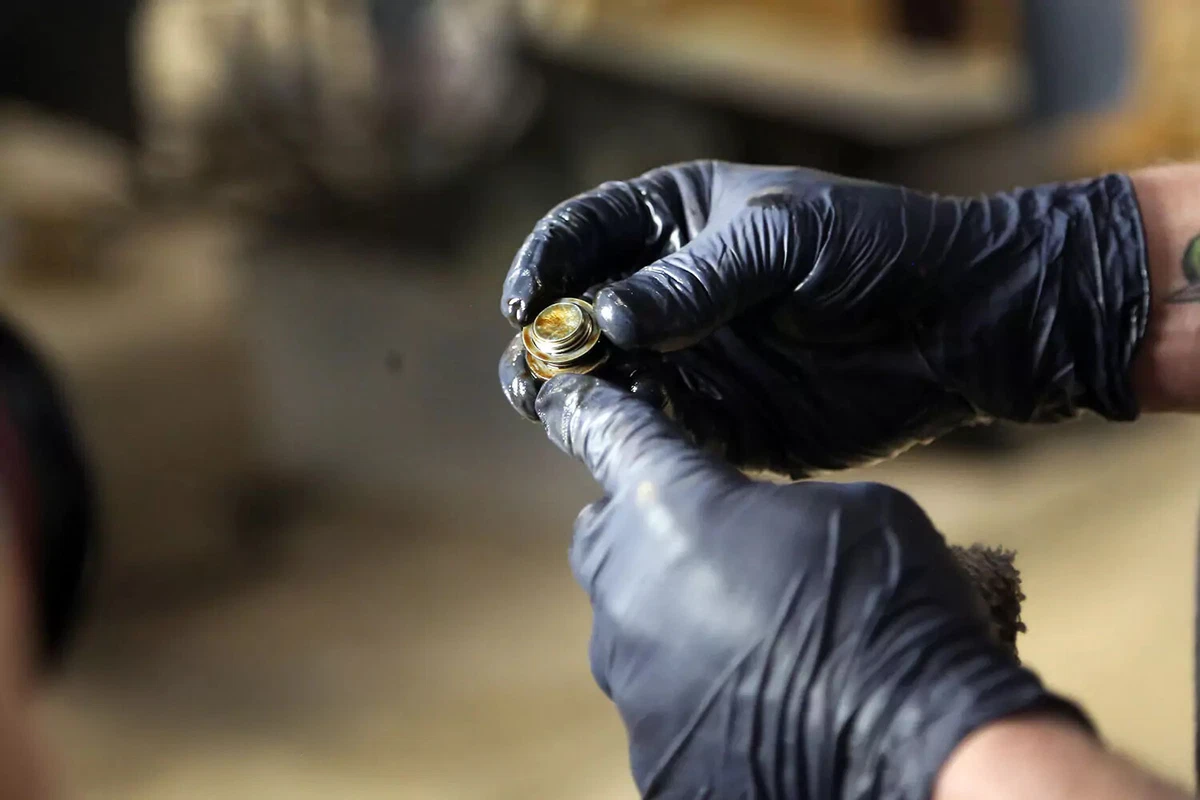
Oil plugs take a lot of abuse, so inspect them to ensure they are still usable. Our plug has a copper washer to seal the pan. The washer was severely damaged and needed to be replaced to guarantee a leak-free seal.
We used a new copper washer from a copper washer kit. Some plugs have O-rings, and others don’t use a washer. If your drain plugs have a magnetic tip, clean it off.

Reinstall the oil drain plug into the oil pan. Tighten the plug by hand with a socket and wrench.
Complete the process using a torque wrench set to the correct spec for your vehicle. Refer to your repair manual for the specific torque specs. Most plugs use between 25 and 35 pound-feet of torque. However, some European models use much lower torque to avoid damaging the threads.
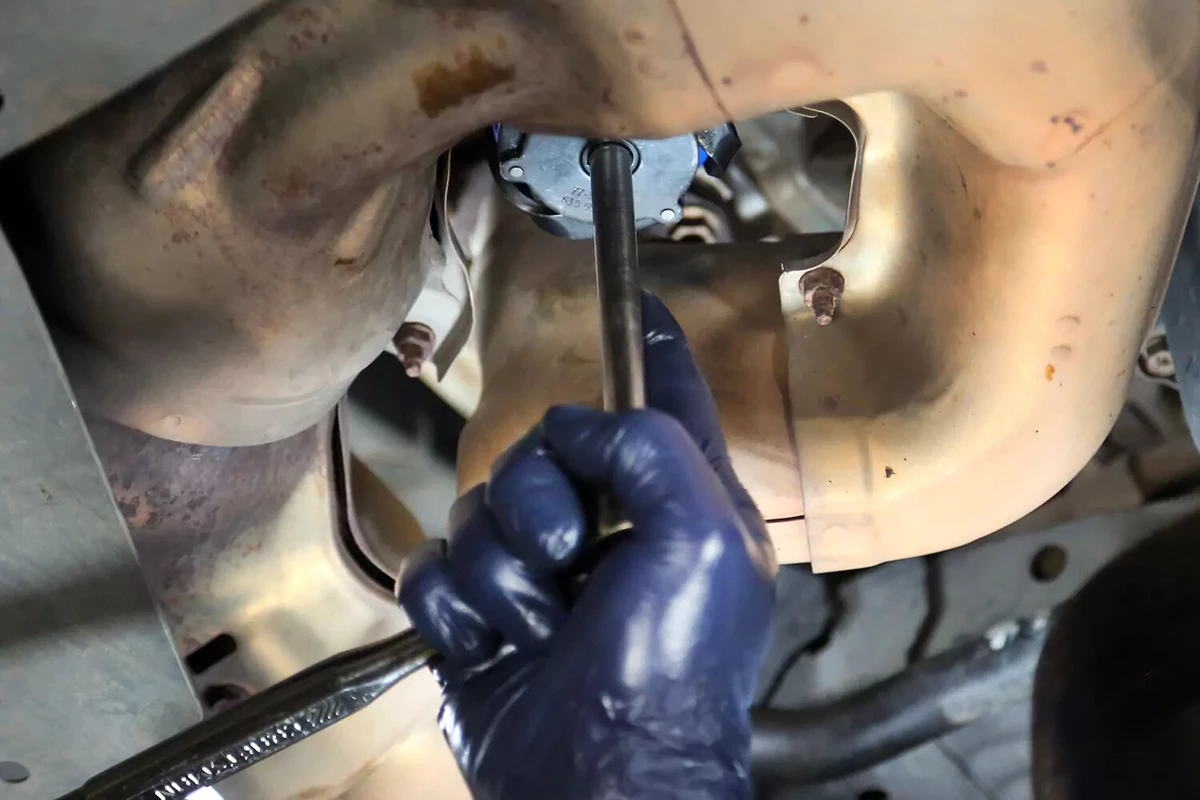
Move the drain pan under the filter. Using an oil filter wrench, break the seal on the filter by turning it counterclockwise. We used a three-jaw oil filter tool, but you can also use a strap wrench or oil filter pliers.
Sometimes, it is difficult to break the filter free. If you can’t get it off with a wrench, you may have to drive a screwdriver through the can and twist it off. Don’t worry about damaging the can. It will leak oil, but there is no reason to be gentle with the old filter.
If you can get a good grip on the filter, you can remove it without tools.
After the block is no longer dripping oil, remove the drain pan and install the new oil filter. Installing the new filter can be messy, especially if the mount is sideways or at an angle. That’s why you fill the filter only about halfway.
When the filter is threaded on, hand-tighten it until the gasket snugs up to the mount.
Then clean the filter so you can get a good grip and tighten it by an extra three-quarters of a turn. Avoid using tools to tighten the filter, which could make it difficult to remove later.
A cartridge filter must be installed into the housing, which goes back onto the engine or remote filter case.

Your engine is now ready for fresh oil. Remove the filler cap and open the bottles of oil. Check your owner's manual to ensure you have the right amount of oil. A typical V-8 needs five to eight quarts, while most four-cylinders use about four quarts. (The engine in our demo vehicle needed 3.5 quarts.)
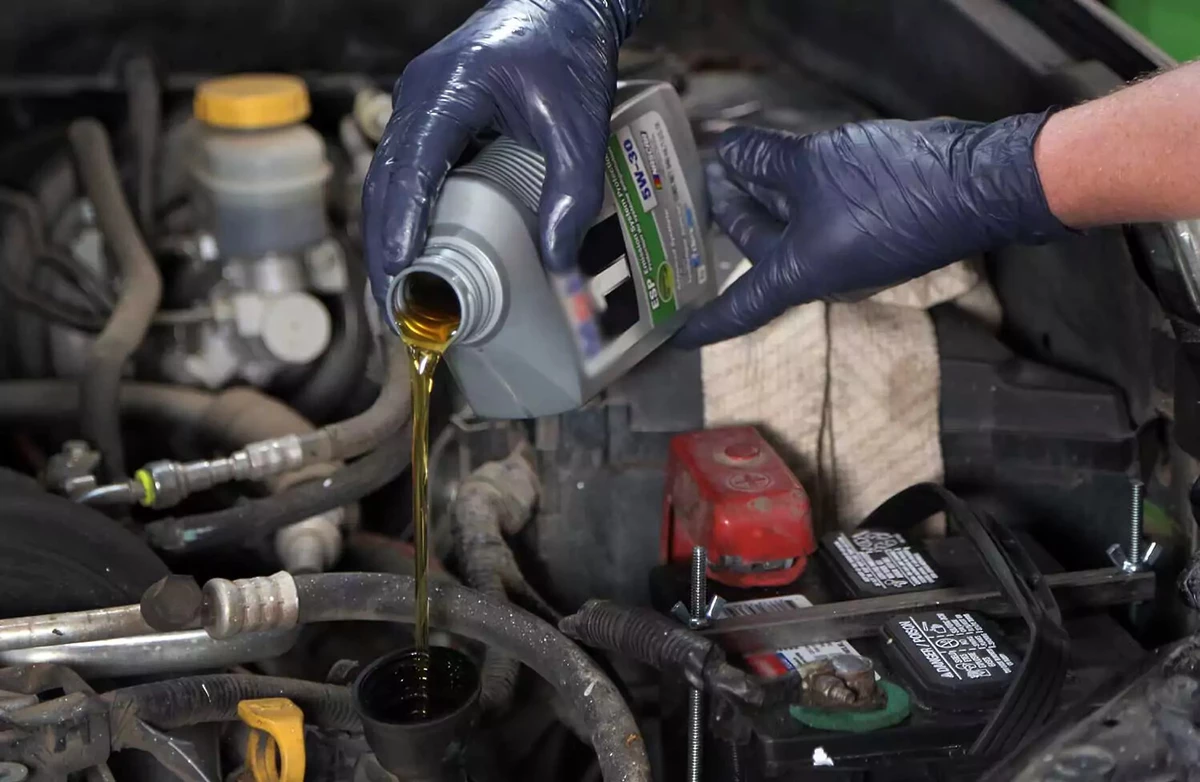
There is a right and wrong way to pour oil into an engine. Turn the bottle so the spout is at the top, not the bottom. If the spout is in the middle of the bottle, hold the bottle sideways. This reduces “glugging,” which can make a mess. Using a funnel is helpful.
After filling the engine, replace the filler cap and clean any spillage.
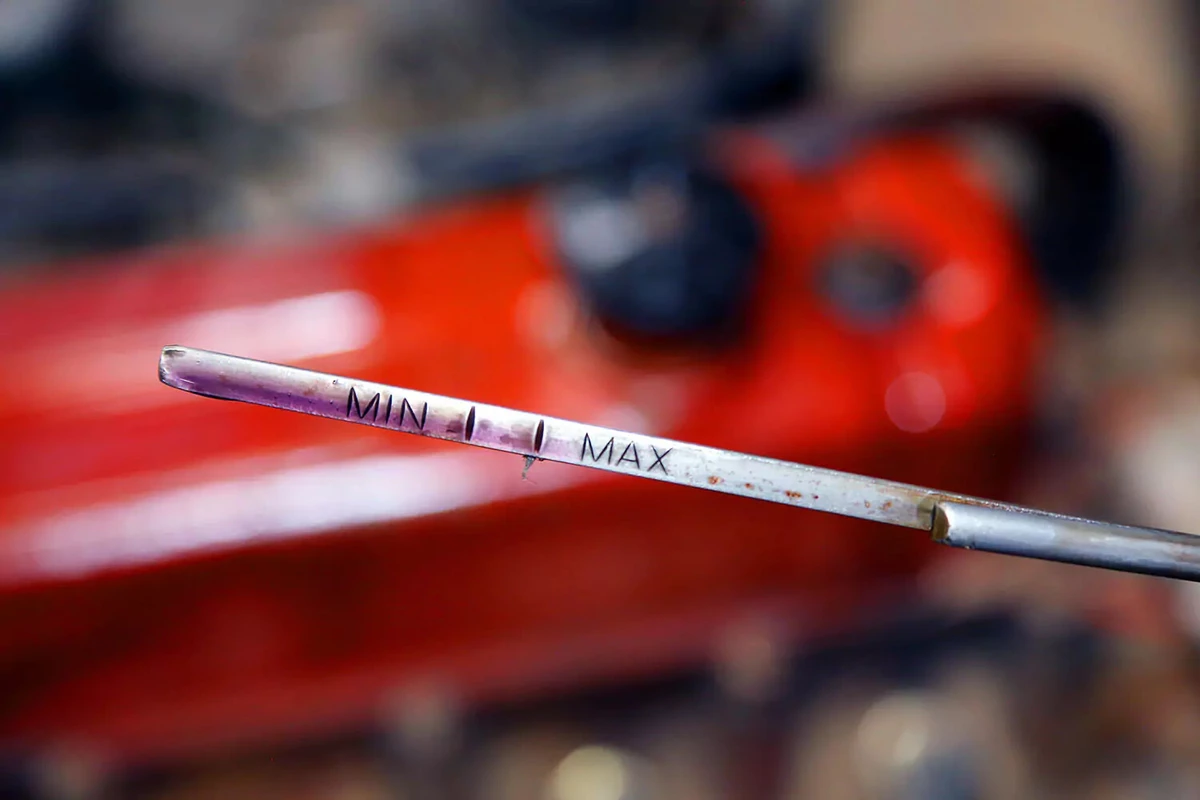
The last step in an oil change is to verify that the engine has the correct amount of oil. After filling the engine, wait a few minutes for the oil to settle in the pan. Then, check the dipstick to ensure the oil is near but doesn’t exceed the “max” mark.
- If the oil level is low, add more.
- If it is high, you can start the engine to allow the oil to flow through all the passages and then recheck.
- If the level is still too high, drain a little oil and recheck.
You don’t want too much oil in the engine. It is hard on the seals and could leak out. Also, too much oil can cause engine problems if the crank whips the oil into a foam.
After checking the fluid level, lower the vehicle and start the engine. Reset any dashboard oil change warnings. Instructions for resetting the oil change light or message are in your owner’s manual.
About the author

Share your feedback
This article is meant to provide general guidance only. Automotive maintenance, repair, upgrade, and installation may depend on vehicle-specifics such as make and model. Always consult your owner's manual, repair guide for specific information for your particular vehicle and consider a licensed auto-care professional's help as well, particularly for advance repairs.
Recommended for you
Find answers and inspiration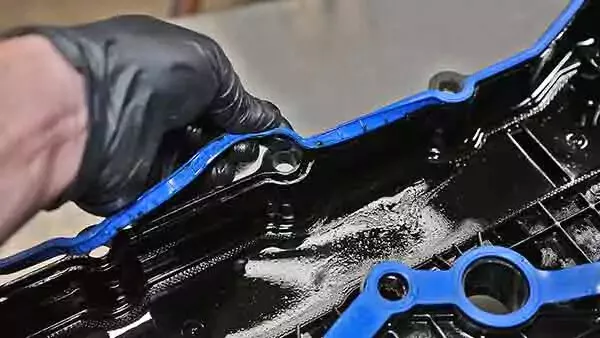
A Quick Guide to Valve Cover Gaskets
6 min read
When to Replace Your Exhaust Manifold Gasket
6 min read
How to Replace an Ignition Coil
6 min read
How to Buy the Right EGR Valve and Gasket
6 min read
Your Complete Idler Pulley Buying Guide
5 min read
How to Buy the Right Throttle Body
5 min read
Buying the Right Distributor Cap and Rotor
4 min read
How to Replace a Drive Belt
5 min read
How to Replace an Intake Manifold Gasket
7 min read
How to Buy the Right Car Starter
5 min read
How to Replace a Valve Cover Gasket
7 min read
Diagnosing Your Serpentine Belt and Tensioner
6 min read
How to Change a Timing Belt
12 min read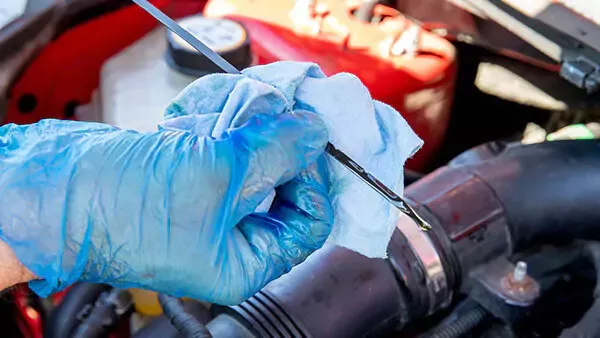
Changing Your Oil: 5 Things to Know
6 min read
How to Clean Fuel Injectors
8 min read
Automation How to Change a Car Battery
6 min read
How to Replace a Mass Air Flow (MAF) Sensor
7 min read
Distributors 101
6 min read
How to Replace Spark Plugs
7 min read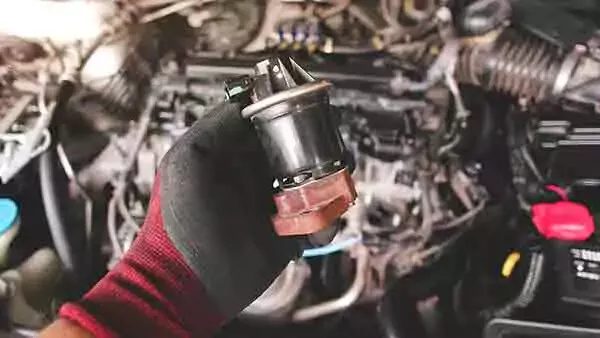
Everything You Should Know About EGR Valves
5 min read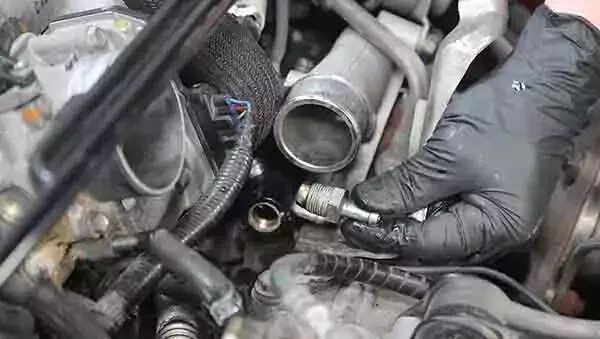
How to Test Your PCV Valve
6 min read
Buying the Best Portable Car Battery Jump Starter
6 min read
An Introduction to Cleaning Fuel Injectors
5 min read
A Deep-Dive Guide to Ignition Wires
7 min read
How to Replace Engine Mounts
4 min read
The Right Tools to Clean Your Fuel Injectors
6 min read
How Do Ignition Coils Work?
5 min read
Spark Plugs 101
7 min read
When to Replace Your Drive Belt
6 min read
Fuel Pumps and How They Work
8 min read
What to Know About Your Vehicle's Throttle Body
6 min read
Everything You Need to Know About Fuel Filters
6 min read
How to Buy the Right Ignition Coils
7 min read
How to Buy the Right O2 Sensor
5 min read
How to Replace a Serpentine Belt Tensioner
4 min read
When to Replace Your Engine Air Filter
5 min read
How to Replace an Oxygen Sensor
5 min read
How to Buy the Right Timing Belt and Related Tools
5 min read
How to Buy the Right Car Distributor
6 min read
Timing Belts 101
5 min read
How to Replace an Engine Air Filter
5 min read
How to Buy the Right Exhaust Manifold Gasket
6 min read
How to Choose the Best Spark Plugs
5 min read
How to Replace a Car Starter
7 min read
What You Should Know About O2 Sensors
6 min read
How to Buy the Right Valve Cover Gasket
4 min read
How to Replace a Distributor Cap and Rotor
5 min read
Understanding Your Car's Idler Pulley
4 min read
How to Replace a Fuel Filter
7 min read
How to Replace a PCV Valve
6 min read
Do You Have a Faulty Mass Air Flow Sensor?
4 min read
Everything You Need to Know About Car Starters
7 min read
How to Replace an Exhaust Gasket
9 min read
Ignition Wire Buying Guide
6 min read
All About Your Distributor Cap and Rotor
7 min read
How to Replace a Throttle Body
6 min read
Spotting Intake Manifold Gasket Problems
7 min read
How to Buy the Best MAF Sensor
4 min read
How to Replace an EGR Valve
5 min read
How to Change an In-Tank Fuel Pump
9 min read
Explore more projects

How to Repair a Chipped Windshield
1 to 2 hours
Beginner
7 min read

How to Replace Brake Fluid
1 to 2 hours
Beginner
10 min read
How to Replace an Ignition Coil
Less than 30 minutes
Beginner
6 min read

How to Replace a Radiator Hose
Less than 30 minutes
Beginner
5 min read

How to Replace Brake Rotors
1 to 2 hours
Beginner
7 min read
How to Replace a Serpentine Belt Tensioner
Less than 30 minutes
Beginner
4 min read
How to Replace a Drive Belt
Less than 30 minutes
Beginner
5 min read

How to Rotate Your Tires
30 to 60 minutes
Beginner
5 min read

How to Refill Windshield Washer Fluid
Less than 30 minutes
Beginner
4 min read
How to Replace an Oxygen Sensor
30 to 60 minutes
Beginner
5 min read

How To Replace Differential Fluid
Less than 30 minutes
Beginner
8 min read

How to Replace Sway Bar End Links and Bushings
30 to 60 minutes
Beginner
6 min read

How to Replace Transmission Fluid and Filter
1 to 2 hours
Beginner
11 min read

How to Change Disc Brake Pads
30 to 60 minutes
Beginner
8 min read

How to Replace a Cabin Air Filter
Less than 30 minutes
Beginner
5 min read
How to Replace a Valve Cover Gasket
Less than 30 minutes
Beginner
7 min read

How to Change Windshield Wipers
Less than 30 minutes
Beginner
3 min read
How to Replace an Engine Air Filter
Less than 30 minutes
Beginner
5 min read
How to Clean Fuel Injectors
1 to 2 hours
Beginner
8 min read

How to Replace Shock Absorbers
30 to 60 minutes
Beginner
8 min read
How to Change a Car Battery
Less than 30 minutes
Beginner
6 min read
Automation How to Change a Car Battery
Less than 30 minutes
Beginner
6 min read
How to Replace a Mass Air Flow (MAF) Sensor
Less than 30 minutes
Beginner
7 min read

How to Replace a Clutch Master Cylinder
1 to 2 hours
Beginner
11 min read

How to Flush and Change Engine Coolant
30 to 60 minutes
Beginner
6 min read
How to Replace a Distributor Cap and Rotor
30 to 60 minutes
Beginner
5 min read

How to Check Tire Pressure and Change a Tire
Less than 30 minutes
Beginner
9 min read
How to Replace a Fuel Filter
30 to 60 minutes
Beginner
7 min read
How to Replace a PCV Valve
30 to 60 minutes
Beginner
6 min read

How to Replace a Brake Caliper
1 to 2 hours
Beginner
7 min read

How to Replace an Idler Pulley
30 to 60 minutes
Beginner
4 min read

How to Change a Headlight Bulb
Less than 30 minutes
Beginner
6 min read
How to Replace an Exhaust Gasket
1 to 2 hours
Beginner
9 min read
How to Replace a Throttle Body
30 to 60 minutes
Beginner
6 min read

How to Replace an Alternator
1 to 2 hours
Beginner
11 min read
How to Replace an EGR Valve
30 to 60 minutes
Beginner
5 min read

How to Jump Start a Car
Less than 30 minutes
Beginner
9 min read